Wednesday, August 30, 2017

Scrapbook.com Nested Flag Banner Dies Card Video

Hello fellow card makers.

Today I am sharing with you a project I made using Scrapbook.com exclusive dies. I was sent two die sets courtesy of Scrabook.com to play with. Today, I am using the Nested Flag Banner Dies. Let me just say one thing, this set is huge. This set will accommodate with the card maker and scrapbooker all in one. From 4 1/4 x 5 1/2 cards to 12 x 12 scrapbook pages. Visit Scrapbook.com 

Today I am making a card using the My Favorite Things Beary Special Birthday Stamp Set. This is one of my favorite stamps sets. Everything from Birdie Brown is absolutely adorable. So I took a top folding A2 size card base in Simon Says Stamp Fog cardstock and masked off the back as to not stamp on it. I inked up the Balloon Strings Background stamp also by My Favorite Things with Simon Says Stamp Fog Ink and stamped it a few times to get a good impression. This ink color results in a very subtle, but great looking background.

The front card panel is cut from the Scrapbook.com Nested Flag Banner die that almost completely fills the A2 card front. I cut it from Strathmore Bristol Smooth White cardstock. I inked up the front panel to create a ground and sky with Distress inks in Mermaid Lagoon and Twisted Citron.

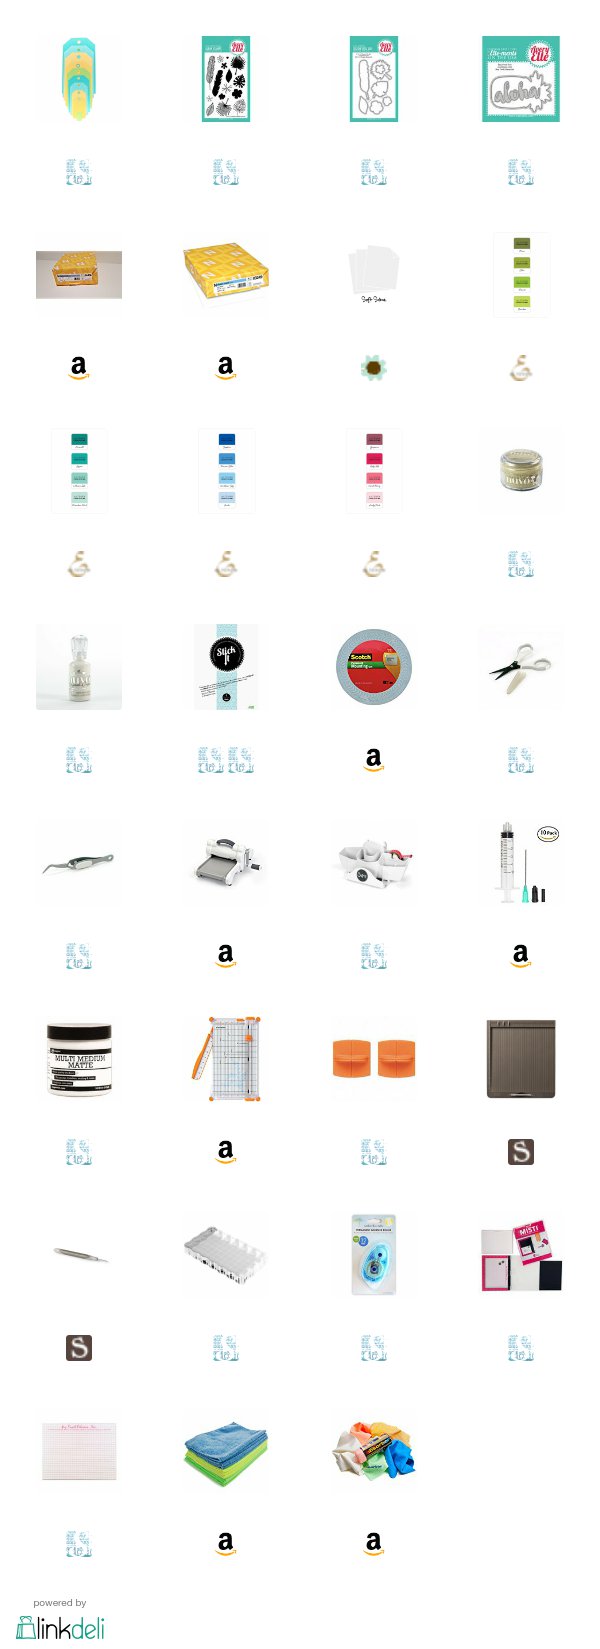
My images were stamped in Memento Tuxedo Black ink and colored with Copic Markers. Below is a Copic color map of all the markers I used on this project. They were cut out and popped up with Scotch 3M foam tape onto the tag banner front panel.

I stamped my sentiment from the Beary Special Birthday stamp set with Scrapbook.com white pigment ink and white heat embossed it with Simon Says Stamp Detail White embossing powder. The sentiment was stamped on Lawn Fawn's black cardstock. I cut it out into a strip to pop up on my card also using foam tape.

For pictures of my card, a link to the YouTube video creating this card, links to the products used on the project, and a copic marker color map, look below.

Thank you for visiting my blog today and don't forget to check out Scrapbook.com exclusive die sets.


Amazon, Blick Art Materials and Scrapbook.com Links  Disclaimer 

These are affiliate links. At no cost to you, I will receive a very small percentage of the sale generated from the link I provided. 

PLEASE READ! Amazon prices change constantly. I only provide links to products that are cheaper to purchase through Amazon. BUT! If you want to make a purchase, please make sure that the price has not changed and you still are receiving the very best deal by purchasing through Amazon. It is not always cheaper through Amazon. Try supporting your local scrapbook store or online retailer that provides us with our awesome supplies. 

Friday, August 25, 2017

Your Next Stamp Challenge #71 Card Video

Hello fellow card makers.

Today I am sharing with you a card I made for the Your Next Stamp Challenge #71. I made this project by sewing cross stitch on my background. The Your Next Stamp Challenge is a biweekly sketch and/or color challenge. Here is a look at this weeks sketch and color combo. (CLICK HERE!) to go to the Your Next Stamp blog and play along with us!


Today I am using the new Party Pets stamp set to create my card. I am also using the Stitching holes die set for my background. I decided to go with the color combo this week. I like playing color challenges. I am somewhat of a clean and simple card maker and color challenges allow me to have more control within the challenge which makes it more fun for me. 

I had a heck of a time with these cards. Not only did it take forever! I literally had blood, sweat, and tears over these cards. I don't love how they turned out, but this was my first attempt at stitching on cards, so I kept plugging along. I was determined to finish! Both of these cards were made the same way. I think I prefer the dog version over the birds. I think it's going to be awhile before I attempt this again. 

Anyway, I started by taking a piece of Neenah 110 lb Solar White cardstock and lining up the Stitching holes die multiple times to create a cross stitch like base. I then proceeded to use the colors from the combo to cross stitch the ground, sky, and sun. I find stitching very relaxing and although it takes more time than a traditional inked or stamped background, I really enjoyed it. 

After I completed the stitching. I stamped my images in Memento Tuxedo Black and colored them with Copic Markers. I also Paper Pieced the ribbon on the birds present to add a little more interest and to stick with the color combo for the challenge. 

After my images were colored, I white heat embossed the sentiment on Lawn Fawn black cardstock. I popped both the image and the sentiment onto the cross stitch background with Scotch 3M foam tape. That entire panel was then placed onto a Simon Says Stamp Fog card base. 

Images of my project, a link to the YouTube video of my making this card, and links to the products used for this project are below. 

Thank you for visiting my blog today, I hope you will play along with us over at the Your Next Stamp blog. (CLICK HERE!)

Koren 


Amazon, Blick Art Materials and Scrapbook.com Links  Disclaimer 

These are affiliate links. At no cost to you, I will receive a very small percentage of the sale generated from the link I provided. 

PLEASE READ! Amazon prices change constantly. I only provide links to products that are cheaper to purchase through Amazon. BUT! If you want to make a purchase, please make sure that the price has not changed and you still are receiving the very best deal by purchasing through Amazon. It is not always cheaper through Amazon. Try supporting your local scrapbook store or online retailer that provides us with our awesome supplies. 
       

Tuesday, August 22, 2017

Your Next Stamp Make A Wish Card Video

Hello fellow card makers.

Today I am sharing with you a card I made for the Your Next Stamp Design Team. We were challenged to create a project with the theme "Make A Wish". To see the rest of the design teams creations visit the Your Next Stamp Blog (CLICK HERE!)

As for my card, I used the brand new Silly Birthday Monsters Stamp Set to create this Make a Wish Selfie! The cell phone and message stamps are by Hero Arts. The cell phone was stamped in Memento Tuxedo Black ink several times to get good coverage with such a solid stamp. I then stamped the messages on the top and bottom with the same ink. I masked of the area where I wanted to create my selfie images. I then stamped and masked images accordingly to create this arrangement of silly monsters, at a party. I fussy cut the cell phone out by hand.

The background is a piece of Simon Says Stamp Fog Cardstock. I stamped the images from the Starburst Background Stamp set in coordinating Fog ink. The sentiment was stamped with Versafine Oynx Black ink. I popped up the cell phone image with foam tape and added some nuvo crystal drops in Ebony Black to complete todays project.

For images of my card, a link to the YouTube video I made creating this project and links to the supplies used, look below.

Thank you for visiting my blog today, and don't forget to visit the Your Next Stamp blog to see the design teams awesome creations.  (CLICK HERE!) 

Koren


Saturday, August 19, 2017

Scrapbook.com Nested Tag Dies Card Video

Hello fellow card makers.

Today I am sharing a project I made with Scrapbook.com exclusive dies (CLICK HERE!) to visit Scrapbook.com. The wonderful people at Scrapbook.com sent me two die sets to play with. I was sent both the nested tag dies that I'm playing with today and the nested tag banner dies. Which I will have another video using that set on Aug. 30th while my family is on vacation at Disney World. (excited face). Visit Scrapbook.com

Today I used the nested tag dies exclusive to Scrapbook.com. This set is huge, way bigger than I expected. I picked a size that I thought worked well for my idea. I am also using Avery Elle's Tropics Stamp Set and Coordinating dies as well as Avery Elle's Stay Fresh Dies. I took the Aloha die from the Stay Fresh set and cut it out four times from a piece of Neenah Solar White 110 lb cardstock that had been stuck to double sided stick it adhesive sheets. I made sure the sticky side was on the front of the die. This makes it easier to adhere all four layers together as well as my next technique. I used Nuvo Sparkle Dust in Gold Shine on the front top layer of the Aloha die. I coated the front with the sparkle dust careful to press it firmly in place to keep it adhered well. This stuff really does sparkle. It is so pretty in real life. Some things, you just can't capture on camera.

I cut the back of my tag out of Neenah 110 lb Solar White cardstock and the front with Papertrey Inks Soft Stone. On the front tag I used a smaller tag from the Scrapbook.com nested tag dies to cut a window. After adhering a piece of Papertrey Inks Soft Stone Stripped Patterned Paper to the back tag. I popped up the front tag with Scotch 3M foam tape and stuck them together. This made a nice sturdy base for my design.

I stamped several of the tropical images from Avery Elle's Tropics stamp set using Altenew Inks. I cut them out using the coordinating dies. I adhered the Aloha die I created to the center of the window with Ranger Multi Medium Matte adhesive. After giving it a few mins to dry I began to arrange my tropical images onto the tag with Scrapbook.com tape runner adhesive. The reinforcer for around the tags hole was also treated with Nuvo Sparkle Dust in Gold Shine to match.

To finish off the tag, I added some retired Avery Elle ribbon and some Nuvo Crystal Drops in Oyster Grey in the centers of the flowers.

For Pictures of my tag, a link to the YouTube video making this tag, links to the products used please look below.

Thank you for visiting my blog today, and don't forget to check out Scrapbook.com for there exclusive die sets.

Koren


Amazon, Blick Art Materials and Scrapbook.com Links  Disclaimer 

These are affiliate links. At no cost to you, I will receive a very small percentage of the sale generated from the link I provided. 

PLEASE READ! Amazon prices change constantly. I only provide links to products that are cheaper to purchase through Amazon. BUT! If you want to make a purchase, please make sure that the price has not changed and you still are receiving the very best deal by purchasing through Amazon. It is not always cheaper through Amazon. Try supporting your local scrapbook store or online retailer that provides us with our awesome supplies. 

Wednesday, August 16, 2017

A Stampin' Up! Birthday Banners Collaboration Card Video

Hello fellow card makers.

Today I am sharing with you my first collaboration video. I asked Alicia, better known as Crazy Paper Chick of YouTube, to do a Collaboration video with me. For this project we are both using Stampin' Up!'s Birthday Banners stamp set to create our projects. I have done a boy themed birthday card and Alisha will be doing a girl themed project. I don't know what she has come up with so I will be just as surprised as you are to see her creation. So after you are done here, head on over to her blog to see what she has come up with. (Click Here!) < Crazy Paper Chick! Here is a link to her video https://youtu.be/3rPaAhcoXtw

My card was heavily inspired by the cards I found in the Stampin' Up! annual catalog. I was so impressed with the products Stampin' Up! has this year. I just had to create a card using this set. They make it look so easy. I used the candles to create a wonky collage with a sentiment banner on the front. I love how Stampin' Up! uses texture as well as color combinations to create such stunning products. I used a Darice embossing folder to add some texture to my front panel. It is polka dots. This combination of Lemon Lime Twist and Night of Navy actually makes a very bright card. It was hard for me to photograph. I didn't capture just how deep the navy blue cardstock really is.

To see images of my project, a link to my YouTube video creating this card, and links to the products used, look below.

Thank you for visiting my blog today and don't forget to see what Alicia created, (Click Here!) < Crazy Paper Chick! Here is a link to her video https://youtu.be/3rPaAhcoXtw

Koren


Friday, August 11, 2017

Your Next Stamp Challenge #70 Chibi Lights Card Video

Hello fellow card makers.

Today I am sharing with you my card for Your Next Stamps Challenge #70. This is a biweekly sketch and color challenge. You can either use the sketch or the color combo. Today, I am using the color combo for my project. Here is a look at both the sketch and color combo. (CLICK HERE!) to play along with us over on the Your Next Stamp blog.


I started by using the Bugs and Kisses Stamp set by Your Next Stamp. I turned the dragonfly in the set into a lighting bug. I used a Chibi Tronics starter kit to make him light up. For information on how I did this, please refer to my YouTube video below of me creating this project. I used some Versamagic chalk ink and a stencil to create my background. It was cut out with some Wonky rectangle dies by Spellbinders. The sentiment was stamped directly onto the background with Versafine Onyx Black ink, As well as the heart. The heart is where my Chibi Tronics light is activated. I used Nuvo glitter drops in Ruby Slipper to fill in the red from the color combo.

My image was partially stamped using a memento tuxedo black marker. I then hand drew the rest of the image the way I wanted it to look with the same marker. Then popped up the image with foam tape. The image sits directly above the Chibi Tronics light. I used Ebony Black Nuvo Crystal Drops to create the bug trail. The image was colored with Copic markers.

For more information on how I put together this card, see the video posted below. There are also photos of my project and a list of supplies used to create it.

Thank you for visiting my blog today, and I hope you will play along with us at Your Next Stamp Challenge #70.

Koren


Wednesday, August 9, 2017

Your Next Stamp Color Me Happy Card Video

Hello fellow card makers.

It's another Design Team Dare over at the Your Next Stamp blog. Make sure you comment on the blog post (CLICK HERE) for your chance to win a stamp set of your choice.

We were challenged to create a project with the theme "Color Me Happy" and this is my project. I was inspired by a card made by Francine Vuilleme created. She is one of my favorite card makers and she always has the most inspiring and inventive card designs. This design is based off of one of her cards, you can find it (CLICK HERE) on her blog. I used a slightly different technique.

I started by creating my background with my Gansi Tambi watercolor 36 set. You can find a color map of the colors I used below, if you want to know exactly what colors I used to make my background. I did a wet on wet watercolor technique to make brush strokes in a rainbow, on a piece of Tim Holtz watercolor paper. I then cut it down with the second to largest stitched rectangles by Your Next Stamp.

I cut out the largest Happy from the brand new Happy Birthday Word Die Set, four times, from a piece of Papertrey Inks Smokey Shadow cardstock. I adhered all four layers together with Ranger Multi Medium Matte. I then used a template of the word die to make sure I lined all my letters up correctly before adhering them to my background, somewhere in the middle. I then stamped "birthday" from the Happy Everything stamp set with versamark ink and heat embossed it with Zing embossing powder in the color Charcoal.

To finish it off, I collected all of the matte Your Next Stamp Gumdrops and Doodlebug Sprinkles I had in my collection. I matched up the rainbow colors to the best of my ability based on what I had in my stash and placed them somewhere in their coordinating colored area. The panel was popped up with craft foam onto a Smokey Shadow panel the size of an A2 card front. I'm running out of this color cardstock, which is a travesty, and I must reorder ASAP. So, I was forced to mount it onto a Neenah 110 lb solar white card base.

I love how imperfect it is. Unlike Francine's card, which is awesomely perfect. You can find photos of my card, the color map of the colors I used on the background, a link the the YouTube video making this card, and links to the supplies used to create it down below.

Thank you for visiting my blog today, make sure you leave a comment on the Your Next Stamp blog post (CLICK HERE) for your chance to win a stamp set of your choice from the Your Next Stamp Online Store.

Koren


Saturday, August 5, 2017

Your Next Stamp August Blog Hop Card Video


Hello fellow card makers.

Today is the August Blog Hop for Your Next Stamp! Your Next Stamp is turning 8 this month, and that makes this hop very special. There are bigger prizes and more games increase your chances to win! The August release is HUGE! And I love it all! If I had to pick a favorite, it would have to be the new Silly Birthday Monsters Stamp Set with coordinating dies. To check out all of this month's release (CLICK HERE!) to go to the Your Next Stamp Online Store.

First comment for your chance to win an $80 gift certificate to the Your Next Stamp Online Store. The more you comment along the hop, the greater your chances of winning. You do not have to comment on every blog to win, but it increases your chances.

                                Blog Hop Starts: August 5th at 10 pm (EST)
                                Blog Hop Ends:  August 8th at 12 midnight (EST)
                                                         The winners will be announced on the YNS blog on 8/10.

Also, there is a Party Game! You are challenged to count the number of Your Next Stamp Gumdrops used on all of the projects along the hop. Enter your count in the special Party Game inlinks on the Your Next stamp blog at the end of the hop.

The Design Team has a ton of projects to share with you along the hop. I hope you take the chance to see everyone's creations.


An InLinkz Link-up

Your Next Stamp is running a special for this months birthday celebration, stop by the your next stamp store and use the code below for your 20% discount!


I have two projects for you today. My first card uses Silly Birthday Monsters and Happy Birthday Word Die Set. I started with a background I created a few weeks ago using Ken Oliver Color Burst. It is a watercolor powder that activates when exposed to water. I placed some on a dry piece of Canson XL watercolor paper and sprayed it from above with a Ranger Mister. I cut it down using a Stitched Rectangle die from Your Next Stamp. I cut out the smaller Happy Birthday from the word die set, directly from the background. I used and inlaid die cutting technique to pop up the word using black craft foam.

My image from Silly Birthday Monsters was stamped with Memento Tuxedo Black ink and colored using Copic Markers. A color map of the colors I used is posted below. I cut out the image using its coordinating die and popped up on the background panel with 3M foam tape. I white heat embossed
the "little monsters" sentiment on black cardstock and popped it up with foam tape as well.

As a final touch, I used the brand new Pretty Peacock Gumdrops to add a bit more purple into the project. I'm really happy with the way it turned out. The background is so fun and these images from the Silly Birthday Monsters Stamp Set are to die for.

For info on my second project, photos of both cards, a link to my YouTube video, and links to all of the products used, (except brand new releases), continue reading!


Supply list card one:


My second card today uses the new Birdie Banners stamp set and the Party Dress Die Set, along with the fabulous new scalloped rectangle die set.

I started with a Simon Says Stamp Fog card base. I used the largest of the scalloped rectangle dies to cut out my front panel in a light pink cardstock. This is Pixie by Avery Elle, which is discontinued.

I stamped my images in Memento Tuxedo Black ink on Neenah 80 lb. Solar White cardstock and I did very simple Copic coloring. The Party Dress was cut from Bazill White cardstock that is textured. The dress and the bow from the set was popped up with foam tape.

I finished it off with some Duck Egg Blue Nuvo Crystal drops.

Thank you so much for visiting my blog today, please make sure you hop along with us and comment along the way for your chance to win!

Koren


Supply list card two:


Your Next Stamp August Preview Day Card Video

Hello fellow card makers.

Today I am sharing with you my project for Your Next Stamp August Preview Day. This is a very special release for Your Next Stamp. Your Next Stamp is celebrating it's 8th Birthday this month. This release is full of birthday stamp sets that will be sure to catch your eye. Once the new release goes live on the Your Next Stamp online store... (CLICK HERE)... to find all the new products. Until then, visit the Your Next Stamp Blog to see all of the new release preview designs the team has to showcase... (CLICK HERE).


Today I am using Party Pets, one of my favorites of the whole release. I started by creating my background with the mini cloud stencil by My Favorite Things. I sponged the clouds using Versamagic chalk ink in Sea Breeze on Strathmore Bristol Smooth White cardstock. I then used the same type of ink in key lime and tea leaves to create my ground. I cut out my background panel using the second largest die in the Your Next Stamp  stitched rectangles die set. The sentiment was stamped in the bottom center using Versafine Onyx Black ink.

My image was stamped in Memento Tuxedo Black ink on Neenah 80lb cardstock. I used my Copic markers to color in my image. A Copic color map of the markers I used is added below in this blog post so that you can have a list of all the colors I used. After my image was colored, I used the brand new Bold Alpha numbers die set to personalize my card, using an inlaid die technique. I cut the number six into the balloon and popped it up using the same die cut out of black craft foam. The image was then placed on the background with foam tape to give it even more dimension. The entire front panel was placed on a Simon Says Stamp Fog top folding A2 card base.

For photos of my card, a link to my YouTube Video creating this card, a Copic color map of this image, and a supplies list complete with link to the products I used to make this card, look below.

Thank you for visiting my blog today,

Koren