Friday, September 27, 2019

Neat & Tangled September Release Week: Recap


Hello everyone. I’m sad that it’s over but it was a great week. The NEW Neat & Tangled September release is available in the online store. (CLICK HERE!) to shop. There is also a ton of inspiration using the new release on the blog with cards from the design team. Here are direct links to each of the September Release products. As well as some photos of my projects from this past week.


The winners of each day have been announced this morning over on the Neat & Tangled Blog.

I hope that you’ve had a good time this week, I know I have.

Thank you for visiting my blog today,

Koren

Thursday, September 26, 2019

Neat & Tangled September Release Week: Day Four


Hello everyone. Today is Day Four of Neat & Tangled’s September release week. Today I’m using the NEW Moon Magic stamp set and coordinating dies to create this simple encouragement card. I also used the NEW Starry Sky red rubber background stamp to add a little interest to my card base.

It’s Day Four which means there is another chance to win a giveaway today by commenting here and on the Neat & Tangled blog. (CLICK HERE!) to visit the blog and while you are there stop over in the online store to shop the new release.


For my project today I started with a piece of Neenah 110 lb. Solar White Classic Crest cardstock. I cut this panel down to 2 3/4 by 4 inches.  I wanted to make sure to leave plenty of card base showing.

I loaded this panel into my original MISTI with the sentiment “let yourself shine”. I stamped it with Versafine Clair Nocturne Ink and heat embossed it with Hero Arts Clear embossing powder. I tried to center it toward the bottom in order to leave space above for my focal image.

For my focal image, I used the coordinating crescent moon die that comes in the Moon Magic Dies set and I cut it from Tonic Studios Craft Perfect Greyboard. This is a chipboard-like material cut you can use thin dies to cut it. It’s thicker than any cardstock I’ve ever come across.


I used an ink dauber to coat the crescent moon with Distress Oxide ink in Chipped Sapphire. I gave it several coats, waiting between each coat for the previous to dry. This left me with a nice navy blue moon. To take this a step further you could add Black Soot to the edges of one side to give it dimension but I did not do that on the project featured in this post.

Instead of giving the moon dimension I decided to dress it up with various colors of paint splattered onto it. I placed my moon into my splat box and used Windsor and Newton Gouche in white mixed with a small amount of water onto an acrylic block and then picked up with a Nuvo paint brush and splattered onto the moon. I did this by picking up plenty of paint on the end of the brush and gently tapping the side of the acrylic block directly above the project. I did this exact technique using Gansai Tambi Starry Nights #904 and Distress Paint in Pumice stone as well.


I made two versions of this card one the has a matte moon with distinct splatter and one glossy moon with blurred indistinct splatter. The only difference between these two cards is the use of Nuvo Crystal Glaze. The matte moon was left to dry and the glossy moon received a healthy coat of the glaze. The glaze did blur the paint spatter. This may be because I didn’t wait for the paint to dry before I added the glaze. I’m not sure if that extra step will change the result, but I kinda like the blurred effect that the instant application gave.


Each of the card bases used on these cards where loaded into my MISTI along with the NEW Starry Sky background stamp. I stamped this onto a Simon Says Stamp Fog card base using it’s Fog coordinating ink. I wanted a subtle tone on tone effect.

I added the moon the the center-ish of the sentiment panel using Tonic Studios Craft Perfect foam squares. I then added that panels to the prepared card bases.

I hope that I’ve inspired you to create something today. Make sure you (CLICK HERE!) to visit the Neat & Tangled Blog and online store to both shop the new September release or to see some additional inspiration from the rest of the design team. Make sure you comment for your chance to win today’s Giveaway. Winners will be announced on Friday 9/27 at 7:30 AM on the N&T Blog.

Thank you so much for visiting my blog today,

Koren


Wednesday, September 25, 2019

Neat & Tangled September Release Week: Day Three


Hello everyone. Today is day three of the Neat & Tangled September release. Which is available NOW over on the website. (CLICK HERE!) to visit the Neat & Tangled online store and blog.  There you will find more inspiration using this months release.

Also, don’t forget to comment for your chance to win today’s Giveaway. Winners will be announced this Friday 9/27 on the Neat & Tangled blog at 7:30 AM EST.

Today, I am using the NEW Moon and Stars stamp set which features a mostly solid image moon surrounded by adorable dots and stars.


I started with a piece of Neenah 110 lb. cardstock cut to 3 1/2 by 4 3/4 inches. I loaded this panel into my Original MISTI as well as the main stamp from this newly release 3 x4 stamp set Moon and Stars. To create the subtle light gray dots and stars I inked up the stamp trying to avoid the moon in the center of the stamp. I used Simon Says Stamp Fog cardstock for this purpose. I made several cards this way and I usually stamped this image twice using the same ink. I did this just to make sure I got good ink coverage on my stamp.

I avoided the moon in the center of the stamp because I had something more interesting planned for the main focal point of this card. If I accidentally got any ink onto the moon, i would take my microfiber cloth and wipe away any ink that may have contaminated the area before stamping down the background.


I also stamped the sentiment “you are my moon & stars” with Versafine Clair Nocturne Ink and heat embossed it with Hero Arts Clear embossing powder. I arranged it below the stamped background justified to the center the best I could.

For the main focal  image, I cut several  pieces of Arches Hot Pressed watercolor paper to have some fun with. I loaded my first piece into the MISTI. To add color to the moon image I used my Jane Davenport Colorsticks from Spellbinders. To do this I would pick a few colors that I thought looked great together and took my colorstick directly to my stamp. Warning ⚠️  This will most likely stain your stamps. A little staining is normal and doesn’t affect the stamped image at all. It just makes the stamp look dirty (but that doesn’t bother me). I would add a few swipes of each color on the stamped image and then use my Nuvo Light Mist spray bottle to wet the stamp. I then took one of the smaller brushes from the Nuvo Brush Set to move some of the color around to blend the colors together on the stamp before I stamped it down onto my paper.


After I felt like the color was well represented on the stamp, I closed the door of my MISTI and let it set down on the paper for a few minutes. Then, when lifting the door of the MISTI off of your paper, you will see a circle of vibrant color. I had a paper towel or microfiber cloth handy to clean up any puddles of color that may look too muddy for the color set into place.

Once your watercolor circles are dry you can use any circle die from your collection that fits this size to cut it out. You may even have an old punch of similar size that might work. I cut out all of my circles and popped them up onto the backgrounds I created earlier. I used Tonic Studios Craft Perfect foam squares to give it dimension.


I adhered my panels to white craft foam using Craft Perfect tear tape adhesive. I attached them to a Simon Says Stamp Fog card base cut to size A2 and scored in top folding portrait orientation.

I hope I’ve inspired you to create something today. Make sure you (CLICK HERE!) to visit the Neat & Tangled online store to shop the NEW Setember release or check out the blog for more inspiration using these products from the design team. Don’t forget to comment for your chance to win today’s Giveaway.

Thank you for visiting my blog today.

Koren


The Rabbit Hole Designs September Guest Design Spot #2


Hello everyone.

I have another card for you today featuring the super adorable 3x4 stamp set from The Rabbit Hole Designs called Gourd-geous.

To check out The Rabbit Hole Designs, (CLICK HERE!) to visit their website to shop and their blog for awesome inspiration.


For my card today, I started with a piece of Neenah 110 lb. Classic Crest Solar White cardstock. I created a circle mask from one of the many basic circle die sets that I have in my stash. I placed it toward the bottom-right of my Neenah panel. I used The Picket Fence Studios (fine) blender brushes to apply Gina K Designs Turquoise Sea ink around the outer rim of my masked moon. Then I added Distress Oxide ink in Black Soot towards the outside edge of our scene. I finally added Distress Oxide Ink in Pumice Stone on the moon itself to make it slightly less white.

Once I was done ink blending, I put this panel in my Splat Box and tried to cover up the blackest areas of my background using scrap papers. This allowed me to focus the majority of the shimmer spray onto the lighter areas of the background. I hit the panel with a few shots of Imagine Crafts Sparkle Shimmer Spray. This panel was then popped up onto a Simon Says Stamp Fog cardstock cut to size A2 and scored in a top folding portrait orientation with black craft foam and Tonic Studios Craft Perfect tear tape adhesive.


I then added a tombstone cut from a die from my stash that unfortunately is no longer available. This die set was originally by Spellbinders. I cut it from a piece of Lawn Fawn Storm Cloud cardstock and loaded it into my MISTI. I stamped the sentiment "#underyourspell" onto the tombstone with Versafine Clair Nocturne Ink and heat embossed it using Hero Arts Clear embossing powder. I popped it up into the scene using Tonic Studios Craft Perfect foam squares.

Next I cut some grass from Lawn Fawn's Black Licorice cardstock using Lawn Fawn's Grassy Border die. I popped it up onto the scene using a double layer of foam squares.

The image from The Rabbit Hole Designs Gourd-geous stamp set was stamped using Simon Says Stamp Intense Black ink and colored with some Copic Markers. I have a Copic Color Map for you with a list of markers that I used to color this image. The image was popped up into the scene using the same foam squares.


The "spooky" word die was cut with a Tonic Studios die four times and layered together. I was cut from the same Black Licorice cardstock. I adhered it all together using Tonic Studios Deluxe liquid adhesive.

I absolutely love how this card turned out. I'm very appreciative of The Rabbit Hole Designs for having me guest design this month. To check out more from them (CLICK HERE!).

Thank you so much for visiting my blog today.

Koren

Tuesday, September 24, 2019

Neat & Tangled September Release: Day Two


Hello everyone. It’s day two of Neat & Tangled’s September release and my card features the NEW Moon Magic stamp set. This super simple card packs a lot of punch.

To check out the entire NEW release from Neat & Tangled (CLICK HERE!)  and visit the online shop and blog. The blog is filled with inspiration from the rest of the design team. Don’t forget to comment for your chance to win todays Giveaway. The winners will be announced this Friday 9/27 at 7:30 AM EST.


For today’s project I started with a piece of Navy Blue cardstock cut to 3 1/2 by 4 3/4.  I loaded this panel into my Original MISTI along with the moon phase stamp from the NEW Moon Magic stamp set as well as the sentiment “this is just a phase”. I stamped them with Nuvo Clear Mark Embossing powder and heat embossed them with Nuvo Gold Enchantment embossing powder with glitter.

To make it a little more dramatic. I used my Nuvo Blender brush to lightly add a little bit of ink blending to the edges of the cardstock. I used Distress Oxide ink in Black Soot. I gently wiped of the panel with my microfiber towel to both blend the ink a little and to clean off any black soot ink that may have gotten on my gold glitter images.


To finish off the card I adhered the panel to a piece of black craft foam using Tonic Studios Craft Perfect tear tape adhesive. Then I attached it to a Simon Says Stamp Fog card base cut to size A2 and scored in a top folding portrait orientation.

I hope that I inspired you to create something today. To check out the entire NEW Neat & Tangled September release (CLICK HERE!) and don’t forget to comment for your chance to win today’s Giveaway.

Thank you so much for visiting my blog today.

Koren


Monday, September 23, 2019

Neat & Tangled September Release: Day One


Hello everyone and welcome to day one of the Neat & Tangled September Release. I absolutely love this release and I’m excited to share my projects throughout this week. The NEW release is now LIVE in the Neat & Tangled online store. (CLICK HERE!) to shop or visit the blog for more inspiration using the NEW products.

Don’t forget to comment and secure your opportunity to win today’s giveaway. Winners will be announced Friday 9/27 at 7:30 AM EST on the Neat & Tangled Blog.

For today’s project I am using the NEW Moon Magic Stamp Set and coordinating dies as well as the NEW Starry Sky red rubber background stamp. This month, Neat & Tangled is also re-releasing the Like Magic Sequin pack. These sequins are awesome because they seem to take on whatever color you are using on your project, like magic.


I started with a piece of Purple Posey cardstock by Stampin’ Up! The piece started as a 4 1/4 by 5 1/2 inch panel but later I will cut it down. I prepped this panel for heat embossing with my magic powder bag making sure to remove as much of the static as possible. I loaded this piece into my Original MISTI as well as the NEW Starry Sky red rubber background stamp. I inked it up with Nuvo Clear Mark embossing ink and heat embossed the entire panel with Hero Arts Clear embossing powder. This will preserve the pale purple color of the cardstock under the image.

I then used my trimmer to cut the panel down to 3 1/2 by 4 3/4. I used my Nuvo Blender Brush to ink blend Distress Oxide Ink in Dusty Concord over the pale purple cardstock. I started on the outer edges and worked a lighter hand in the center of the cardstock. Making sure to darken the edges to reveal the embossed images beneath it. The darker the edge the more you will see the images.

After the I felt like I had added enough ink to the background. I took my microfiber cloth and moistened it with a quick spray of water. Not too much, just enough to give the cloth a little moisture. I then wiped my background with the cloth. This helps to clean the excess ink off of the embossed images and also helps blend you ink even further. Be careful- oxide inks are reactive to water, so don’t use too much.


This panel was popped up onto a Simon Says Stamp Fog card base cut to size A2 and scored in a top folding portrait orientation. I attached it first to a piece of Tonic Studios Craft Perfect Grey Board. This is a thick chipboard like material that will give my background dimension and rigidity.  I used Tonic Studios Craft Perfect tear tape adhesive to adhere it all together.

This beautiful image of a Luna Moth is also from the Moon Magic stamp set. I stamped this image in a MFT’s Cement Gray Hybrid ink onto Arches Hot Pressed Watercolor paper. I used my Derwent Inktense Pencils to add color to my image. Adding a small amount of the pencil to the shadow areas and then drawing the color out with a Tombow Mono Dual Brush Marker Blender Pen. I have a list of all of the pencils I used to color this images listed below.

I used the coordinating Moon Magic dies also available in this release to cut out my images. I popped up the moth using Tonic Studios Craft Perfect foam squares.


As for the sentiment, I stamped the “a friend like you is rare” phrase onto another piece of the Purple Posey cardstock, a scrap piece, with Nuvo Clear Mark embossing ink. This time I used Nuvo Crushed Mullberry to heat emboss the sentiment. I added a little more of the Dusty Concord ink to the strip in order to blend it into the background a little more. I cut it down with my Fiskars Wire Guide paper trimmer and popped it up with the same foam Squares.

To finish off the project I added the beautiful Like Magic Sequins around the moth using Glue Dots. I love the sparkle that they give off.

I hope that I’ve inspired you to create something today. Remember to (CLICK HERE!) to visit the Neat & Tangled Blog and see all the inspiring projects from the rest of the design team. Also shop the new release over in the online store.

Thank you so much for visiting my blog today. I can’t wait to show you day two.

Koren

Wednesday, September 18, 2019

The Rabbit Hole Designs Guest Design Spot!


Hello everyone.

This month I have the pleasure of guest designing for The Rabbit Hole Designs! I have made two cards for them this month, the first of which I will show you today. I was so excited when they sent me the Gourd-geous 3x4 stamp set. I just love the image and it’s detailed in a way that you don’t need to be an excellent colorist for it to look great.

To check out more from The Rabbit Hole Designs (CLICK HERE!) to visit their website.

I started with a piece of Taylored Expressions Earl Gray cardstock cut down to 3 1/2 by 4 3/4. I stamped my Gourdgeous gourd with Versafine Nocturne Clair Ink. This leaves us with a nice crisp black lined image to color.


I used my Faber Castell Polychoromos colored pencils to color my image today. I used just a few pencils concentrating most of the color in the darkest areas of the image and blending them out.

For the sentiment I stamped the “hey gourd-geous” from the same 3x4 stamp set with the same black ink but this time I used Hero Arts Clear embossing powder to heat emboss it as well. I love the shiny sentiment paired with the dark matte image.


I used gray craft foam and Craft Perfect tear tape adhesive to pop it up onto a Simon Says Stamp Fog Card Base cut to size A2 and scored in a top folding portrait orientation. To finish it off I took the black colored pencil and made some stars and spots around my pumpkin to give it a little magic.

This card is super simple but with great images, you don’t need to do a lot to make the recipient feel the holiday season upon us.

I hope you enjoyed my project for today. To check out more from The Rabbit Hole Designs (CLICK HERE!)

Koren

Thursday, September 12, 2019

Your Next Stamp Circle Burst

Hello everyone.

Today I get to play with another NEW stamp set from the Your Next Stamp September release. I have the Circle Burst stamp set, and although it's small in size, it is so versatile. These small sets with geometric shapes can be all sorts of things... fireworks like my project today, or simple geometric background images to livin' up a clean and simple card- I can simply find a ton of uses for these.

To check out the rest of the inspiration using this month's Your Next Stamp release (CLICK HERE!) to visit the YNS Blog and online shop. There you can comment for your chance to win the daily giveaway and shop the NEW release, which is available today!


For my project, I made my Circle Bursts into fireworks. I started with a piece of Stampin' Up!'s Seaside Spray cardstock cut down to 3 1/2 by 4 3/4 inches. I loaded the three-circle burst images onto the door of my Original MISTI, and arranged them to stamp on the blue panel in a way that made them appear to be fireworks with the largest in the foremost front and the subsequent sizes behind it. I was trying for a little forced prospective. I stamped the largest of the images and the smallest image first with Nuvo Clear Mark embossing ink and using Nuvo Clear embossing powder to heat emboss them in place. This will help to retain the light blue color of the cardstock as I ink blend the background.


The third and final image was stamped with the same clear sticky ink, but this time I used Nuvo Classic Silver embossing powder to heat emboss it. Once I had all of the embossing done for the background I could then begin adding some ink to the edges.

I used my Nuvo Blender Brushes and Distress Oxide ink in Chipped Sapphire and Black Soot to darken up the night sky background. I added a considerable amount of ink, leaving the center relatively untouched so that pretty shade of light blue cardstock would remain visible.


Once all the ink was added I could then spray the sparkle on the background. I love doing this. The spray melts all the ink in the background together and makes the entire background shine. I used my Splat Box to protect my work surface and added my three favorite shimmer sprays to the background. I used Hero Arts White Iridescent Shimmer Spray and Imagine Crafts Frost and Sparkle shimmer spritz.

After giving the panel a short time to dry completely, I wiped the embossing on the front panel with a damp cloth. I wanted the embossing to really stand out so I wiped away the excess ink from on top of the embossing, which really helps do that.

I then stamped the sentiment "birthday wishes" from the same Your Next Stamp Circle Burst stamp set onto more of that Stampin' Up! Seaside Spray cardstock with Nuvo Clear Mark Embossing Ink. I again used the Classic Silver embossing powder. To spruce up the sentiment a little, I added the same three shimmer sprays that I added to the background. After they dried completely I cut them down into small strips using my Fiskars Wire Guide Paper Trimmer.


I popped up the fireworks panel onto a Simon Says Stamp fog card base cut to size A2 and scored in a top folding portrait orientation. I did this using gray craft foam and Craft Perfect 1/2 inch tear tape adhesive. As for the sentiment strips, they are adhered using Craft Perfect Foam Squares.

To finish off the fireworks, I added a series of gray enamel dots to the center of each one. I used Your Next Stamp Gumdrops in "summer chill".

I hope you enjoyed my card project today using the NEW Your Next Stamp Circle Burst Stamp Set. To see the entire NEW release and to see more inspiration (CLICK HERE!) to visit the Your Next Stamp Blog and Online Shop.

Don't forget to comment to enter in your chance to win today's giveaway. For more information you can visit the YNS website.

Thank you for visiting my blog today,

Koren


Tuesday, September 10, 2019

Your Next Stamp Coffee and Donuts


Hello everyone.

 I am so excited to be creating with some NEW Your Next Stamp products today. Your Next Stamp is Celebrating 10 Years, and I am thrilled to be celebrating with them! Happy 10th Birthday Your Next Stamp!


If there’s one thing Your Next Stamp does really well during celebration times, it’s GIVEAWAYS! Comment on the YNS Blog and IG post for a chance to win everyday during this celebration week. So make sure you comment for your chance to win! For more information visit the YNS blog (CLICK HERE!)

Today we are previewing the NEW Latte Happy Vibes Stamp set and coordinating dies. I’ve made a vibrant coffee and donuts scene and I wanna tell you about it. The entire release will be available in the shop on Thursday September 12.

I started with a piece of Neenah 110 lb. cardstock cut to 3 1/2 by 4 3/4. Then I taped it down to my Tonic 12 x 12 glass mat with some ThermoWeb Purple Tape. I made sure to secure the tape on the back of my piece of paper so that I could place a stencil on the front. I don’t want any tape lines on the front of my project.


I used Distress Oxide Ink in Picked Raspberry and Wilted Violet on the front panel. I used The Picket Fence Studios Blending Brushes to blend on the pink color towards the left side of the panel and the purple color on the right side while blending them somewhat in the center.

After I had some color applied to the panel,  I used Heffy Doodle’s Brick by Brick Stencil. After securing the stencil to the front of the panel, I used the same Distress Oxide Inks to blend more of those same colors in the same general areas. This leaves behind an awesome pink and purple brick background that I think is so fun. To enhance this effect a little bit, I did run my front panel with the stencil in place through my die cutting machine in it’s embossing sandwich. This process adds additional dimension and I love the way it looks.

I also  added some paint splatter on my brick wall. I put a small amount of the same Distress Oxide Inks onto an acrylic block and used a small round paint brush to take it from the block and onto the wall. I gently tap the end of my paint brush onto the edge of the acrylic block several times. I usually put my panel into a splat box during this process. It helps contain the mess.

I sat my background panel to dry while I stamped one of the images from the NEW Latte Happy Vibes stamp set. I stamped them using Your Next Stamp Black Olive Ink onto Neenah 110 lb cardstock. I cut them out using the coordinating die set (which is also available for purchase this Friday), and I used my Copic markers to color them. I have made a color map if you are interested in the colors I used from my stash.


I also used some embellishments to enhance my images. Instead of coloring the Jimmies (sprinkles for those of you not from the Mid-Atlantic)  I used Brutus Monroe’s Faux Sprinkles to give my donut some toppings. I glued them on with Nuvo Deluxe Liquid Adhesive. I picked out only coordinating colors for my project. I wanted to use the pink, white, and purple jimmies only. If that doesn’t tell you how crazy I am about card making, I don’t know what will.

I also added a bit of glitter to the splash of hearts I used on this project. I coated the hearts with the same liquid adhesive and used Nuvo Sparkle Dust in Cosmo Berry on top. After it’s dry the glitter stays put and it adds a ton of shine.

For the sentiment, I loaded the “coffee and donuts make the impossible possible” stamp into my MISTI along with a piece of Neenah 110 cut to 1 3/4 x 3 1/2. I positioned my sentiment towards the center of this piece on the MISTI door. I inked up the “coffee” word in the sentiment with the Wilted Violet and stamped only that word. I also did this with the “donuts” word  and the Picked Raspberry ink. The rest of the sentiment was stamped with Versafine Clair Nocturne Ink. I love this type of selective stamping for sentiments especially when they have distinct font differences. I think it really enhances the design of the sentiment.


The entire brick back panel was popped up onto a Simon Says Stamp Fog card base cut to size A2 in Portrait (top folding) orientation. I used Craft Perfect 1/2 inch tear tape adhesive and a piece of gray craft foam cut slightly smaller than the back panel so that it remains hidden in between but gives the card a ton of dimension.

I popped up the sentiment panel with Craft Perfect Foam Squares in various sizes and placed it at the bottom of the brick panel. The images were also popped up with various sizes of foam squares in double width as needed to clear the height already given to the sentiment panel. I even cut some down to make them even smaller to use in tight spaces. I also popped up the sparkle dusted splash hearts, but this time with only one layer of foam tape.

That is my card for today. I hope you all will take the time to visit the Your Next Stamp blog and leave a celebratory birthday message and also enter yourself into a giveaway. (CLICK HERE)

Thank you for visiting my blog today.

Koren

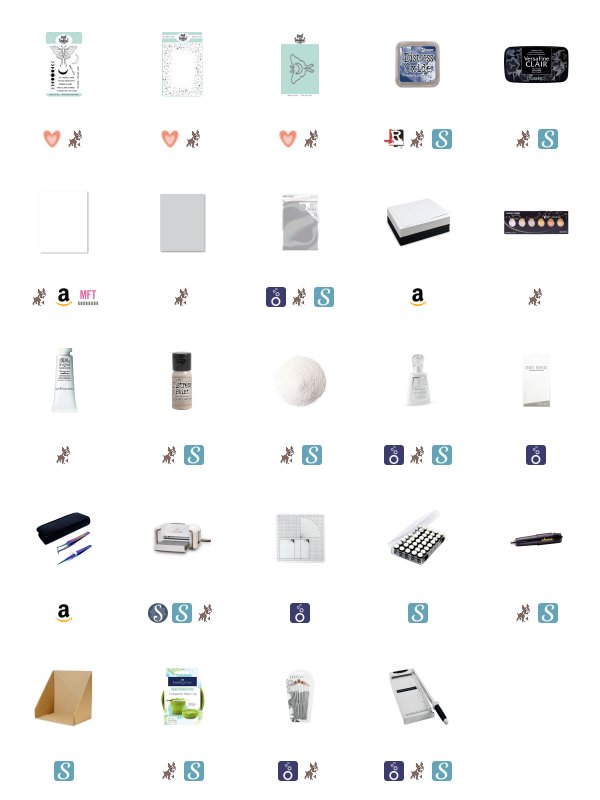
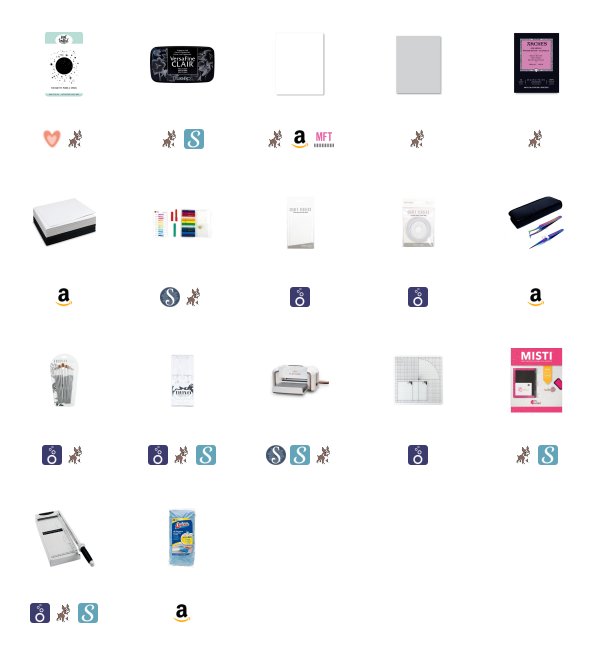
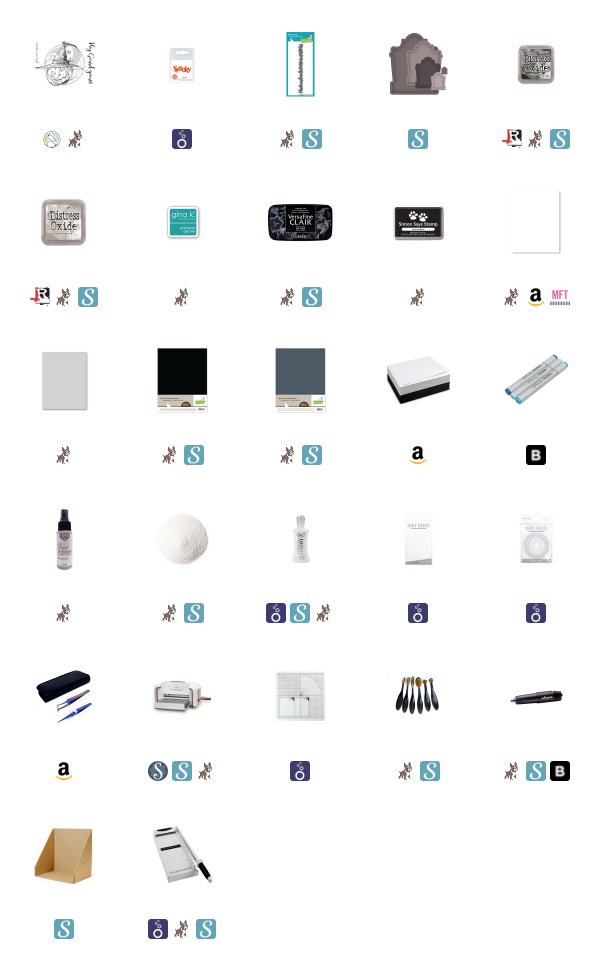
List of supplies used on this project with affiliate links used when available. Thank you for supporting me and my creativity.