Sunday, July 22, 2018

Your Next Stamp Christmas In July Card

Hello fellow crafter.

Today is Christmas in July over at the Your Next Stamp blog. (CLICK HERE!) to visit the blog and to check out all of the awesome inspiration that the design team and special guests have created. It's 6 months until Christmas and I know that I've already started planning. I'm sure like most of you, I love the holiday season. So when I saw the them for this month's Feature Day, heck yeah! I was excited! I was really looking forward to making a holiday card.


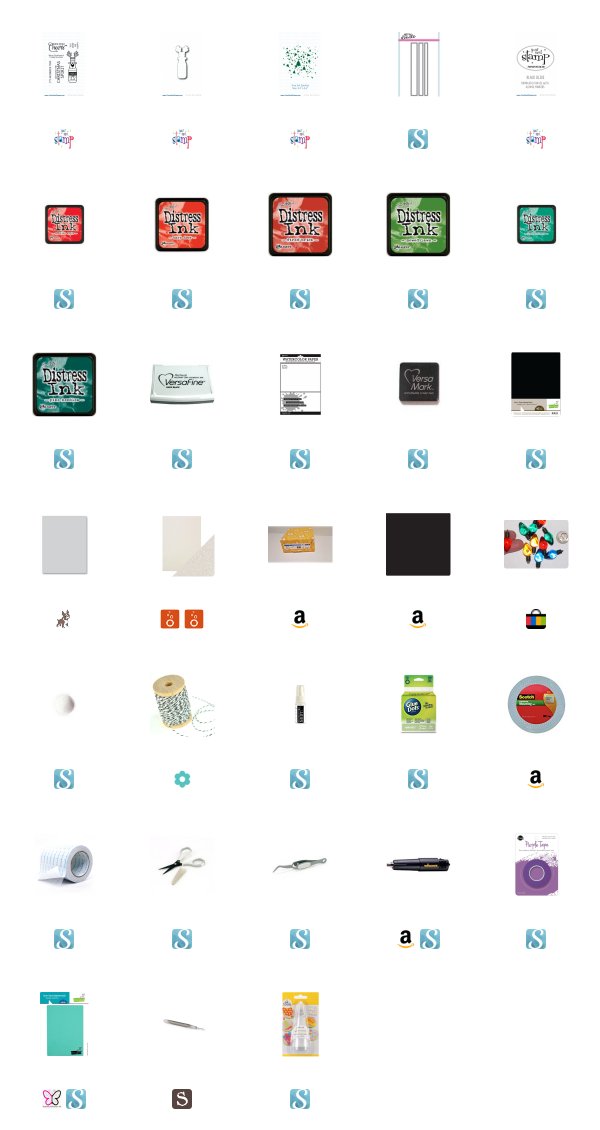
I used the Your Next Stamp Reinbeer stamp set and coordinating die to create the focal point of my card today. I started with a piece of Ranger watercolor paper. This brand of watercolor paper is very white compared to most. It also has a smooth side and a rough side, like traditional watercolor paper.
I like to use the smooth side, especially when stamping directly onto this paper. It has less grooves for your stamp to skip ink.

I pulled out an assortment of Christmas Distress Ink colors. I ended up using the following colors of Distress Ink on the background of this project. Candied Apple, Barn Door, Fired Brick, Mowed Lawn, Lucky Clover, Pine and Needles. I ink-smooshed those six inks onto a piece of Ranger watercolor paper. I used Hero Arts Iridescent Shimmer Spritz to spray and blend the inks together. I would place a small amount of ink directly from the ink cube on a piece of packaging from a stamp set that I cut down into a square.


I would spray the little square piece of plastic with the shimmer spritz to wet the ink before smooshing it down onto the watercolor paper. I did this in many variations with all six ink colors I selected above. I also sprayed the entire background with the same shimmer spritz and cut down that panel with the Your Next Stamp Stitched Rectangle Die set (second from largest).

I then placed the Your Next Stamp Tree Splatter background stamp into the Mini Misti I use to stamp with, and centered it to stamp in the center of my watercolored piece. I stamped the background trees with Versafine Onyx Black Ink. I added some dimension to the back of this panel using black craft foam and Scrapbook.com double-sided adhesive. I placed the background on an A2 top folding Simon Says Stamp card base.


I stamped the Reinbeer image from the Your Next Stamp Reinbeer stamp set with Your Next Stamp Black Olive Ink and colored it with my Copic Markers. I used his coordinating die to cut him out. I popped him up on the background with Scotch 3M foam tape. I added a touch of Gelly Roll Stardust Glitter Pen to his antlers to make them sparkle and shine.

I then stamped the sentiment, also from the Reinbeer stamp set. I stamped it on Lawn Fawn Black Licorice Cardstock with Versamark ink and heat embossed it with Hero Arts Ultra Fine White embossing powder. I used a Heffy Doodle Strips of Ease Die to cut out the sentiment. I put it on a frame of Tonic Studios Glitter Cardstock in the color Sugar Crystal. This glitter paper tends to pick up the colors around it in it glimmer. I popped the completed sentiment up with 3M foam tape and mounted it right under the Reinbeer.

As for the string of lights curled up in his antlers. I made that out of Papertrey ink Jet black twine and some Christmas light charms that I can not for the life of me remember where or even when I bought them. I just hung the lights on the twine secured it behind the card panel and then used glue dots to keep them in place. All the while wrapping them around my Reinbeers antlers.

Thank you for stoping by my blog today. Link for the supplies used on this project are linked below. Don't forget to (CLICK HERE!) and visit the Your Next Stamp blog for more Christmas in July fun!

Koren


Saturday, July 21, 2018

Spellbinders Toucan Card Video

Hello fellow crafter.

Today I am sharing with you a video that I created while making a card, using some products by Spellbinders to put it together. The kind people over at Spellbinders sent me a wonderful package of goodies to try out. The stamp set and coordinating dies were designed by Debbi Adams. I was lucky enough to meet Debbi at Creativation last January. Not only is she a super-talented designer but she is super sweet too.


The set I am playing with today is called Friends of a Feather. This is a great quality red rubber cling mount stamp set with coordinating dies. The dies are creatively designed by giving you, not only a die that cuts out the image of the bird, but it also has a larger outline die to create a shadow of that image. I'm not sure this is how they intended for it to be used, but thats how I'm using it today, and I think it worked well.


Below is a link to the YouTube video I created while making this card. I have also made a pin-able graphic for the exact Faber Castell colored pencils I used to color my images. Below that is a list of some links for the products I used in the video. Some are affiliate links (when possible) which helps me earn a paycheck at no cost to you.

Thank you for stoping by my blog today. I hope you enjoyed your time here.

Koren


Saturday, July 14, 2018

Heffy Doodle Wingman Cardmaking Kit Inspiration Video

Hello fellow crafters:

Today I am sharing with you a video I created for Heffy Doodle. They have just come out with a brand new Wingman Cardmaking Kit and its available on the Heffy Doodle website (CLICK HERE!) to purchase the kit or to look around at other supplies that might tickle your fancy.

Anyway, I made a card using supplies very similar to the kit. I don't have a kit, but I want to create something to inspire people that have to make something great with it. I found many of the things that were in the kit in my stash. I linked everything below as well as the video itself. I also have a Copic Color Map with the list of markers I used to color my "wingmen".


I hope you enjoyed my project using the NEW Heffy Doodle Wingman Cardmaking kit. You can find it by (CLICKING HERE!). I hope I could inspire to create something great with it. 

Thank you for visiting my blog today, 

Koren 


Wednesday, July 11, 2018

Your Next Stamp DT Dare "Pop it Up"

Hello fellow card makers.

Today I am sharing my Design Team Dare project for this months theme "Pop it Up". Each month the design team over at Your Next Stamp is given a dare to come up with a way to use the NEW release products with a fun theme. This month we are popping things up. To visit the blog and see what all the other designers came up with (CLICK HERE!).

You also have the chance to win a stamp set of your choice from the Your Next Stamp online store. Just comment on the Your Next Stamp blog post for this month's dare and one lucky winner will be chosen on July 15th.


I popped things WAY up! I used the NEW Your Next Stamp Coffee Cart stamp set and coordinating dies. Along with the Lawn Fawn Scalloped Box Card Die Set. I started with a Simon Says Stamp Fog box card set and added grass with the Your Next Stamp Grass Border Edge Die through out the box card. I used both Lawn Fawn Cilantro and Papertray Ink's Limeaide Ice to create variation in the color of the grass.

I used Simon Says Stamp Sea Glass on the back part that contains the sky area. I then cut out a chevron pattern that matches the color scheme I was going for from an older Fancy Pants Beloved pattern paper 6x6 pack. I added this to the bottom and sides of my box card.


The sentiment panel was cut out of Neenah 110 lb cardstock. I took one of the sentiments from the Coffee Cart set and stamped it with Versamark ink and heat embossed it with Zing Charcoal embossing powder.  I added a little coffee bean image also from the set below the sentiment. I stamped the coffee beans with Distress Oxide ink in Vintage Photo. I popped this part of the card up with Scotch 3M foam tape.

I stamped ALL of my images with Your Next Stamp Black Olive Ink and colored them with my Faber Castell Polychromos colored pencils. I have a color map below listing all of the different numbers to the pencils I used to color my images. This graphic is easy to pin to Pinterest and save if you see a color combo that you would like to try on your next project.


I used the coordinating dies to cut out all of my images. I then took strips of acetate by Crafter's Companion to prop up all of my images where I intended them to be. Glue dots and various other types of adhesive helped me do this. WARNING... this is A LOT of images on a box card. I WILL HAVE TO PUT THIS IN A LARGE ENVELOPE. But look how cute it is!!!


Thank you for stopping by my blog today. Don't forget to to (CLICK HERE!) and visit the Your Next Stamp Blog and comment for your chance to win a stamp set of your choice.

I hope you liked my coffee card bunnies and their fun scene that I created for them.

Koren

Saturday, July 7, 2018

Your Next Stamp July Release Blog Hop Card Video

Hello fellow card makers.

It's BLOG HOP TIME! That means there has been a NEW release by Your Next Stamp this month, and its a good one. We have tons of NEW stamps and dies to play with this month. From them, I have two projects for you today featuring the NEW products. To see ALL the NEW stuff (CLICK HERE!), it will take you to the NEW PRODUCTS page over on the Your Next Stamp website. If you are new to me, welcome, you will have much more fun over on my YouTube channel, I promise. But before you go let me tell you the scoop on the hop.


The blog hop runs from July 7th at 10:00 PM EST until July 10th. Hop along with us to see all the projects that the Design Team and Guest Designers have created using NEW Your Next Stamp July release items. While you hop along, make sure you comment for your chance to win a $25 gift certificate to spend in the YNS online store. Each time you comment, it increases your chance of winning, so be sure to leave no stone unturned.

On top of that, Your Next Stamp has a coupon code for 20% off your entire purchase! That is an amazing coupon. I'm leaving the banner below with the code: JULY2018 <---- Don't be like me and forget to use it. I do that ALL the time, don't forget!


I have two projects for you today. The first one, I've created a YouTube video showing its creation. I will link it below for your enjoyment. I'm using the NEW Happy Hour stamp set and coordinating dies to make a fun after party themed card. It was an idea I had to use the images from the set as though the drinks are gone and their owners are off dancing.  Here, have a look for yourself...


Here are some photos of the project featured in the video above. I hope you enjoyed it. I will also leave a full list of supplies below. But wait!!  I have a second project to show you, so don't leave just yet.


As for my second project I am using the NEW Honey Bee Stamp set and coordinating dies. Along with the NEW Honey Comb Die and Honey Drip Die to create my second card. I started with a piece of Neenah 110 lb cardstock and inlaid the Honey Comb Die using craft foam and Ranger Multi Medium Matte liquid adhesive. Before inlaying the honey comb I did run it through with a old Vine embossing folder from Stampin' Up! I'm not sure you can buy this anymore (I know that is so annoying). The background is cut down with the second from largest Your Next Stamp Stitched Rectangle Die and placed on a Simon Says Stamp Fog cardstock base.


The sentiment is also from the NEW Your Next Stamp Honey Bee stamp set. I stamped it with Versamark ink on a piece of Lawn Fawn Black Licorice cardstock and heat embossed it with Hero Arts Ultra Fine White embossing powder. I cut the sentiment down with one of the smaller stitched rectangles from the YNS set. I added a piece of Stampin' Up! So Saffron cardstock cut with the NEW Honey Drip edge die. I wanted it to appear to be getting covered in honey.


The images are stamped with Versafine Onyx Black ink and heat embossed with Hero Arts Clear embossing powder. I stamped them on Ranger Watercolor paper. I colored them with my Derwent Inktense pencils. I applied a little color in the darkest areas of the image and then I drew out the color with Stampin' Up! blender pens as if I were using a paint brush. I added some sparkle to the wings with my Gelly Roll Stardust clear pen. I then cut the images out with their coordinating dies and popped them up onto the background with Scotch 3M foam adhesive.


I want to thank you for visiting my blog today. Please remember to comment along the hop for your chance to win a $25 gift certificate at the Your Next Stamp online store. To check out the entire NEW RELEASE (CLICK HERE!) to visit the new products page over on the website. It should have all the new products available for you to look at.

Koren


Your Next Stamp July Preview Day 2018

Hello fellow card makers.

Today is Preview Day at Your Next Stamp and that is exciting because that means the NEW RELEASE comes tomorrow at 10:00 PM EST! This release is amazing, just like all the others. To check out what the rest of the design team is previewing over on the Your Next Stamp blog (CLICK HERE!). If you are interested in the entire NEW RELEASE check back tomorrow at 10pm EST for projects featuring all of the new stuff.

For now, I decided to use the NEW Strike Up the Fun stamp set to create a fun bowling-themed card. I love how Your Next Stamp has a stamp for just about any occasion. I use to be on a bowling team years ago,  and I even own my own ball and shoes. I keep them in my bowling bag that has flames on the side.


To create this card, I started with a piece of patterned paper from the Basic Grey Hipster 6x6 paper pack. Because I am a hoarder, it is no longer available. It has great retro paper. When I think of bowling, I think of Neon and old Las Vegas for some reason. So, I picked a great piece from the pack and cut it down with my Your Next Stamp Stictched Rectangle die (second from largest). I popped it up onto a Simon Says Stamp Fog card base with double sided adhesive and craft foam. 

I cut the starburst the you see behind my image with the We R Memory Keepers Nesting Starburst Dies out of Simon Says Stamp Sea Glass cardstock. That die cut is adhered directly to the piece of patterned paper with scrapbook.com tape runner adhesive. 


As far as the image panel goes... I cut out one of the circles from the Your Next Stamp Stitched and Pierced Circles from Neenah 110 lb cardstock. I stamped the image with Your Next Stamp black Olive ink and colored it with my Copic Markers.

I also stamped the additional bowling ball image from the same set separately and colored him as well. I popped him up on top of the original stamp image with an action wobble attached to him. This makes him interactive and super fun while hitting those pins.


I stamped the word "STRIKE" from the same Strike Up The Fun stamp set onto EK Success wood veneer paper with Versafine Onyx Black ink. Pigment ink works better for this because it sits on top of the paper unlike dye ink which would bleed into the wood and it would not result in a crisp image. I also stamped the same word onto Neenah 110 lb cardstock and fussy cut it out around the black line that it has. I used the wood veneer paper and fussy cut each letter to fit inside the white layer. The result is adhered with Ranger Multi Medium Matte Liquid adhesive and then popped up with Scotch 3M foam adhesive onto my card panel.

The last sub sentiment was stamped onto Lawn Fawn Black Licorice cardstock with Versamark Ink and heat embossed with Hero Arts Ultra Fine White embossing powder. I then used my Heffy Doodle Strips of Ease to cut it out. It too is popped up with foam adhesive on the back.

Thank you for visiting my blog today. Make sure you stop back tomorrow for the blog hop starting at 10 pm. EST.

Koren


SaveSave

Friday, July 6, 2018

Your Next Stamp Challenge #93

Hello fellow card makers.

Today is a NEW biweekly challenge over on the Your Next Stamp blog. (CLICK HERE!) to visit the Your Next Stamp blog and see what all the other designers and participants have done with this weeks sketch and/or color combination.

Your Next Stamp hosts a biweekly sketch and/or color combination challenge. You can use the sketch  and the color combination on your project, or one or the other. It a lot of fun to see what you create with a little challenge. Here is a look at this week's sketch and color combinations to inspire you to create a project using Your Next Stamp products.


This week was a good week. I was inspired to use both the sketch and the color combination to create my card. I used Legion Yupo Paper and Ranger Alcohol Inks in Flamingo, Peach Bellini, Turquoise, Denim, and Amethyst. The colors may not be an exact match, but you can definitely tell that they are close. I dropped each color onto the Yupo paper four drops spread out at a time and one color at a time. I use a straw to blow the color out as it dries. I then cut the panel down with Your Next Stamp Stitched Rectangle Die (second from largest).


I added Ranger Multi Medium matte liquid adhesive to the white area of the Yupo paper that did not get touched with Alcohol Ink. I quickly covered the areas of adhesive with Ranger Rock Candy Glitter. As the adhesive dries to a clear finish, the Rock Candy Glitter sparkles and shines in all the areas the were left barren. I think it adds a fun sparkle to my project and reminds me of a geode.


I then cut coordinating colors of cardstock with the Your Next Stamp Starburst Die Set. I used Stampin' Up! Tempting Turquoise and Night of Navy and Papertrey Ink's Hibiscus Burst and Royal Velvet. I took one of each color to create some flowers to add character to my sentiment strip. I mimicked the sketch and created a strip across my card front. I used Papertrey ink's vellum cardstock to create the strip.

Then I cut "thanks" with the YNS Scripty word die set multiple times from Neenah 110lb cardstock to create a faux chipboard word. I adhered all the layers together with Ranger Multi Medium Matter liquid adhesive. I also used the same liquid adhesive to adhere the piece to the center of the vellum strip.


I then cut tiny pieces of Scotch 3M foam adhesive strips to affix behind the thicker parts of the letters in the word die in order to pop up the piece and hide the adhesive. Glue dots were used to adhere the flower I cut both behind and on top of the sentiment strip.

I thought I would get creative and add a little White Nuvo Drops to the center of the flowers and before they could dry add a little Ranger Rock Candy Glitter. It didn't turn out the way I expected. It was too heavy and the glitter pushed the Nuvo drop down and made it all weird and bumpy. I'll try it on a smaller scale another time, but I wanted it to stay a perfect drop.

Finally I stuck the entire panel onto a piece of craft foam and popped it up onto a Simon Says Stamp Fog card Base. I think alcohol inks always make amazing looking cards. Even when things don't go as planned.

Thank you for visiting my blog today. If you want to play along with Your Next Stamp Challenge #93 (CLICK HERE!) to visit the YNS blog and check it out.

Koren