Thursday, April 23, 2020

The One with the Simon Says Stamp Sunny Days Ahead Release Video

Hello everyone. The Anticipation is over. The Simon Says Stamp Sunny Days Ahead Release is finally here and I have a video to share with you, and I go through the entire release on camera, and share a few samples of cards made with the new release products. 

The release has quite a bit for the graduates in your life as well as your Mom! This spring is sure to bring sunnier days and Simon Says Stamp is setting us up for us that. 

I also have a few additional card projects to share with you here on my blog so if you are interested in those, just keep reading. 

You can find the entire Simon Says Stamp Sunny Days Ahead release (CLICK HERE!) to visit the online shop and blog with tons more inspiration using these products. 


Background: 
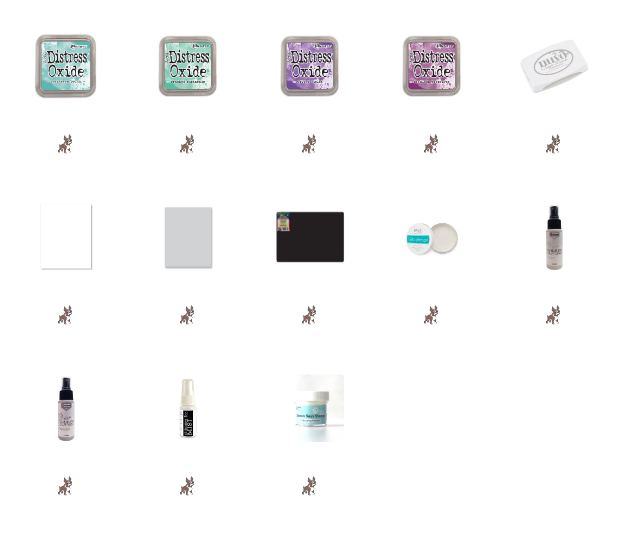
For this card, I started with a piece of Neenah 110 lb. Solar White Classic Crest cardstock cut to 4 3/4 by 3 1/2. I used the NEW Graduation Celebration Layering Stencil Trio, specifically the balloon stencil from the trio. I ink blended Distress Oxide inks in Cracked Pistachio Evergreen Bough and Wilted Violet with a Simon Says Stamp blending brush. I then used the confetti stencil from the same trio to add some Gina K Designs White Glitz Glitter Gel and set it aside to dry. 

Sentiment:
As for the sentiment, I cut the NEW "Grad" word die by CZ Designs. I cut the shadow from black cardstock and used white for the word die itself. I just love black and white sentiments. I added a sub sentiment of "you're one rad" from the NEW Grad Party stamp set also in collaboration with CZ Designs. To finish it off I also added a heat embossed tiny grad cap from the same stamp set. 

Everything was popped up onto a Simon Says Stamp Fog card base cut to size A2 and scored in a top folding portrait orientation. 


Background:
For this card, I wanted to make a card for my Mom. So I grabbed a piece of Neenah and cut it to 3 1/2" by 4 3/4"  and the NEW Simon Says Stamp Mom, Mum, Love Stencil. This stencil is fabulous for not just Mother's Day but to shower your Mom with love all year. I laid down the stencil trying to center the word Mom the best I could and ink blended some Distress Oxide ink in Wilted Violet and Seedless Preserves with a Simon Says Stamp Ink Blending tool. I then transferred the panel to my splat box keeping the stencil in place. I sprayed the piece with my favorite combination of shimmer sprays to make the Mom sparkle. I used Imagine Crafts Frost and Sparkle shimmer spray along with Hero Arts White Iridescent shimmer spray. Once you pull off the stencil, the crisp ink blended word beneath it shimmers and sparkles. 


Sentiment: 
I kept this super simple by using one of the pre-made sentiments in this month's release. I love the idea of telling my Mom just how much she's killing it out there, and this sentiment is perfect. I cut it into a strip and popped it up onto my ink blended panel. 

The panel was then added to a Simon Says Stamp Fog card base cut to size A2 and scored in a side-folding landscape orientation. 

I hope you have enjoyed checking out the NEW Simon Says Stamp April Release with me. I will have a few more cards over on Instagram so make sure you follow me there as well. Find the #SSSsunnydaysadhead to see tons of inspiration from designers all over the world. 

Thank you so much for visiting my blog today, 

Koren


Friday, April 17, 2020

The One with the #spreadjoynotgerms Blog Hop

Distress ink castle princess Heffy doodle ranger Simon says stamp cinderella have a magical birthday card greeting circle stamping card making die cutting sparkle Koren Wiskman


Hello everyone and welcome to the #spreadjoynotgerms Blog Hop! A number of fabulous companies have banded together to inspire us to spread joy with our crafting. I want to thank the wonderful ladies Catherine Pooler Designs and Alexandra Stapleton-Smith for organizing this hop for us. This hop is HUGE so if you get lost along the way visit The Hedgehog Hollow for a complete list of participants and more information. 

There are tons of prizes to be won, thanks to all of our wonderful sponsors. To win, just comment along the blog hop to enter. You do not have to comment on every blog to win but the more you comment, the greater your chances are of winning. So- comment!!!! The deadline to enter for prizes is April 24. Winners will be announced on Monday, April 27 on Catherine and Alexandra’s blogs.

Today I’m using Heffy Doodle’s Happily Ever Crafter Stamp and a few other goodies to create a magical Birthday card. If you want to know more, just keep reading. 

Background: 
The background was created using a piece of Neenah 110 lb. Solar White Classic Crest cardstock cut to 3 1/2 by 4 3/4. 

I wasn’t exactly sure how I wanted to pull off the card idea that I had when I started, so I began playing with the products and settled on the Heffy Doodle Circle Masquerade Stencil to create a sky in my background in the shape of a circle. I later decided to add another layer to the card which really made this step unnecessary, but I did it, so I’m explaining it. You can see at the top of the circle aperture in the finished photos of the card that you can see that the background stops. This could have been avoided if I had not used the stencil. 

Distress ink castle princess Heffy doodle ranger Simon says stamp cinderella have a magical birthday card greeting circle stamping card making die cutting sparkle Koren Wiskman

With the stencil in place, I used several Distress Oxide inks to ink blend some color on the paper. I used an ink blending tool from Simon Says Stamp to apply my color. I used one tool for all of the colors blended on, which were Weathered Wood, Stormy Sky, Salty Ocean, and Blueprint Sketch. I started with the lightest colors in the palette, blending them on first before adding a little something extra in background. I cut a mask of a castle using the die from the Happily Ever Crafter coordinating die set, and cut it from Avery Reposistionable label sheet. I added the mask to position the castle to appear to be off in the distance behind my focal images. Masking the castle after adding some of the highest colors allows it to appear to be a haze off in the distance. If you add the mask right away, your castle will be stark white and the effect will be lost. You could also do this by adding the mask first but after taking it off reapplying some of the lightest colors of ink to color the castle. 

Once the castle mask was added I then moved onto some of the darker colors in the blue palette that I chose, building up the color until I felt that it was the color and look I was happy with. I then removed the castle mask and placed the entire piece into my splat box. 

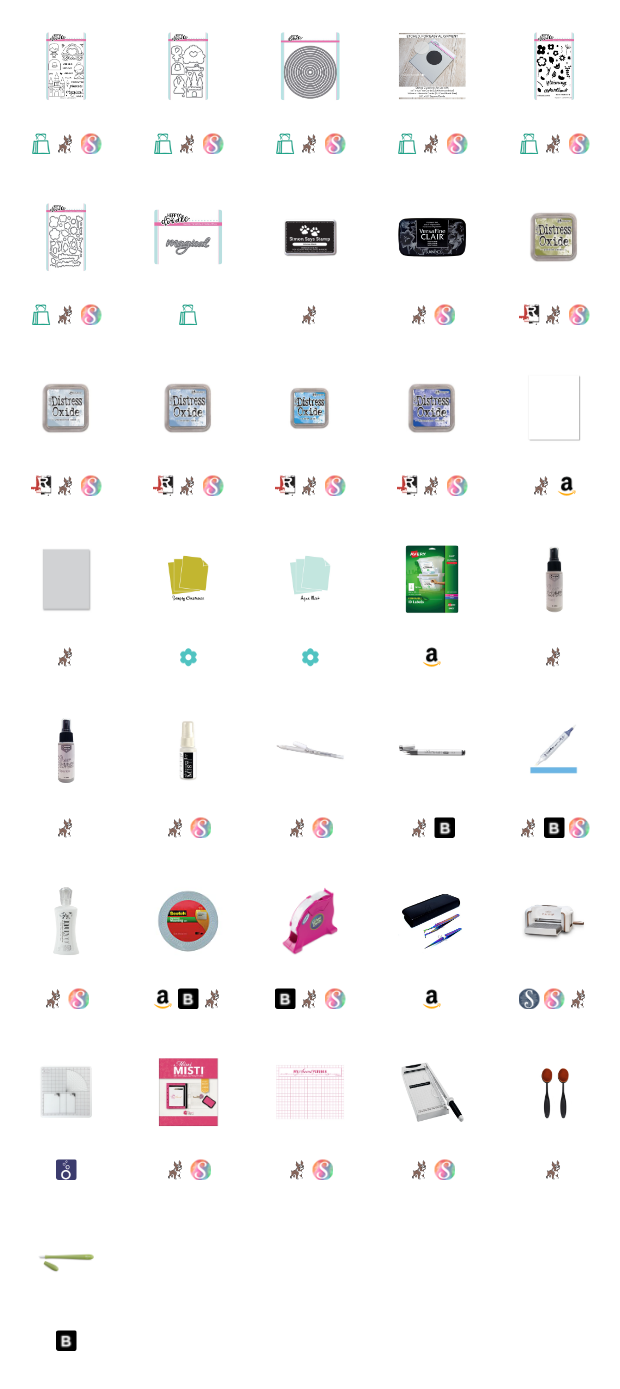
I wanted the background to look magical and to me the equals shimmer. I applied several layers of shimmer spritz from three different products all linked below. You do not need to use this much, I have an addiction to shimmer spray. But it looks fabulous. 

Distress ink castle princess Heffy doodle ranger Simon says stamp cinderella have a magical birthday card greeting circle stamping card making die cutting sparkle Koren Wiskman

While the ink blended piece was drying I cut another piece of Neenah to the same dimensions. This time I took the Heffy Doodle Imperial Stitched Circle dies and picked one that aligned with the size of aperture I wanted the card to have. I cut the circle from the same spot that I lined up my stencil to allow it to line up better in the end. This piece will be popped up onto the ink blended panel using foam tape. 

I then cut several of the greenery pieces from the Heffy Doodle Blooming Marvelous stamp set. I stamped them with Distress Oxide ink in Peeled Paint onto Papertrey Ink’s Simply Chartruse Cardstock and used their coordinating dies to cut them out. I used liquid adhesive to adhere some of the vines flat to the background while using glue dots on other to stick them to the popped up panel. This gives them a little more dimension. 

Images:
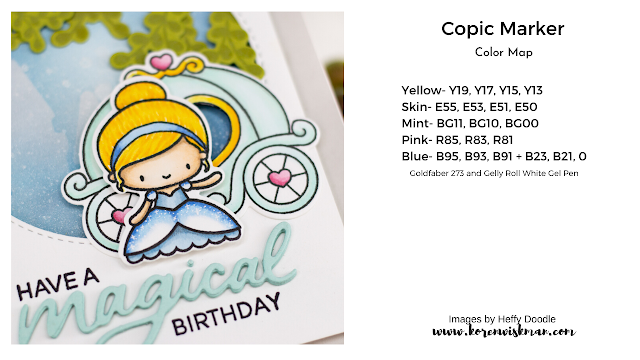
The images from the Heffy Doodle Happily Ever Crafter stamp set were stamped using Simon Says Stamp Intense Black ink and colored with my Copic Alcohol Markers. I have a Copic Color Map to list all the markers I used. I also used my Goldfaber 273 Colored Pencil to add a little shading. The sparkles on the dress were added using Gelly Roll White Gel Pen in size 05.  I used the coordinating dies to cut them out and to take it a step further, I used an exacto knife to cut out the heart shaped doors in the pumpkin carriage.  If you notice that my princess is sporting a headband that is not part of the original design, that is because I drew it in. First I made some marks with my pencil before added permanent lines with a Copic Multiliner 0.3. The images were popped up using foam tape. 

Distress ink castle princess Heffy doodle ranger Simon says stamp cinderella have a magical birthday card greeting circle stamping card making die cutting sparkle Koren Wiskman


Sentiment:
The sub sentiments “have a” and “birthday” were stamped using Versafine Clair Nocturne ink. I used the Heffy Doodle “magical” Heffy cuts word die to finish it off. I cut it four times and layered them together using liquid adhesive. I didn’t notice that it was a bit off until I saw a giant version of the card photo being edited on my computer screen. Oh well. It still looks great to me. 

I added the completed panel to a Simon Says Stamp Fog card base cut to size A2 and scored in a top folding portrait orientation. 

I hope that I’ve inspired you to share a little joy today. Don’t forget to comment for your chance to win one of the several giveaways donated by our generous sponsors. 

Next in the hop is …. Ingrid Blackburn (CLICK HERE!)

Thank you so much for visiting my blog today, 
Koren 


Saturday, April 4, 2020

The One with the Simon Says Stamp Blog Party


Hello everyone. Today I am partying with Simon Says Stamp for the #sssunitedwecraft Blog Party. We are using some past Simon Says Stamp exclusive products to create with today. Visit the Simon Says Stamp blog for more information about the blog party and to find tons more inspiration to keep you happy and crafting during this difficult time. (CLICK HERE!) to visit SimonSaysStamp.com. Use the hashtag #sssunitedwecraft if you make a project and party with us and your Simon Says Stamp exclusive products on social media.


I have two cards for you today. The first of which I broke out the stitching panel die from the March Lucky to Know You release by Simon Says Stamp. I first took a piece of Ranger watercolor cardstock and my Avery Elle liquid watercolors and went to town using the Cherry, Lemon Grass, and Celery colors. I used a wet on wet technique where I wet my paper first with clean water before bringing my watercolors to the paper. This technique allows the watercolors to blend together more easily. I used a different technique on the second project today.


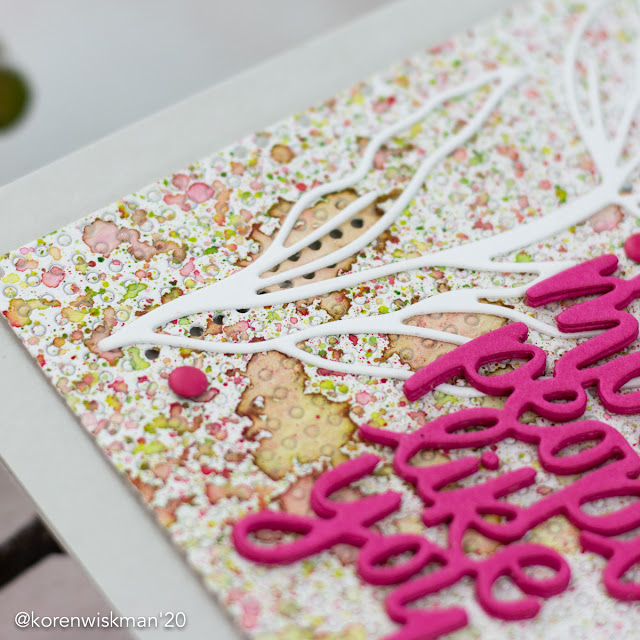
The second project received a dry watercolor splatter technique to the background. I placed another piece of watercolor paper into my splat box and started to use the same three watercolors to splatter on the background. I simply picked up my brush full of watercolor and splattered it on the panel. Dipping my brush in water to regenerate the watercolor still left on the brush and then splattering again. Dipping the brush into the water to refill the brush dilutes the watercolor still left on the brush, bringing a different shade of the same color into the mix.


simon says stamp, blog party, just because word mix 2, crocus flowers, stitching panel die, watercolor, cardstock, mix media background

I purposefully used a various amount of color concentrations to splatter the background. This gave me a range of colors even though I was only using the same three colors mentioned above. I used water to dilute the mix more and more before splattering the color.

After both watercolor panels where dry, I cut them down to 3 1/2 by 4 3/4 to prepare them for the next step.  I wanted to run both watercolor backgrounds through the die cutting machine using the Stiching Panel Die by Simon Says Stamp. This panel die cuts a gazillion holes the the piece and adds a tremendous amount of texture to the background.

Once the holes where cut, I thought about how many holes I actually wanted to come out. I wanted to show some texture by taking some of the holes completely out but also keep enough holes to hide my foam adhesive. The splattered panel was able to be popped up using thin strips of foam adhesive in the areas where the holes did not come out. The panel with less holes to hide adhesive was just added flat to the card base using liquid adhesive.

simon says stamp, blog party, just because word mix 2, crocus flowers, stitching panel die, watercolor, cardstock, mix media background

Both card bases are made from Simon Says Stamp Fog cardstock and cut to size A2 and scored in a top folding portrait orientation.

I then cut the Crocus Flowers dies by Simon Says Stamp from Neenah 110 lb Solar White Classic Crest cardstock. I cut them several times to have plenty to work with. I layered the die cut pieces together on the "a little note" card using liquid adhesive. I cut the die cut four times and layered them together to create a focal image for my card. They were also adhered to the panel using the same liquid adhesive in the lower left of the panel.

simon says stamp, blog party, just because word mix 2, crocus flowers, stitching panel die, watercolor, cardstock, mix media background

As for the sentiment on this one, I stamped the "a little note" from the Simon Says Stamp Just Because (Word Mix 2), but I used a smaller circle die to cut it out leaving no white border around the edges. This was popped up on the flowers using foam tape.

To finish this card off I added a few black enamel dots.

simon says stamp, blog party, just because word mix 2, crocus flowers, stitching panel die, watercolor, cardstock, mix media background

For the second card, I added on of the crocus flowers flat to the panel on the left side of the card. I cut the "the world need more people like you" sentiment from the Simon Says Stamp The World Need wafer dies. I used a nice hot pink cardstock that I liked with the background already created. I cut the sentiment four times from the pink cardstock and layered them together using liquid adhesive. I used the same glue to adhere it to the right side of my card panel.

To finish off this card, I added a few coordinating hot pink enamel dots sprinkled on the panel.

simon says stamp, blog party, just because word mix 2, crocus flowers, stitching panel die, watercolor, cardstock, mix media background

I hope that you enjoyed my card projects for you today. I hope to inspire you to create something. Remember to (CLICK HERE!) to visit the Simon Says Stamp blog and find more crafting inspiration over there.

Thank you so much for visiting my blog today,

Koren