Saturday, February 23, 2019

Video: Cardmaking with Ranger Ink and Simon Hurely Collection.


Hello everyone.

Today I have been given the chance to play with some brand new products by Ranger Ink and Simon Hurley. I love the fact that Simon has put in so much time and effort to give us some fun NEW toys to play with. At such a young age, he really should be commended for his efforts. Thank you Simon for all of your hard work. The collection is fantastic.


In this video, I'm testing out the NEW Simon Hurley Inks by doing some ink blending. I have always enjoyed using Ranger Dye inks and these are no exception. They feel just like the Ranger Dye Inks I use to own. They stamp beautifully and a rich and vibrant color.

The Stark White Cardstock from the collection has a nice heavy weight and is very very white. Those are two things I look for first in a white cardstock. I also enjoyed ink blending on it. It accepted the dye inks nicely and gave a beautiful ink blended result. I will have to color more on it with alcohol markers to give you my opinion on that, but for stamping and ink blending, it is top notch.


The red rubber background stamps that I put to the test are wonderful. The Classic Flannel pattern and a great staple to add to my collection. I continue to add red rubber background stamps to my collection because of their high quality and the precision images they create.

The stencils are great, my favorite being the Flower Maker stencil. Even someone as botanically challenged as myself, still managed to create a few stunning flowers to add to some clean and simple cards.


The bold sentiments from the Bestest Friends stamp set were also instant favorites of mine. They stamp beautifully and are made from high quality photopolymer that we have all grown to love and enjoy.

I hope you enjoyed my blog today and my thoughts on the NEW Simon Hurley Create Collection by Ranger Ink. Please take a moment and check out my new video below, which shows, in more detail, all of the new products from this set.  All of the products used to create these cards are linked below.

Thank you for stoping my by blog.

Koren


Saturday, February 16, 2019

Heffy Doodle Gnomes and My Brother Scan N Cut Video


Hello everyone.

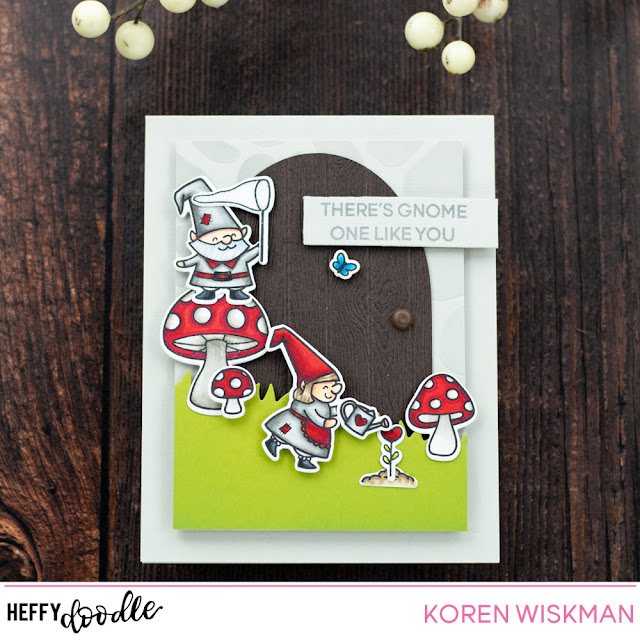
Today I'm sharing my latest video for Heffy Doodle using the NEW Gnome Matter What stamp set. To continue with the gnome theme, I grabbed the Stoney Maloney stencil for my background. The grass was cut using the NEW Grassy Lass border dies and to top it off, I added a door that I made using my Brother Scan N Cut 2.


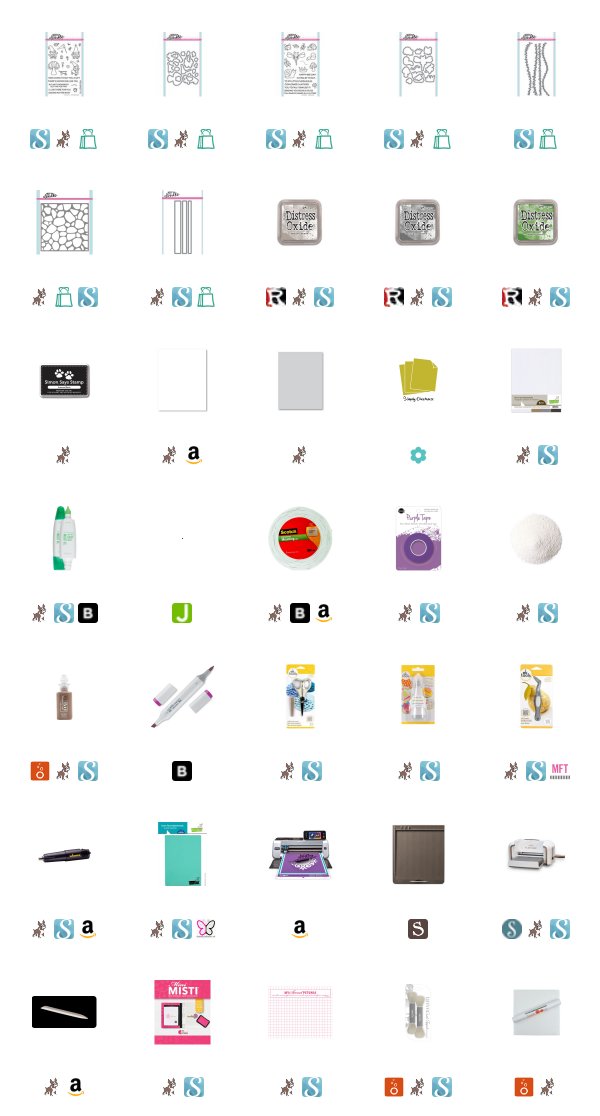
I will link to the video I made creating this card as well as a Copic color map listing all of the Copic markers I used to color my images. I will also have a full list of supplies.

Thank you for visiting my blog today.

Koren


Monday, February 11, 2019

Heffy Doodle Release 6 Blog Hop


Hello everyone.

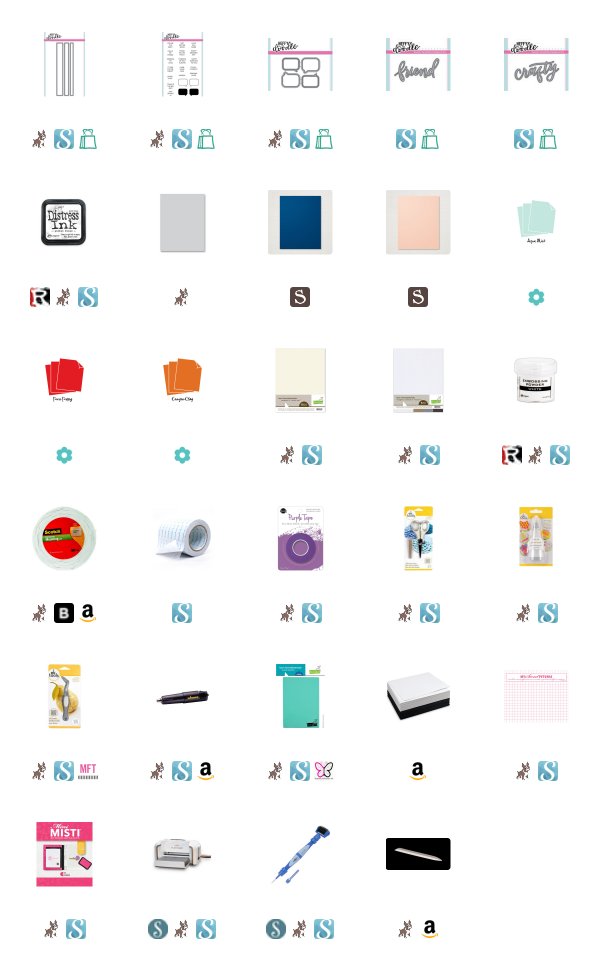
Today we are hopping along with Heffy Doodle to celebrate release 6. If you didn't know, Heffy Doodle is a relatively NEW company and this marks their 6th release. The release is packed with goodies that I'm sure you will love. The entire release is available NOW! So (CLICK HERE!) to check it out. All of my supplies will be linked below.

I guess we will jump into the fun stuff- There is a prize up for grabs. All you have to do is comment along the entire blog hop for your chance to win a 50 pound gift certificate to the Heffy Doodle online shop. I know what you're thinking. Wow, that's one heavy gift certificate. No, I just don't know how to make the little sign for the fancy L for British pounds. It doesn't matter! Comment along the hop to win MONEY at the Heffy Doodle online shop. Everyone understands money : )

There is also a promotion going on right now. If you spend 30 pounds in the Heffy Doodle online shop, then you will receive the Exclusive Rescue Dogs stamp set for free with your order. Even better, spend 45 and you will get the dies to go with it.


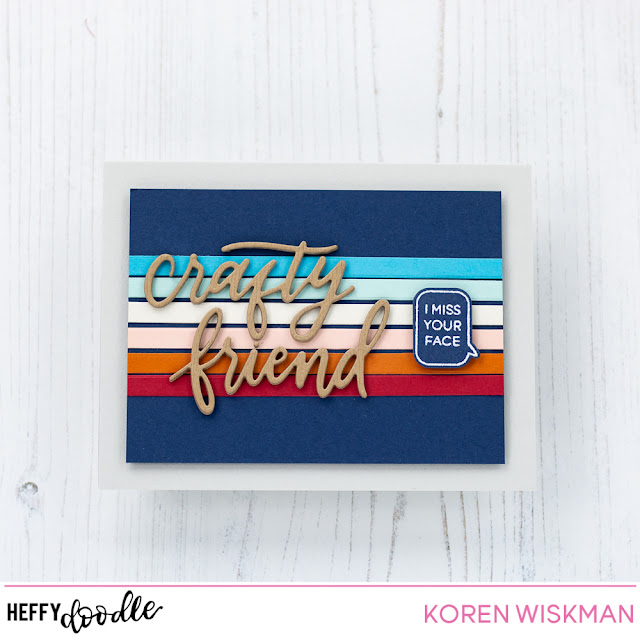
As for my card, today I'm using the NEW Crafty and Friends Heffy Cuts Word dies to create a card for a special crafty friend.

To start, I cut a piece of Night of Navy cardstock by Stampin' Up! down to 3 1/2 by 4 3/4. This is going to be a super simple background for todays card. To spruce it up a bit, I cut 6 strips of card stock from different scraps I had. I used Stampin' Up's! Petal Pink and Tempting Turquoise (retired). I also used Papertrey Ink's Aqua Mist, Pure Poppy, and Canyon Clay. To finish it up, I cut some Lawn Fawn Vanilla Malt as well. These strips where then grouped together in the center of my card panel and adhered using Lawn Fawn Glue Tube liquid adhesive. I tried to get somewhat even spacing between the strips to show a little of the navy cardstock behind it, but I didn't stress if it wasn't perfect. These pieces were eventually popped up onto a Simon Says Stamp Fog card base using white craft foam and Scrapbook.com double sided adhesive.


I then took the NEW Crafty and Friends Heffy Cuts word dies and cut them from Lawn Fawn Neutrals Woodgrain Cardstock. I cut it four times each. I layered them together using the same liquid adhesive. These funky word dies are just what I needed in my stash. I love my crafty friends and I don't have any word dies like these. I'm so excited to use these on cards to send to my online crafty friends.

The word dies were adhered together and then flat to the rainbow panel with Glue Tube adhesive.


I then took another piece of the navy cardstock and stamped one of the speech bubbles from an older Heffy Doodle set called Whatcha Sayin'. If you like this set, a brand new set called Whatcha Sayin' Now is coming out today also, so make sure you check out the release. (CLICK HERE!)

Once I had the speech bubble stamped using Distress ink in Picket Fence, yes, you heard me correct. I stamped it using Distress Ink in Picket Fence. This ink is basically white pigment ink. I sometimes use white pigment ink to heat emboss, especially when fine detail is important. The white ink helps it pop off of the page just a bit more on dark cardstocks.


Once the speech bubble and sentiment (from the same Whatcha' Sayin' stamp set, by the way) was stamped, I used Ranger White embossing powder to heat emboss the sentiment.

I used the coordinating die to cut it out and popped it up with Scotch 3M Foam adhesive.

That is it, that is my project for today's blog hop. Don't forget to comment along the hop for your chance to win a gift certificate to the Heffy Doodle online shop. I hope you get inspired along the way as well.

Thank you for visiting my blog today.

Koren

Blog Hop Line Up


Kori <--- You are here
Tallie
Crystal
Franci

Friday, February 8, 2019

A Recap of Neat & Tangled's February Release Week

Hello everyone. 

Today I am doing a recap of all of the cards I posted this week for the Neat & Tangled February Release Week. Well, if you are reading this, they are now LIVE and up for purchase in the Neat & Tangled online shop. (CLICK HERE!) to visit and fill your cart with things that will bring you joy! 

Day 1: Mail Background - This week Neat & Tangled released their very first red rubber background stamp and I couldn't be more excited about the NEW product line joining the team. I love red rubber background stamps and I hope you will too. (CLICK HERE!) to read the original post.


Day 2: Jump for Joy - Let's all Jump for Joy with this adorable stamp set that just explodes with outdoor play. I love playing outside, and encouraging others to do the same is always one of my goals. I really think that this card does exactly that. And this NEW stamp set by Neat & Tangled was the key. (CLICK HERE!) to read the original post.


Day 3: Typed Sentiments - I have to say the stamp the says "no one is as entertained by us, as us" is awesome and one of my all time favorites, EVER! And the typewriter font really takes us back to another time, before the internet connected everyone, letters did, and this takes me back to the excitement of seeing something in the mailbox with your name on it, with a postmark from a friend. (CLICK HERE!) to read the original post.


Day 4: Slow & Steady - I adore the main image from this set. I have never seen anything like it and it is so fun, in a slower kinda way.  Much like the typeface in Day 3's project, the imagery here pulled me back to a simpler, and slower time in my life.  It reminds me a little bit of tortoise and the hare, but instead of racing the hare, the tortoise found a buddy more his speed, and there was no conflict at all.  Yeah- it might not make for the best story, but it makes for a fantastic stamp set image! (CLICK HERE!) to read the original post.


I hope you've enjoyed my recap of this week. Make sure you (CLICK HERE!) to visit the Neat & Tangled Blog and online store and shop until your heart is content.

Thank you for visiting my blog today.

Koren


Thursday, February 7, 2019

Neat & Tangled Slow & Steady February Release


Hello everyone.

Today is Day 4 of the Neat & Tangled February Release Week. We are showcasing the NEW Slow & Steady stamp set. I think this stamp set is completely adorable. I have never seen a sloth riding a turtle in any set ever. Why wouldn't these two hang out, they both live life at a slower pace, they are perfect for each other. I would love to hang out with these guys, I would love a slower pace around my home. Make sure you (CLICK HERE!) to visit the Neat & Tangled Blog for more inspiration from the rest of the design team. This set, as well as the rest of the release, will be available Friday morning at 8:00 AM EST. Thats tomorrow : )

My card is super simple today. I started with a piece of Ranger Watercolor Paper, cut to 3 1/2 by 4 3/4. I love this watercolor paper, it is my favorite and it is the whitest I have ever used, so the coloring really pops off of the bright white. I stamped the main image from the set as well as two grass accent stamps along the ground of the image. I used Versafine Claire Nocturne ink and heat embossed with Ranger Clear embossing powder. I always like to make take these steps when I plan to watercolor with my Zig Clean Color Real Brush Markers. Which is what I did.


I started adding color with my Zig CCRB Markers in the parts of the image that would appear the darkest or the shadow areas. Then I used my Stampin' Up! Blender Pen to draw out the color into the lighter areas of the image. This gives the image a little depth and life. I have created a color map so that you will know exactly which colors I used to color my image below.


Then I cut out one of the NEW Sentiment Strips also by Neat & Tangled to use for my sentiment. I stamped one of the sentiments from the Slow & Steady stamp set with Nuvo Clear Mark embossing ink and heat embossed it with Ranger White embossing powder. I used Papertrey Ink Prairie Grass for the sentiment strip. I popped this up onto my card front using Scotch 3M foam adhesive.

To finish it off, I used white craft foam and Scrapbook.com double sided adhesive to adhere the entire panel to a Simon Says Stamp Fog card base in size A2 in a portrait orientation.

I hope you enjoyed my project today. Don't forget to (CLICK HERE!) to visit the Neat & Tangled Blog and check out what the rest of the design team created. The entire release will be available tomorrow Friday at 8:00 AM EST.

Thank you for visiting my blog today.

Koren

Wednesday, February 6, 2019

Neat & Tangled Typed Sentiments February Release Week


Hello everyone.

Today is Day 3 of the Neat & Tangled February Release Week. We are showcasing the NEW Typed Sentiments today. The photos of my cards may not look like much but I can assure you, it's time consuming and requires maximum patience! lol. Not really, I learned something while creating this card and I am going to share it with you.

If you would like to check out what the rest of the design team came up with (CLICK HERE!) to visit the Neat & Tangled blog for tons of inspiration. The February release will go live on Friday morning at 8:00 AM EST.


As for my card, I wanted to use as many of the stamps from the Typed Sentiments set as I possibly could, and then have a few stand out among the rest. Many of these sentiments are adorable, but also small. This makes them harder to line up in any kind of a row, which is what my plan was.

I knew that I needed a few tools to get me through this one. First being the MISTI. The grid lines on the MISTI door would help ensure that the sentiment strip was straight, but I also needed the words to line up with each other to the best of my ability. For this, I broke out my Simon Says Stamp transparency grid. This little thing has come to my rescue many times, it really helps me keep some kind of a horizontal line while adjusting and moving the stamps around.


After I had collected all of my tools, I started stamping my background. I cut a piece of Neenah 110 lb Solar White Classic Crest cardstock down to 3 1/2 by 4 3/4. I placed it into my MISTI and used the  transparency grid over it to line up the first row of stamps. The first row was pretty easy. The difficulty actually began in the second row. Getting the spacing right in between rows. I must have tried three times to get this "right". Every time, I would miss a measurement and it would go off the rails from there.

-All of the supplies used will be linked below-


Then I realized, and here is what I learned, I remembered typewriters weren't the most aligned either, especially when you had to go back and correct a mistake.  So, I stoped being so critical of my stamping and just had fun with it. I stopped critiquing every line and just had a good time. I have to learn this lesson over an over again it seems, but it still feels good when I just let go of perfection. It makes those times when I nail it! even sweeter.

I made two cards. I used the NEW Love Mail die set (also from Neat & Tangled) to accent my background with a heart, and added a few Ebony Black Nuvo drops to one of the cards and not to the other. The heart was cut from Papertrey Inks Berry Sorbet. This is one of my favorite cardstocks to use.

I hope you all enjoyed my card projects today. Remember to not take card making too seriously and enjoy the process. (CLICK HERE!) to visit the Neat & Tangled Blog to see what the rest of the design team has come up with. The release will be available from the same link on Friday at 8:00 AM EST.

Thank you for visiting my blog today.

Koren

Tuesday, February 5, 2019

Neat & Tangled Jump for Joy February Release

Hello everyone.

It's Day 2 of Neat & Tangled's February Release Week, and today we are showcasing the NEW Jump for Joy stamp set. This set is completely adorable and really reminds me of playing outside in the warm weather. I don't know about you, but I will be so happy to feel the warm air outside again this spring. It simply cannot get here fast enough. Until then, we can play with these super cute stamps. (CLICK HERE!) to visit the Neat & Tangled Blog and to check out what the rest of the design team has come up with to inspire you.


For my card, I started with my background. I took a piece of turquoise cardstock. This one happens to be Avery Elle, which they don't sell anymore, but any shade of blue would do nicely. I grabbed my Time for Tea Designs stencil from my stash which had some clouds in the center of it. It's called Wonderful Waves. I used Distress Ink in Picket Fence to ink blend the clouds onto my background.  I wanted them to be big and cartoon like.

After I inked the clouds, I did not move my stencil. I kept it, in place, on the background and sprayed some Imagine crafts Shimmer Spritz in both Frost and Sparkle to give the clouds some shimmer.

Once my background was complete and dry, I then used a Lawn Fawn Slide on Over die to cut a channel into the background so that I could make one of my images jump up and down. To do this, I placed the die where I wanted my image to jump up and down and ran it through my die cutting machine. I always have to remember to save the negative piece that gets cut out, because I will use that too.


I grabbed a second piece of turquoise cardstock and cut them both down to 3 1/2 by 4 3/4. The second piece will live behind the piece with the clouds ink blended on it. I added two layers of Scotch 3M foam adhesive onto the back of the ink blended panel. I also lined up the little negative piece that got cut out for the slider channel. Once you line up both pieces you can see where you need to adhere the small piece that was cut out. I used Lawn Fawn Glue Tube liquid adhesive to do this.

I then used an MFT slider element to fit inside my channel and stuck the two turquoise panels together. The slider element fits inside the channel I made and once my image is cut out, I can adhere it to the slider element and it will then move freely up and down in the channel.

I used Heffy Doodle's Grass border edge die to cut out three layers of grass for our critters to be playing in. It makes it look like my yard, only my grass isn't a pretty green color usually, lol. It's more brown and sometimes mossy. I took Lawn Fawn Cilantro cardstock added some Mowed Lawn Distress Oxide Ink blending along the outside but it hardly shows in the photos. Before sticking these three layers of grass together. I stamped one of the sentiments from the NEW Neat & Tangled Jump for Joy stamp set in the bottom right corner using Versfine Claire Nocturne ink. It was then time to place the grassy layers onto the slider panel. I was careful not to cover my channel, so that my critter still had room to jump.


I then stamped all of my images from the same Jump for Joy stamp set with Simon Says Stamp Intense Black ink and colored them with my Copic Markers. Once they were all colored, I used Scotch 3M foam tape to adhere them all to the scene I had created. Now the little squirrel in the middle of the card jumps up and down on the trampoline because it now lives onto that little slider element inside the channel.  I will share a short stop motion video over on my Instagram stories if you are interested in seeing this card in action. 

I hope you enjoyed my project today. (CLICK HERE!) to visit the Neat & Tangled Blog for more design team inspiration this week. The February release will be available for purchase on Friday at 8:00 AM EST 

Thank you for visiting my blog today. 

Koren 


Monday, February 4, 2019

Neat & Tangled Mail Background February Release


Hello everyone. 

Today is Day one of the Neat & Tangled February Release! The full release will be available Friday at 8:00 AM. (CLICK HERE!) to visit the online shop. We are showcasing the NEW Mail Background stamp. This stamp is red rubber, which is, in my opinion, the best kind of background stamp. 

I stamped the NEW Mail Background stamp onto a piece of Neenah 110 lb Solar White Classic Crest cardstock with Simon Says Stamp Intense Black ink. This is important because I want to color my background with my Copic Markers and this ink is alcohol marker friendly. After coloring each little envelope image,  I trimmed my front panel down to 3 1/2 by 4 3/4 .  To pop it up, I adhered a piece of black craft foam with Scrapbook.com double sided adhesive and placed it on a Simon Says Stamp Fog card base. 


I then had to get the red envelope formed, and took the NEW Love Mail Die set and cut out one the letters with a heart detail die from Papertrey Ink Pure Poppy cardstock. I scored it with my Teflon Bone Folder and stuck it to the background using Lawn Fawn Glue Tube Liquid adhesive. 

I then took one of the NEW Skinny Strips dies to cut a double ended banner strip (and you can get some real use out of this one, because there are so many great banner strips in this set). I cut it from Lawn Fawn Black Licorice cardstock. 


I grabbed the NEW Typed Sentiments Stamp Set by Neat & Tangled and stamped this awesome sentiment using Nuvo Clear Mark embossing ink.  I also heat embossed it with Ranger White embossing powder. This strip was then popped up with Scotch 3M Foam Tape. 

That is it, that is my project for today. Make sure you check out the Neat & Tangled Blog for tons more inspiration from the rest of the design team with the NEW Neat & Tangled February release. The new release will be available Friday at 8:00 AM EST (CLICK HERE!) to visit the online store. 

Thank you for visiting my blog today. 

Koren 

Saturday, February 2, 2019

Heffy Doodle Ink Blending, Robots, and Zig CCRB Markers Card Video

Hello everyone,

Today I am excited to share with you another Heffy Doodle Video. In This video I create an upgraded version of a card that I designed for my "On The Make" Crafty Events card class on Feb, 3rd in Savage, Maryland. It's a Valentine Extravaganza!

The products used on this card are available for preorder NOW and the release date is February 11th, 2019. Make sure you watch the Design Team this week to get sneak peeks and full projects of NEW Heffy Doodle products. #heffydoodler


Anyway, for this one, I make a few extra parts and pieces to "upgrade" my card a little. I use the NEW Heffy Doodle Bots of Love stamp set and coordinating dies to create a cute and masculine valentine card. I'm thinking about making so many more with this set, it's just so adorable. I also used the NEW Heffy Doodle Love Circuit Stencil. This is the perfect stencil to create with this robot theme card.


I will link below to my YouTube video that I created while making this card and a few extra things. I made a Zig Clean Color Real Brush Marker Color Map so that you can see all the different markers I used to watercolor my image. I also took a few photos for you to enjoy.

Thank you for visiting my blog today.

Koren


Friday, February 1, 2019

Spellbinders Large Die of the Month Kit February

Hello everyone.

Today, I'm using Spellbinders Large Die of the Month Kit for February 2018. I created a very shiny, watercolor card that can be used for just about any occasion.

The Large Die of the Month February Kit from Spellbinders consists of four amazing butterfly dies that each cut out different parts of a butterfly including it's tiny body and then several flower and leaf dies to add some beautiful flowers to your card, if you so choose.

Today I didn't use the flower dies, but I did fill my card front with three butterflies each colored with Gansi Tambi watercolors in different designs.


I started with Ranger Watercolor cardstock cut down to 3 1/2 by 4 3/4. I adhered it to a Simon Says Stamp Fog card base cut to size A2 in the top folding portrait orientation. I used white craft foam and Scrapbook.com double sided adhesive to stick it on.

I then used my Spellbinders Platinum Die Cutting Machine to cut three of the large butterflies from the same Ranger Watercolor Cardstock. I took my Pearl and Gem Gansi Tambi watercolors and a number 6 brush to paint and flick watercolor onto the butterflies.


The top butterfly was painted by dipping the brush into the paint and then applying it to the dry cardstock. I did use my heat tool to help dry the added paint before moving onto the next color. It produced a very intense hue of these soft watercolors.

The middle butterfly was just me simply flicking the same colors onto the body of the butterfly, trying desperately to spread out the color and get good variation. I love how this turned out. It made for a great background for the word die to live in front of.


As for the bottom butterfly, I used clean clear water to dampen the cardstock before adding the same watercolors. This time, I would allow some of the colors to mix and blend together before using my heat tool to dry the cardstock and re-dampen it before the next group of colors where added. I also added a few flicks of color to this butterfly because I loved that look so much.

I then cut the outline die in the Spellbinders Large Die of the Month kit that just cuts the outline of the same butterfly. I used Lawn Fawn Glue Tube liquid adhesive to adhere the outline to all three butterflies after giving them some time to dry completely.


I used the same liquid adhesive to adhere the butterflies to the front panel of my card.

I then cut the word die from the same set that says "Bonjour" with an adorable heart over the J, out of Spellbinders poster board in gold. I also cut it three additional times from Neenah 110 lb Classic Crest Solar White cardstock to give the word die some dimension. I also cut the little bodies of the butterflies from the same gold poster board. These little bodies have a few details embossed into the die, in true Spellbinders fashion. I used liquid adhesive to adhere the bodies of the butterflies.

I grabbed my Tombow Extreme tab clear adhesive to stick on the word "Bonjour" so that you did not see anything behind it, and to add a little more dimension.

I love how this card turned out and I stopped, and sat, and just colored butterflies for quite some time even after this card was finished. It was relaxing and I had a lot of fun creating. This set is perfect for that, and leaves your mind open to many ideas with all of the intricate dies included in it.

I hope you enjoyed my project today. Thank you for visiting my blog.

Koren