Friday, March 30, 2018

Your Next Stamp Challenge #86

Hello fellow card makers.

Today I am sharing with you my project for the Your Next Stamp challenge #86. Your Next Stamp has a biweekly sketch and/or color combination challenge and it's time for a new one. Here is a look at this week's sketch and color combo.


I wanted to test myself to see if I could create a card around this week's sketch. Although the color combination is very beautiful, I wanted to see if I could do it. So, I grabbed one of the new stamp sets by Your Next Stamp and started planning. I used the Puddles of Fun stamp set and coordinating dies to create my card.

I started with a piece of Neenah 110 lb cardstock. I used Darice's Chicken Wire embossing folder to emboss the paper. This was the start of my hexagon theme for this card. I cut this panel down with the second to largest Stitched Rectangle Die and adhered it to a piece of white craft foam using double sided tape. I also used double sided tape to adhere it to my Simon Says Stamp Fog card base.


To create the bottom portion of my background, and in keeping with the sketch; I grabbed some patterned paper. This honeycomb or chicken wire type patterned paper is from an older My Mind's Eye 6x6 paper pad called Quilting Bee. I cut it down using the same Stitched Rectangle Die I used on the embossed panel. I adhered it to the embossed panel using double sided adhesive.

I moved onto the centerpiece of my card, that being the center most rectangle in the middle of the sketch. I chose to use a piece of Strathmore Bristol Smooth White cardstock. I used the smallest rectangle from the My Favorite Things Blueprints 1 Die-namics die set.  For this part of the card, I ink blended a sky and some hills using Distress Oxide inks and the My Favorite Things Drifts and Hills stencil. I used Iced Spruce and Twisted Citron Distress Oxide Inks. Once I was done ink blending, I spritzed the background with Hero Arts White Iridescent Shimmer Spray. It is hard to tell in the photos, but this gave the panel a shimmer and also lifted some of the ink from the blending in classic Distress ink fashion. I wasn't sure if I was done with this panel but I adhered it to the card front with double sided adhesive. I also added a piece of washi tape to the top left corner as shown in the sketch.


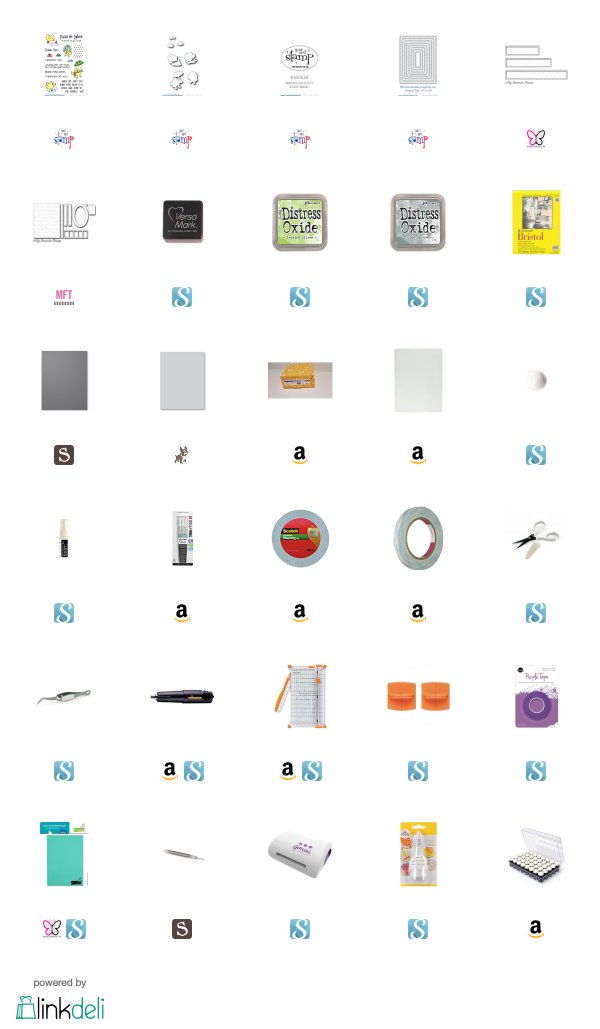
I stamped my image in Your Next Stamp Black Olive Ink and used my Copic Markers to color them.  For a complete list of which colors I used, see the Copic color map I created below. I used the coordinating dies to cut out my image. I then adhered it to my drifts and hills background using Scotch 3M foam tape.

The sentiment which is also from the Your Next Stamp Puddles of Fun stamp set was stamped on Stampin' Up!'s Basic Gray cardstock with Versamark ink. I used Hero Arts Ultra Fine White embossing powder to heat emboss it. I used the Stitched Window Rectangles by My Favorite Things to cut out my sentiment. I adhered it to the card panel also with foam tape.


As I was creating this card I noticed that the chick was holding an umbrella which is typical for Spring, but he was also wearing a scarf. Considering we just had about 8 inches of snow here 3 days into Spring, I got the idea to add a little snow to my card. It's about as unexpected at the snow we just had was. So I used my white Gelly Roll pen to add tiny dots of snow all over my background and my image. I think it helps document the weather we have been having and hopefully says good bye to colder weather for the rest of Spring.

Thank you for visiting my blog today. I hope you enjoyed my project. Please (CLICK HERE!) to visit the Your Next Stamp blog to play along in challenge #86 or to see what other inspiring projects the design team and others are creating with the sketch and color combo.

Koren


Sunday, March 25, 2018

Bubble Background Card Video

Hello fellow card makers.

Today, I am sharing with you a fun way to create a background for your cards. I used bubbles, thats right, bubbles. I mixed clear bubble solution and Avery Elle Liquid watercolors. I mixed them and litterally blew them onto my watercolor cardstock to create the background for these cards.

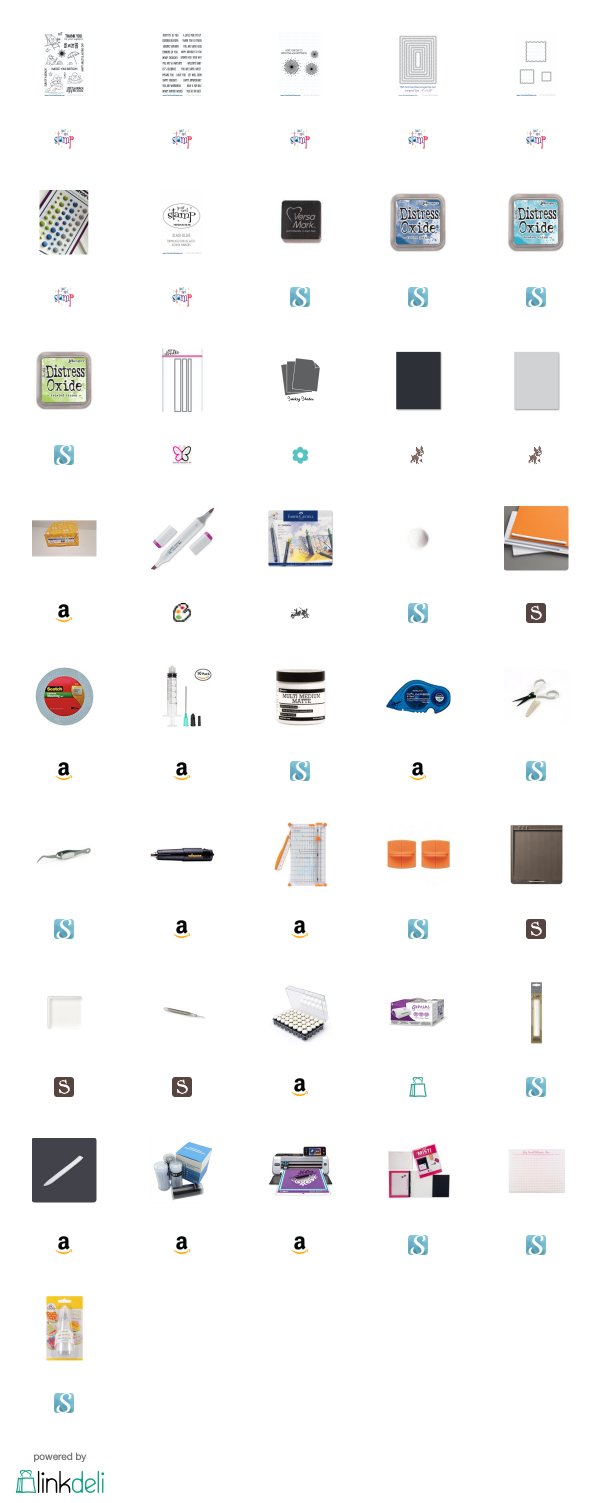
To see this in action. Click on the link to the YouTube video I created while making these cards. It shows you how they were created from start to finish. I complete supply list with some affiliate links are listed below for your convenience.


My backgrounds where made on Canson XL watercolor paper. Watercolor paper is needed because you completely saturate your paper with bubbles and liquid watercolors, so you need to use something that will hold up to that much wet material. I cut both of my panels down using the second to largest Your Next Stamp Stitched Rectangle die. This is my favorite size die to use for my card panels. I love the way it shows off the gray from my Simon Says Stamp Fog card base. I popped up both card panels using white craft foam and double sided adhesive. 

I stamped my images using My Favorite Things Extreme Black ink. This ink is Copic marker friendly and I knew that I wanted to use my Copics to color my images. I listed each marker I used to color the images on Copic color maps that are easy to Pin to Pinterest for future reference. I also used the coordinating dies for this set to cut them out. 


As for the sentiments, they were stamped with versamark ink and I used Hero Arts Ultra Fine white embossing powder to heat emboss them onto Simon Says Stamp Slate cardstock. For the card with the bunny in the green dress, I used the My Favorite Things Stitched Oval Word Window dies to cut out my sentiment. I used Scotch 3M foam tape to pop it up along the bottom of my background panel. I also used foam tape to pop up my bunny image and the bubble images on this card. 


My sentiment on the card with the bunny in the red dress was cut out using Sizzix Circle Framelit dies. I used the coordinating dies for the stamp set to cut out some additional circles. I popped up the sentiment circle using foam tape but the rest of the circles were adhered with Lawn Fawn glue tube adhesive and adhered flat to the background panel.


I added a tiny heart from the Doodle Bug Shaped Sprinkles Tiny Heart collection beneath my sentiment. The bunny image on this card was also popped up with foam tape. I did not like how the sentiment circle covered up so much of the beautiful background I created. I thought briefly about stamping my sentiment onto some colored vellum but I do not currently have any vellum adhesive and I did not want my adhesive to show. I like the way this card turned out, but I will be adding some vellum adhesive to my next crafty haul. 


To finish off the other card I added some Darice Iridescent Clear sequins scattered throughout my background to add a little sparkle. I think this added a great touch and the sequins have a similar bubble look to them. 

I want to thank you for visiting my blog today. I hope you check out my youtube video on this technique and if you share your projects on soical media, I would love to see them. 

Koren 


Thursday, March 22, 2018

Your Next Stamp March Feature Day "Sweet Treats".

Hello fellow card makers.

Today I am sharing my project for Your Next Stamp March Feature Day. This month's theme is "Sweet Treats". (CLICK HERE!) to head over to the Your Next Stamp blog to check out what everyone else on the Design Team has created. While you are there, don't forget to leave a comment by March 25th for your chance to win a stamp set of your choice.


I am using the brand new Humming By stamp set and coordinating dies for my card today. I started with a Simon Says Stamp Fog card base. If you have been with me for any length of time, you will know that this is my regular card base. I took a piece of Strathmore Bristol smooth white cardstock and ink blending a group of clouds in the upper right hand corner using Versamagic ink in the color Aspen Mist. I used the YNS Stitched Rectangles die (second from largest) to cut down the panel. I adhered some white craft foam to the back with double sided adhesive and centered it onto my card base.


I stamped my image in Your Next Stamp Black Olive ink onto Neenah 110 lb. cardstock and colored it with Copic markers. I have a Copic color map showing which markers I used to color the image, you can even Pin to Pinterest if you would like. I used the coordinating dies to cut it out. I wanted to use part of one of the stamps from the Humming By... stamp set. It reads "happiness is" because I masked the sweet as to not stamp that part of the sentiment. The sentiment was stamped with Versamark ink and I used Hero Arts Ultra Fine White embossing powder to heat emboss the sentiment onto Lawn Fawn Black Licorice cardstock. I used Heffy Doodle's Strips of Ease dies to cut it down.


I used the YNS Fancy Sweet word die to finish off my sentiment. I cut it from Neenah 110 lb cardstock a total of four times and adhered the layers together with liquid adhesive. I sponged a little of the VersaMagic ink that I used for the clouds around the bottom of the sentiment. I adhered the black sentiment strip with Scotch 3M foam tape as well as the humming bird. I used liquid adhesive to adhere the "sweet" word die cut.

Thank you for visiting my blog today. Don't forget to (CLICK HERE!) to visit the Your Next Stamp Blog and comment for you chance to win a stamp set of your choice. Comments must be left by March 25, 2018.

Koren

Saturday, March 17, 2018

Plumber Brothers Card Video

Hello fellow cards makers.

Today I am sharing with you two cards I made using Kindred Stamps Plumber Brothers Stamp Set. I was made aware of a few "new to me" stamp companies when I did my Instagram 1000 follower giveaway. During that giveaway I asked my Instagram followers to tell me their favorite stamp company and one of those companies was Kindred Stamps. I fell in love with their pop culture stamp sets right away. I ordered a few things that will be featured in an upcoming haul video.


Today I am playing with Plumber Brothers. This set is so cool. We are huge Nintendo fans in this house, myself being the biggest, so I had to play with this set. For the first card, I was inspired by the Nintendo packaging and wanted to create a tone on tone background using the various stamps in the set. I took a piece of Papertrey Ink Pure Poppy cardstock and stamped the images on the background using Simon Says Stamp Fog cardstock. I created a similar panel using Neenah 110 lb cardstock and Hero Arts Soft Granite ink. I cut both of these panels down using the Your Next Stamp Stitched Rectangles die set (the second from largest). I arranged the white panel so that it was hanging off the card base and then popped the red panel on top of the and popped up using craft foam. I cut off the edges that were hanging off of the card.


I stamped my images with My Favorite things Extreme Black ink. This is a new Copic friendly ink. I colored them with my Copic markers. I used Scotch 3M foam tape to pop them up onto my card. I stamped the sentiment onto Lawn Fawn Black Licorice cardstock with Versamark ink and heat embossed it. I cut it into a strip and popped it up on my card front. To finish it off I added some gold sequins from a Neat and Tangled Mix.


For my second card using this set, I made a shaker. I took a piece of Simon Says Stamp Fog cardstock and embossed the My Favorite Things Small Brick Stencil into my cardstock. I then cut it down using the Your Next Stamp Window Panel Die. I cut out the Window panel die five additional times to create my shaker pocket instead of using foam tape. I adhered all of the layers together using Ranger Multi Medium Matte. I adhered the top brick layer to a piece of acetate. I filled my shaker with Kindred Stamps Fire Shaker Mix and sealed it up using 1/8 inch double sided tape and a piece of Lawn Fawn Black Licorice cardstock. I adhered the entire panel to my card base using double sided adhesive.


I stamped my images again using My Favorite Things Extreme Black ink and colored them with my Copic markers. I adhered most of the images to my card front using liquid adhesive but I did pop up Mario with a little Scotch 3M foam adhesive. The sentiment was stamped with Versamark Ink and heat embossed using Hero Arts Ultra fine white embossing powder. I stamped it on Lawn Fawn Black Licorice cardstock that I had cut down using Pretty Pink Posh Stitched Speech Bubbles. It was also popped up using foam adhesive.


I want to thank you for visiting my blog today, above are photos of my projects, and Copic color maps showing which markers I used. Below are supplies lists for each project including links. Some of the links are affiliate links but some are not.

Koren


Friday, March 16, 2018

Your Next Stamp Challenge #85

Hello fellow card makers.

Today I am sharing my project for Your Next Stamp Challenge #85. Your Next Stamp has a biweekly sketch and/or color combo challenge over on the Your Next Stamp blog. (CLICK HERE!) to visit the blog, to play along, or to check out what everyone else has created using the given sketch and color combination. For this challenge you can use either the sketch, the color combo, or both. Here is a look at this week's sketch and color combo inspiration.


This week, I struggled with this challenge for some reason. I think I was having a bad day and it effected my crafty mojo. This is the downside to creating on a deadline. Sometimes, you just don't feel creative. When I feel this way, I go back to the basics. This project is simple, but I don't hate it. I used the sketch to create my very basic, but cute card.

I started with a piece of Neenah Solar White 110 lb cardstock. I cut it down to replicate the sketch with the largest of the Your Next Stamp Scallop Rectangles die set. Then I cut a hole in the bottom right instead of popping up that piece of the sketch. Sometimes if you think dimensionally, it can add a whole new look to the sketch you are working with.

At this point I was trying to come up with a good combination sentiment to use. I knew I wanted to incorporate a die cut word and a sub sentiment in the cut-out. I ended up choosing "Congrats, it's your special day". I just love, love, love the What Not Sentiments Four stamp set. Its the perfect amount of scripty and plain text with wonderful sentiments.

I stamped the sub-sentiment of "it's your special day" with Versamark ink. I used my MISTI stamping tool to line up the stamp to be seen through the front panel to the card base. I used Hero Arts Sliver embossing powder to heat emboss the sentiment. I popped the front panel up onto the card base with Scotch 3M foam tape.

I cut out 4 of the "congrats" words with the Your Next Stamp Scripty words die set from Neenah 110 lb cardstock. I adhered the layers together with Ranger Multi Medium Matte liquid adhesive. Once the layers were dry I painted the top layer with Ranger Multi Medium Matte adhesive with a flat brush and dunked my die cut into Lawn Fawn Prisma Glitter. I gave the die cut a bath in it. I brushed off a little of the excess and set it down to dry. Once it was dry, I added a little more liquid adhesive to the back of the die cut and stuck it on my card and let it cure.

To add even more sparkle, I collected Spooky Cute Sparkly Gumdrops from my stash and added a few of the teal shade to my project.

Thank you for visiting my blog today. Be sure to (CLICK HERE!) to visit the Your Next Stamp blog and play Challenge #85 with us.

Koren


Wednesday, March 14, 2018

Your Next Stamp Whats Up Card Video

Hello fellow card makers.

Today I am sharing my project for the Your Next Stamp March Release Design Team Dare. We were challenged to create a project around the theme "whats up" and I used the brand new Your Next Stamp What Not Sentiments 12 set to create my project. This set is filled with awesome sentiments. Make sure you (CLICK HERE!) to visit the Your Next Stamp blog. Every commenter has a chance to win a stamp set of their choice from the Your Next Stamp online store.


The idea behind my card was to use the balloon image to create that one balloon that always seems to get away and float all the way up into the atmosphere. That one balloon that is so popular that everyone stops and stares into the sky to watch it fly far far away, lol. I'm not sure if I captured the idea or not, but you can be the judge.

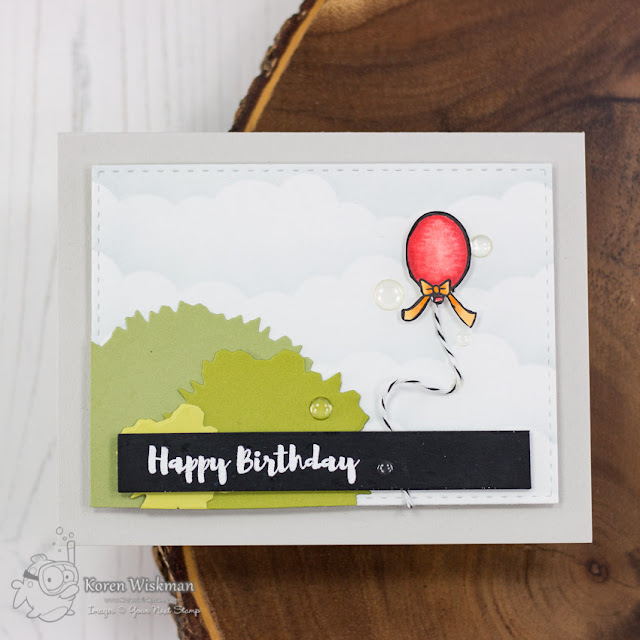
I started with a piece of Neenah 110 lb cardstock and ink blended some clouds to create the sky using MFT's Mini Cloud Border stencil and Versamagic Aspen Mist ink. I cut this panel down using the Your Next Stamp Stitched Rectangle die (second from largest). I then took the brand new Ripped Rectangles dies and cut all three from three different shades of green cardstock. I used Stampin' Up! Pear Pizazz, Papertrey Ink's Simply Chartreuse and Limeaide Ice. I wanted them to look like the tops of trees. I adhered the tree tops to my card panel with double sided tape and trimmed of the excess hanging off with my large Tim Holtz scissors.

I stamp masked one of the sentiments from the What Not Sentiments 12 stamp set to only ink up the "happy birthday" using Versamark ink. I then heat embossed it using Hero Arts Ultra Fine white embossing powder. This was done on Lawn Fawn Black Licorice cardstock. I cut down the sentiment into a strip using the Heffy Doodle strips of ease die set. I popped up the strip using foam tape towards the bottom of my card front.


I then stamped my image of the ballon from the What Not Sentiments 12 stamp set. I hate fussy cutting, but I did the best I could. I colored it with my Copic Markers and added a string of Papertrey ink True Black twine as the string that I was not about to fussy cut out. I popped it up on my sky panel using Scotch 3M foam tape.

To finish off the card I added a few Clear Gumdrops also by Your Next Stamp to add a little more interest to the card. Like always, I added it to a Simon Says Stamp Fog card base. I feel like it is a little blank but I'm not sure what else to add. Maybe you could leave me some ideas in the comments below.


As a bonus I have a second project using some additional Your Next Stamp supplies to see it, click the link to my YouTube video to watch. In it I use thin foam used to create flowers and my heat tool to make the daisys you see pictured on my card above.  I use a technique I learned from Yana Smakula and a video she did with Spellbinders on their YouTube channel. To see that video  (CLICK HERE!) 

Thank you for visiting my blog today and make sure you stop over to the Your Next Stamp blog and leave a comment for your chance to win a stamp set of your choice from the Your Next Stamp store. (CLICK HERE!) 

Koren

Saturday, March 10, 2018

Your Next Stamp March Blog Hop Video

Hello fellow card makers.

Today is the March New Release Blog Hop for Your Next Stamp! I love love love this release. For real guys, this is my favorite release ever. My favorite stamp set of the release is the Silly Monsters Say Cheese stamp set. I always love the monster sets that come out. I also really like the Retro TV die, and the Raindrops die, oh my! lol. If you would like to check out the Your Next Stamp March New Release (CLICK HERE!) It will take you to the New Products page over on the Your Next Stamp Store. There you can see all the goodies.


The blog hop starts on March 10th at 10 EST and will run until March 13th at midnight. Comment on each blog along the hop to enter to win a $25 gift certificate to the Your Next Stamp Online Store. The more you comment the more your chances of winning increase, so comment! I know I love to read your comments.

To make things even better, Your Next Stamp has a coupon code that you can use during the hop to receive 20% off of your order. I think that is a very generous coupon code so take advantage during the hop.


I have two projects to show you today. The first is using my favorite set of the release, Silly Monsters Say Cheese. I took a piece of Stampin' Up!s Night of Navy cardstock and the My Favorite Things Radiating Rays stencil and ink blending some Hero Arts Unicorn White pigment ink to create a spotlight effect on my card panel. I used the Your Next Stamp Stitched Rectangle die (second from largest) to cut down this panel and adhered it to a Simon Says Stamp Fog top folding A2 sized card base. I used double sided adhesive to make sure it stayed up.


I then cut some stars from the Spellbinders Count The Stars set using both Tonic Mirror Card in Polished Gold and Chrome Silver. I cut out three clusters of two stars. I used double sided adhesive to also adhere them to my card.

I wanted to create a shaker card for this project using the brand new Retro TV die. I cut the die out of several times from Neenah Solar White 110 lb cardstock. I also cut it from Simon Says Stamp Fog cardstock. I also cut a piece of acetate to fit behind the tv die to hold the shaker bits. For better explanation of this view the YouTube video linked below that I created while making this card. I adhered the layers of the shaker portion of my card together using Ranger Multi Medium Matte liquid adhesive.


I added Pop! Microbeads to the inside of my shaker tv in both black and white to mimic the effect of static on the tv. As for the back of the shaker. I cut the back out of some wavy lines in the Your Next Stamp Geometric paper pad. I stamped Your A Super... in Versafine Onyx Black ink in the center. I also stamped a star from the same set using Versamark Ink and Gold Heat Embossed it with Hero Arts Gold embossing powder. I adhered it to a slightly larger piece of typing paper and adhered it to the back of the shaker tv using liquid adhesive. Remembering to seal all the Microbeads in and also not allowing any of the typing paper to show. Once my piece was complete, I adhered it to my card base using double sided adhesive.


I stamped my image in Your Next Stamp Black Olive ink and used my Copic Markers and Goldfaber colored pencils to color it in. A list of the markers I used to color the image are listed below on a Copic color map. Once he was colored I used the coordinating dies to cut him out. I used Scotch 3M adhesive to pop him up onto my project.

I also used the #smile stamp from the Silly Monsters Say Cheese stamp set and stamped it on Lawn Fawn Black Licorice cardstock with Versamark ink and used Hero Arts Ultra Fine White embossing powder to emboss it. I cut it down using the smallest stitched rectangle die. I also popped it up on my card using Scotch 3M foam tape.


For my second project today I am using the All Aboard Bouncing Baby stamp set. I started with a piece of Simon Says Stamp Fog cardstock. I stamped almost all of the images from the set to create my background. I stamped the images with Versamark ink and used Hero Arts Ultra Fine White embossing powder to emboss them. I cut it down with the second to largest Stitched Rectangle die and adhered it to white craft foam with double sided adhesive. I also used double sided adhesive to stick it to my card base, which happens to be Stampin' Up! Speckled cardstock, that they don't sell anymore. I'm sorry. I used a white colored pencil to fill in some of the shapes in the background.


I stamped my image in Your Next Stamp Black Olive ink and colored with a combination of both Copic markers and Goldfaber colored pencils like I did on the first project. I then used the coordinating dies to cut it out. This set is filled with adorable baby images, but I had to use the one with the balloon.

I stamped my "welcome baby" sentiment on Lawn Fawn Black Licorice cardstock with Versamark ink and used Hero Arts Ultra Fine White embossing powder to heat emboss it. I cut it down using Heffy Doodles Strips of ease dies and cut a flag end with my scissors. I did the same cuts for the patterned paper underneath. I used a combination of double sided tape and Scotch 3M foam tape to adhere it to my project. I finished it off with some green enamel dots from the Carrot Cake Gumdrops also from this release and a heart from Doddlebug's Tiny Heart Sprinkles.


I want to thank you for visiting my blog today. Please remember to visit the Your Next Stamp store to check out the new release (CLICK HERE!). Also, make sure you comment on the design team blogs along the hop to enter to win $25 Gift Card. The more you comment, the higher your chances are of winning.

Koren


Your Next Stamp March 2018 Preview Day

Hello fellow card makers.

Today is Preview Day over at Your Next Stamp. I have seen the March release and it is fabulous. I have to say that it is my favorite so far of all the releases I have been blessed to be a part of. I couldn't even pick a favorite from it, but if I had to... I'd have to say tomorrows blog hop card is my favorite. Just wait until tonight 10 pm Est.

As for my preview project, I am using the brand new Puddle of Fun stamp set and some super fun new dies. To see the rest of the previews (CLICK HERE!) to visit the Your Next Stamp blog and check out what the rest of the design team came up with.


I started wit a piece of Neenah 110 lb Solar White cardstock. I used the My Favorite Things Mini Cloud stencil to ink blend some clouds with Versamagic Aspen Mist ink. This is my favorite ink to use for clouds. It is a soft blue gray. Now for the fun part- I used the brand new Your Next Stamp Raindrops die and blank stencil sheets from The Crafters Workshop to create my own stencil. I used my homemade stencil to ink some rain drops also using Versamagic Aspen Mist ink. After I inked them, I used Nuvo Glimmer paste in Moonstone to add texture and dimension. Not to mention, a ton of sparkle. I cut this panel down using the second to largest Your Next Stamp Stitched Rectangle die and adhered flat to a Simon Says Stamp Fog card base with tape runner adhesive.


I cut some border clouds that I wanted to be popped up at the top and the bottom of my front panel. I used the Your Next Stamp Puffy Clouds Border die to do this. I also used the same stitched rectangle die to cut down my clouds and to continue the stitching detail throughout the panel. On the bottom border I stamped my sentiment from the new Puddles of Fun stamp set in a rainbow of Distress Oxide inks. I used Candied Apple, Wild Honey, Squeezed Lemonaide, and Faded Jeans. The lower part of the sentiment was stamped with Versafine Onyx Black ink. Both the top and bottom cloud borders where adhered to my card using Scotch 3M foam tape.


I stamped the adorable chick image wearing boots and looking down into a puddle with Your Next Stamp Black Olive Ink and colored it using my Copic Markers. I also used my Faber Castell Goldfaber colored pencils to add some shading. I used the coordinating dies to cut him out. This die is awesome because it cuts out the space between the chick and the puddle. I popped my image up with Scotch 3M foam tape.

The sun that you see in the upper right corner of my card is the brand new Starburst die set by Your Next Stamp. I cut it from Papertrey Ink Summer Sunrise cardstock. and popped it up using foam tape. I think it adds to the sentiment I chose. The combination of rain and sun and the rainbow, I just love how it turned out.


Thank you for visiting my blog today. Don't forget to check out the rest of the design teams projects over at the Your Next Stamp blog to get more previews of tonights release. (CLICK HERE!) Join us tonight March 10, 2018 at 10pm EST for the March New Release Blog Hop

Koren


Saturday, March 3, 2018

The Heffy Doodle Hey Cheese Card Video

Hello fellow card makers.

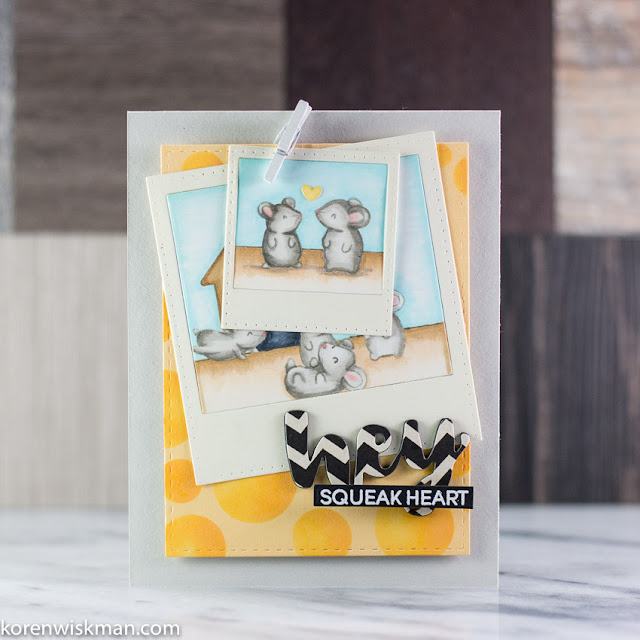
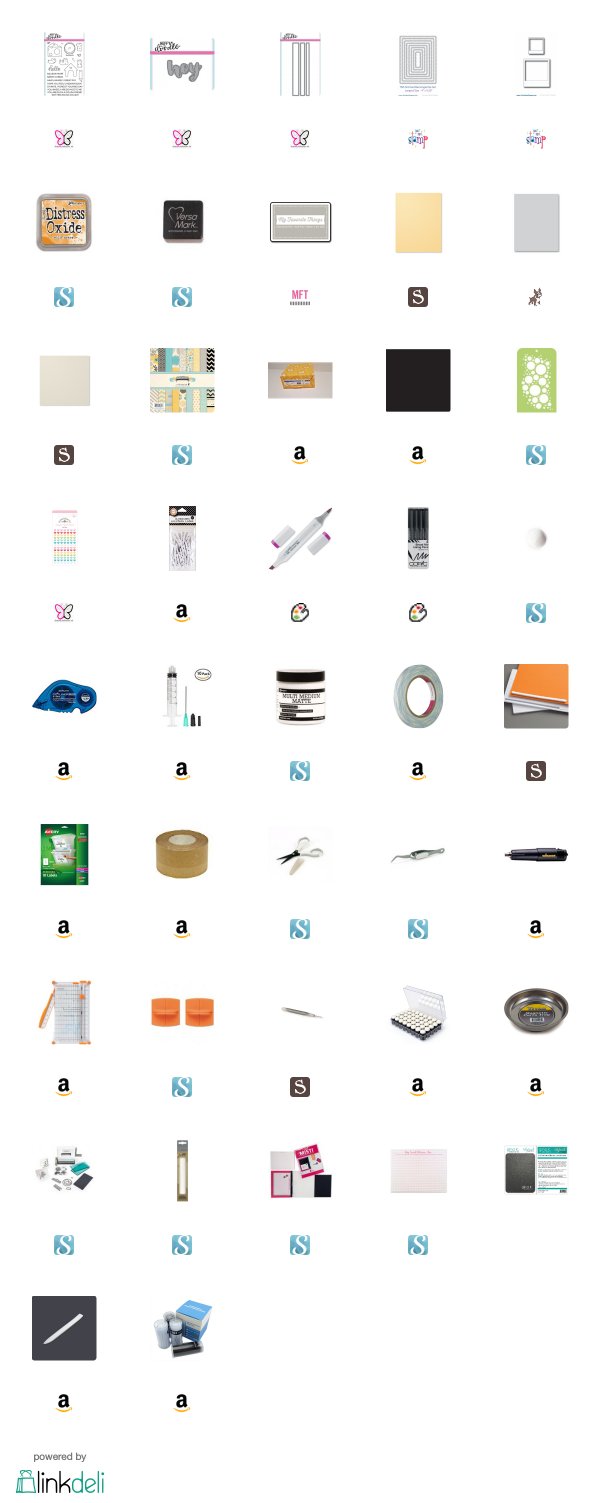
Today I am sharing a card that I made using Heffy Doodle stamps and dies. I couldn't resist the new Hello Squeakheart stamps and thats what I'm using on my project today. I also picked up a few more things from Heffy Doodle to use on today's project.


I started with a piece of Stampin' Up's! So Saffron cardstock cut down using a Stitched Rectangle die from Your Next Stamp. I brought out my Kaiser Craft Bubbly stencil and some Wild Honey Distress Oxide ink to make some cheesy background patterned paper. I ink blended a few circles scattered around the soft yellow cardstock to mimic the look of cheese.

I cut both dies from the Your Next Stamp Insta Love die set in Stampin' Up's! Very Vanilla cardstock. I cut the same dies also from Neenah 110lb. cardstock, which is what I like to use with Copic markers. The interior portions of these dies will be what I use to stamp my images on. I want it to look like a stack of old polaroid photos clothespinned to the front of my card.


I stamped my images using My Favorite Things Hybrid ink in the color Cement Gray. I wanted to try some no line copic coloring today. This ink is fairly faint and does a great job at disappearing while still allowing you to see what you are doing. I used both my Copic markers and my Faber Castell Goldfaber colored pencils to color and shade my images.

Once my images where colored, I attached them to their coordinating polaroid with tape runner adhesive and a piece of typing paper. This technique allows me to make the polaroids all one piece, which makes it easier to adhere to my card base. I popped up the first layer, the cheese panel, with black craft foam and 1/2 inch double sided tape. I adhered the rest of my panels flat with the double sided tape. The clothespin at the top is simply for show, everything is securely fastened. As a finishing touch, I added a little yellow heart from Doodlebugs Shaped Sprinkles set of Tiny Hearts. I love adding these hearts to my projects.


I cut out the Hey, Heffy Cut die from a piece of patterned paper from Fancy Pants, Park Bench paper pad. It is a black and off-white chevron pattern. I then cut out the same die a few more times from Simon Says Stamp Black cardstock. I adhered them all together with Ranger Multi Medium Matte liquid adhesive. Once it was dry I used the same liquid adhesive to adhere it to my card front. The sub-sentiment was stamped in Versamark ink and white heat embossed with Hero Arts Ultra Fine White Embossing powder. I used the super fabulous new Strips of Ease die set from Heffy Doodle to cut out my sentiment. These dies really make it easy to line up and cut a straight sentiment. I used foam tape to pop up the sub-sentiment strip in place.

Thank you for visiting my blog today,

Koren


Friday, March 2, 2018

Your Next Stamp Challenge #84

Hello fellow card makers.

Today I am sharing with you, my project for Your Next Stamp's Challenge #84. Your Next Stamp holds a biweekly sketch/color combination challenge on their blog. (CLICK HERE!) to check it out, play along, or just to see what everyone else is creating. Here is a look at this week's sketch/color combination.


I was more inspired by the sketch this week than the color combo. I started by creating a card front that mimics the sketch. I took a piece of Papertrey Ink's Smoky Shadow cardstock and cut it down using the Your Next Stamp Stitched Rectangle dies (second from largest). Then, I took the largest Reverse Scallop die from the Your Next Stamp set and cut two "windows", both out of the front of the panel to look like the sketch. I then took a piece of Simon Says Stamp Fog cardstock and cut it down the same way. I used a pencil to mark the center of the boxes on the fog piece. This will help me stamp where the holes in the front panel will show through. I stamped the middle starburst from the Your Next Stamp Starburst Backgrounds with multiple Distress Oxide Inks. I used Twisted Citron, Broken China, and Faded Jeans.


After stamping the starburst, I needed something to fill the space on the lower third of the card front. I have been playing around with creating fonts on my Brother Scan N Cut, so I imported some text using the Brother Scan N Cut Text Converter and welded some text together in Canvas Workspace to create my own word. I made the word "Stinker", which is what we call Dexter. I cut the word from Simon Says Stamp Fog card stock three times and layered them together using Ranger Multi Medium Matte liquid adhesive. I used sponge daubers and the Distress Oxide inks listed above to create and ombre of ink on the word "Stinker". I adhered it to my card front also using liquid adhesive.


The sub-sentiment is from the Cool Tag Banner Sentiments stamp set. I stamped it in Versamark ink and white heat embossed it with Hero Arts Ultra Fine white embossing powder onto Simon Says Stamp black cardstock. I cut it out using Heffy Doodle Strips of Ease dies and popped it up with a thin strip of foam adhesive.


I stamped my images from one of my first Your Next Stamp stamp sets called Waddles Beach Fun in Black Olive ink. Your Next Stamp Black Olive ink is a Copic friendly ink. I colored my images using Copic markers and Faber Castell Goldfaber colored pencils. I have been having fun using the combination of the two coloring mediums. The colored pencils are used at a minimum to add depth and shading to a few areas. For the most part, the images are colored with Copic markers. These images were added in the open areas in front of the starbursts with liquid adhesive.


The front panel was covered with Scotch 3M foam adhesive and popped up onto the card base. The card base is made from Simon Says Stamp Fog cardstock. I added some Your Next Stamp Love Earth Gumdrops to fill some of the space on the card.

Thank you for visiting my blog today. Please considering playing along with us over at the Your Next Stamp Blog (CLICK HERE!)

Koren