Showing posts with label Heffy doodle. Show all posts

Friday, July 3, 2020

The One with the Heffy Doodle Release July 2020


Hello everyone, today marks the end of pre-order and the first day of the now available Heffy Doodle July 2020 release. This NEW release comes packed with fun stamp sets, innovative stand alone dies, and amazing NEW stencils. To check out the entire NEW release (CLICK HERE!) and visit the Heffy Doodle online shop or blog for even more inspiration. 

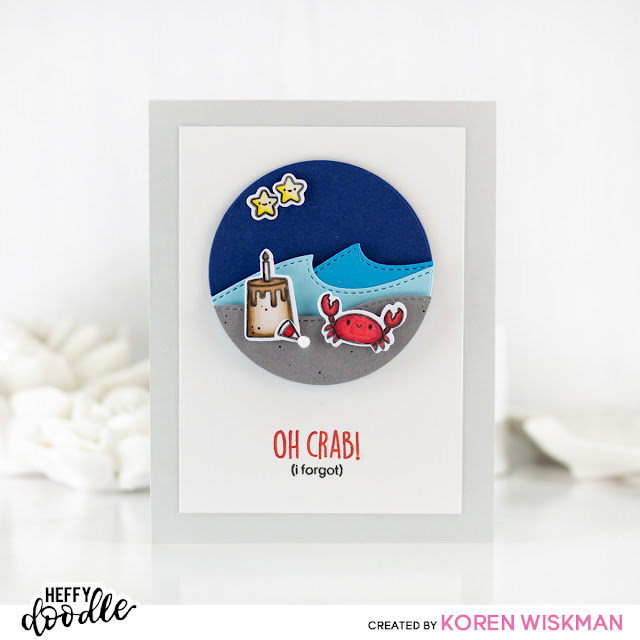
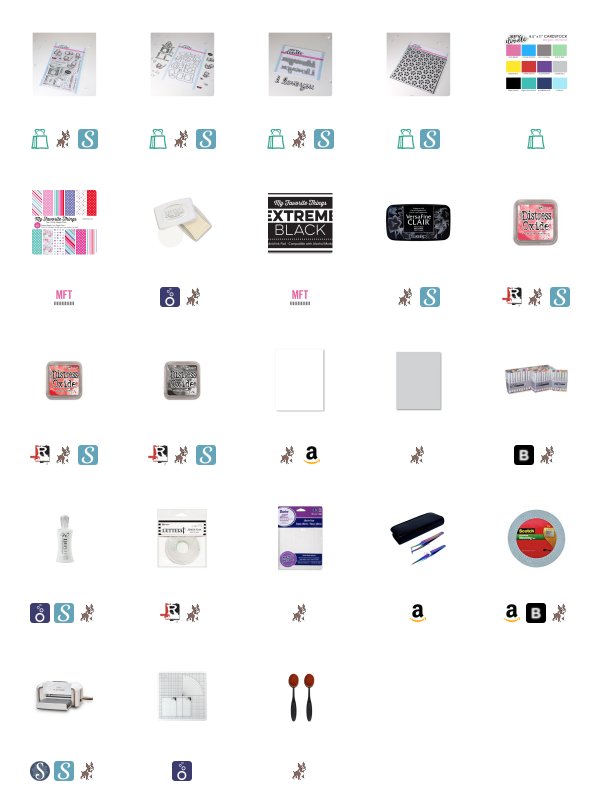
Today I have a card using the NEW A Little Shellfish stamp sent and coordinating dies as well as the NEW Breaking Waves border dies. I love love love this release and I encourage you to check out the rest of it linked within this post. 

Background:
For the background of my card, I grabbed a piece of Blueberry Bliss cardstock found in the Heffy Doodle cardstock assortment pack and one of the Skinny Circle Frames dies. Together I chose a circle die that fit well on a card panel cut to 4 3/4 by 3 1/2. I cut a piece of Neenah to those exact measurements and held up the circle frames until I saw one I liked. This was going to be the background of my scene. 


I then grabbed the NEW Breaking Waves Border dies and two more colors of cardstock from the assortment pack. I picked Blueberry Bliss and Ice Blast for my waves. I cut pieces of cardstock cut to 4 1/4 by 5 1/2 first with the wave border die and then with the same circle frame die as before to keep it within my circle scene. I also used a piece of Holy Mackerel cardstock as my night sandy beach.  I used the more subtle wave from the set to create an evening coastline. 

Images:
I stamped my images for this project using alcohol marker friendly black ink onto Heffy Doodle's Alcohol Marker Friendly cardstock. This stuff is amazing for blending your alcohol markers. I haven't reached for anything else since I first tried it. It's a must have in my book. I do however heat set my inks when I stamp on it to give it extra time to dry. Although the sheen on this paper is not glossy, it's not exactly matte either. It lies somewhere between the two in the semi-matte territory. I love it. I used the coordinating dies to cut out my images, which are also available in this new release.  


Sentiment:
Before adhering everything together, I put my white card panel into my MISTI and stamped the "Oh Crab!" part of my sentiment in Candied Apple Distress Oxide ink. I did this by masking the lower part of the sentiment using Heffy Doodle Memo Tape. I then spun the tape around to mask the red part of the sentiment and stamped the "(i forgot)" sub-sentiment in the same black ink as before. 

I finished off the card by layering everything together into my circle aperture. I added the panel to an Oyster Shell cardstock base cut to size A2 and scored in a top folding portrait orientation. I also added a little tiny pom pom onto the party hat that was left over from the party. To add a little tiny bit of texture to the beach I added a few little black dots of sand to mimic the look of the sand castle cake image.

I adhered the stars in the sky to wish us goodnight on this project, and I hope that I've inspired you to create something today. 

If you have time and interest, don't forget to check out the rest of this fabulous NEW release from Heffy Doodle. (CLICK HERE!) to visit their online store or blog for more inspiration using the new release. 

Thank you for visiting my blog today, 
Koren 

Friday, April 17, 2020

The One with the #spreadjoynotgerms Blog Hop

Distress ink castle princess Heffy doodle ranger Simon says stamp cinderella have a magical birthday card greeting circle stamping card making die cutting sparkle Koren Wiskman


Hello everyone and welcome to the #spreadjoynotgerms Blog Hop! A number of fabulous companies have banded together to inspire us to spread joy with our crafting. I want to thank the wonderful ladies Catherine Pooler Designs and Alexandra Stapleton-Smith for organizing this hop for us. This hop is HUGE so if you get lost along the way visit The Hedgehog Hollow for a complete list of participants and more information. 

There are tons of prizes to be won, thanks to all of our wonderful sponsors. To win, just comment along the blog hop to enter. You do not have to comment on every blog to win but the more you comment, the greater your chances are of winning. So- comment!!!! The deadline to enter for prizes is April 24. Winners will be announced on Monday, April 27 on Catherine and Alexandra’s blogs.

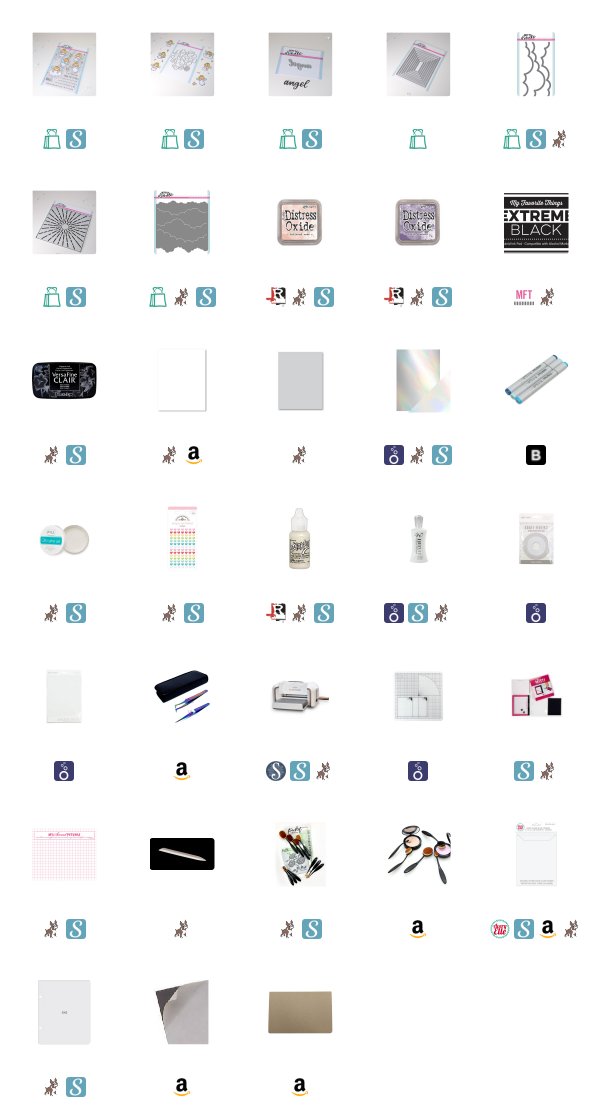
Today I’m using Heffy Doodle’s Happily Ever Crafter Stamp and a few other goodies to create a magical Birthday card. If you want to know more, just keep reading. 

Background: 
The background was created using a piece of Neenah 110 lb. Solar White Classic Crest cardstock cut to 3 1/2 by 4 3/4. 

I wasn’t exactly sure how I wanted to pull off the card idea that I had when I started, so I began playing with the products and settled on the Heffy Doodle Circle Masquerade Stencil to create a sky in my background in the shape of a circle. I later decided to add another layer to the card which really made this step unnecessary, but I did it, so I’m explaining it. You can see at the top of the circle aperture in the finished photos of the card that you can see that the background stops. This could have been avoided if I had not used the stencil. 

Distress ink castle princess Heffy doodle ranger Simon says stamp cinderella have a magical birthday card greeting circle stamping card making die cutting sparkle Koren Wiskman

With the stencil in place, I used several Distress Oxide inks to ink blend some color on the paper. I used an ink blending tool from Simon Says Stamp to apply my color. I used one tool for all of the colors blended on, which were Weathered Wood, Stormy Sky, Salty Ocean, and Blueprint Sketch. I started with the lightest colors in the palette, blending them on first before adding a little something extra in background. I cut a mask of a castle using the die from the Happily Ever Crafter coordinating die set, and cut it from Avery Reposistionable label sheet. I added the mask to position the castle to appear to be off in the distance behind my focal images. Masking the castle after adding some of the highest colors allows it to appear to be a haze off in the distance. If you add the mask right away, your castle will be stark white and the effect will be lost. You could also do this by adding the mask first but after taking it off reapplying some of the lightest colors of ink to color the castle. 

Once the castle mask was added I then moved onto some of the darker colors in the blue palette that I chose, building up the color until I felt that it was the color and look I was happy with. I then removed the castle mask and placed the entire piece into my splat box. 

I wanted the background to look magical and to me the equals shimmer. I applied several layers of shimmer spritz from three different products all linked below. You do not need to use this much, I have an addiction to shimmer spray. But it looks fabulous. 

Distress ink castle princess Heffy doodle ranger Simon says stamp cinderella have a magical birthday card greeting circle stamping card making die cutting sparkle Koren Wiskman

While the ink blended piece was drying I cut another piece of Neenah to the same dimensions. This time I took the Heffy Doodle Imperial Stitched Circle dies and picked one that aligned with the size of aperture I wanted the card to have. I cut the circle from the same spot that I lined up my stencil to allow it to line up better in the end. This piece will be popped up onto the ink blended panel using foam tape. 

I then cut several of the greenery pieces from the Heffy Doodle Blooming Marvelous stamp set. I stamped them with Distress Oxide ink in Peeled Paint onto Papertrey Ink’s Simply Chartruse Cardstock and used their coordinating dies to cut them out. I used liquid adhesive to adhere some of the vines flat to the background while using glue dots on other to stick them to the popped up panel. This gives them a little more dimension. 

Images:
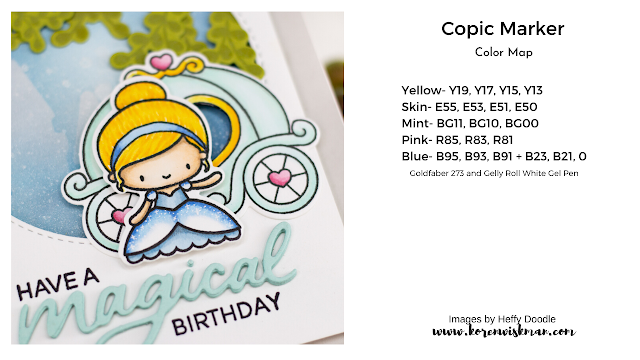
The images from the Heffy Doodle Happily Ever Crafter stamp set were stamped using Simon Says Stamp Intense Black ink and colored with my Copic Alcohol Markers. I have a Copic Color Map to list all the markers I used. I also used my Goldfaber 273 Colored Pencil to add a little shading. The sparkles on the dress were added using Gelly Roll White Gel Pen in size 05.  I used the coordinating dies to cut them out and to take it a step further, I used an exacto knife to cut out the heart shaped doors in the pumpkin carriage.  If you notice that my princess is sporting a headband that is not part of the original design, that is because I drew it in. First I made some marks with my pencil before added permanent lines with a Copic Multiliner 0.3. The images were popped up using foam tape. 

Distress ink castle princess Heffy doodle ranger Simon says stamp cinderella have a magical birthday card greeting circle stamping card making die cutting sparkle Koren Wiskman


Sentiment:
The sub sentiments “have a” and “birthday” were stamped using Versafine Clair Nocturne ink. I used the Heffy Doodle “magical” Heffy cuts word die to finish it off. I cut it four times and layered them together using liquid adhesive. I didn’t notice that it was a bit off until I saw a giant version of the card photo being edited on my computer screen. Oh well. It still looks great to me. 

I added the completed panel to a Simon Says Stamp Fog card base cut to size A2 and scored in a top folding portrait orientation. 

I hope that I’ve inspired you to share a little joy today. Don’t forget to comment for your chance to win one of the several giveaways donated by our generous sponsors. 

Next in the hop is …. Ingrid Blackburn (CLICK HERE!)

Thank you so much for visiting my blog today, 

Koren 


Thursday, March 12, 2020

The One with the Heffy Doodle Inspiration Hop


Hello everyone. Today is the Heffy Doodle Inspiration Hop. My card today uses the Purrfect Day stamp set and the I love you shadow die set. I guess I was channeling Hello Kitty with this one. I honestly didn't intend to but it is certainly Hello Kitty Flavor!

There is a GIVEAWAY associated with this hop. Heffy Doodle is giving away a Fifty Pound voucher! Comment on each blog along the hop to be entered in the giveaway. The winner will be selected randomly on March 19th and announced over on the Heffy Doodle Blog.


If you scroll down towards the bottom of this post you will find the official blog hop list.

I started this project with a piece of Razzelberry cardstock from Heffy Doodle cut to 3 1/2 by 4 3/4. I used the Heffy Doodle Kalidescope stencil to dry emboss the design from the stencil into the Razzelberry paper. I use my Spellbinders Platinum die-cutting machine to easily do this using the embossing folder sandwich.

To enhance the dry embossed design further I used some Distress Oxide inks. I used some ink blending brushes to darken the pattern left from dry embossing the stencil.


I then took the pink ink blended panel and cut three small alternating rectangles. Behind them, I used three patterned papers that matched well with the theme of the card. I used foam tape to pop up the panel leaving some space between the two layers.

I stamped each of my images with alcohol marker friendly black ink and colored them with my Copic markers. I have made a Copic Color Map showing the colors of each marker used to color my images.

The images were then cut out using the coordinating die set and popped up into place on the card panel using foam tape.


For the sentiment I used the I love you shadow die set from Heffy Doodle. I cut the shadow from some Simply Teal-lious cardstock and layered the word dies over it cut from Neenah 110 lb. Solar White Classic Crest cardstock. I cut it four times and layered them together using liquid adhesive. I adhered the shadow and word die to the panel using clear foam adhesive by Ranger so that it's harder to see.

The finished card panel was then added to a Simon Says Stamp Fog cardstock card base cut to size A2 and scored in a top folding portrait orientation. I used tear tape adhesive to do this.

Don't forget to comment here and on all of the blogs in the hop in order to enter the fabulous GIVEAWAY. Here is the blog hop line up...

Koren Wiskman (you are here)

I hope that I've inspired you to create something today. Thank you for visiting my blog.

Koren


Saturday, January 4, 2020

The One With The Angel Card Video


Hello everyone.

Today I have a NEW video for you using NEW Heffy Doodle supplies. In this video I create an angelic card using the My Little Angel stamp set and coordinating dies.

If you haven't heard, the Heffy Doodle NEW release is now LIVE and in the shop over on the Heffy Doodle website. (CLICK HERE!) to shop and check out more inspirations on the Heffy Doodle Blog.


I also have a Copic Color Map for you to pin. I like to save these on a special board over on Pinterest. I collect them and refer back to them often for color combinations.

I hope that i've inspired you to create something today using the NEW Heffy Doodle release.

Koren


Wednesday, November 27, 2019

Heffy Doodle 25 Days of Christmas Tags


Hello everyone.

Today I have a fun Christmas tag for you using Heffy Doodle products. We at Heffy Doodle are participating in the 25 Days of Christmas Tags today. (CLICK HERE!) for more information and inspiration for holiday themed tags. Each day there is a different company sponsor and a ton of inspiration comes too.


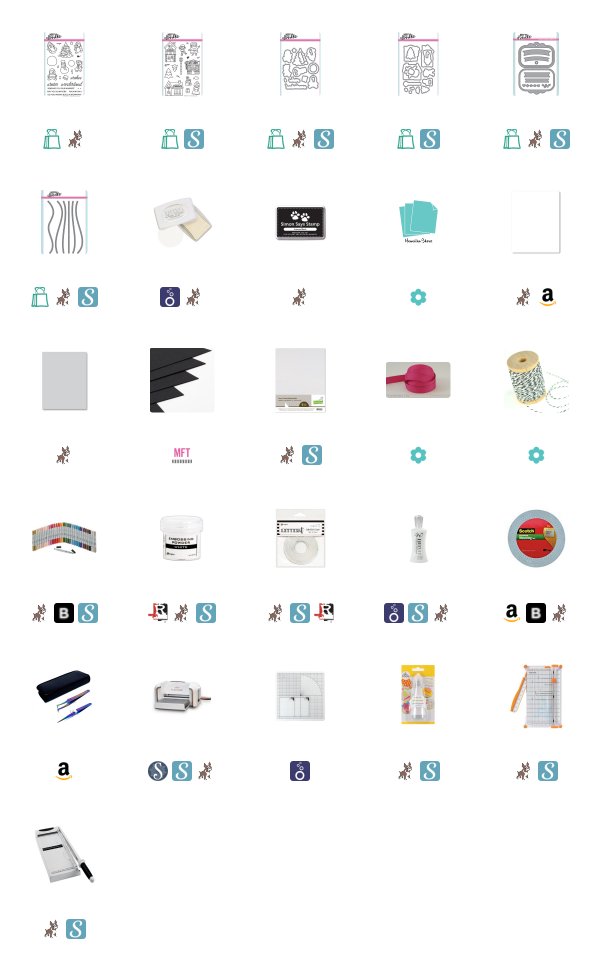
I started with the Heffy Doodle Tag A Long die set and some Neenah 110 lb. Solar White cardstock. I cut the fun tag out from the heavy weight white cardstock with my Spellbinders Platinum Die Cutting Machine.  I also cut the background from Papertrey Inks Hawaiian Shores cardstock.

I then took the same background die from the Tag A Long die set and the Heffy Doodle Slopey Joes die set and cut two strips of Lawn Fawn Pixie Dust Glitter cardstock. I made sure that I was leaving enough room to stamp a sentiment above my landscape as well as ensure enough room for all of my trees and presents I was about to cut out.

I stamped my images from Heffy Doodle's Santa's Village stamp set as well as the Wanna Build A Snowman stamp set with Simon Says Stamp Intense Black ink onto the same Neenah 110 lb. cardstock. I colored my images today with my Copic Markers. I have them listed in a pin-able Copic Color Map. I like to save them to my Copic Pinterest Board and it helps me keep track of color combinations. I used the coordinating dies of both sets to cut them out.


For the sentiment, I stamped the "winter wishes" from the Wanna build A Snowman set onto the teal background using Nuvo Clear Mark embossing ink. I also stamped the "sending you our warmest" from the same set onto My Favorite Things Black Licorice cardstock also with clear ink. I heat embossed both sentiments using Ranger White embossing powder and my Wagner Heat Tool. I cut down the sentiment strip using my Fiskars wire guide paper trimmer.

Once all of the main elements of the tag were created, I could then start to put it together. The tag itself is very easy to put together. This tag can also easily be made as a shaker tag. This time I just adhered most of the Tag A Long dies together using Nuvo Deluxe Liquid Adhesive. I put some Scotch 3m Foam tape to pop up one of the layers of glitter paper for the ground and I started to either adhere flat or pop up with foam tape all of the images you see on the tag.


To finish off my tag I needed to add some ribbon and twine. I decided to match the vibrant pink I used on the images. I have had most of my ribbon for a long time. You can no longer purchase the exact ribbon I used but I linked a fine alternative below for you to check out. I also added some black and white twine to coordinate with the black and white sentiment.

I hope I've inspired you to create something handmade today. Make sure you (CLICK HERE!) to visit the latest 25 Days of Christmas Tags blog post that Tracey organizes.

Thank you so much for visiting my blog today.

Koren

Saturday, August 24, 2019

Pear Blossom Press Power Pack Hop


Hello everyone.

Today is a special day because we are hopping along with another Pear Blossom Press Power Pack Hop. We are inspiring you to light up someone’s life with a handmade card today using one of Pear Blossom Press’s  awesome power packs. This pack comes with everything you need to create a light up card.

Each Pear Blossom Press Power Pack comes with a battery and switch, a roll of copper tape, and lights. Depending on which pack you purchase the quantity of these items change. It also comes with instructions on how to use these products. Everything you need to make your card light up is included. You just need to add the card.

To shop Pear Blossom Press Power Pack Kits  (CLICK HERE!)


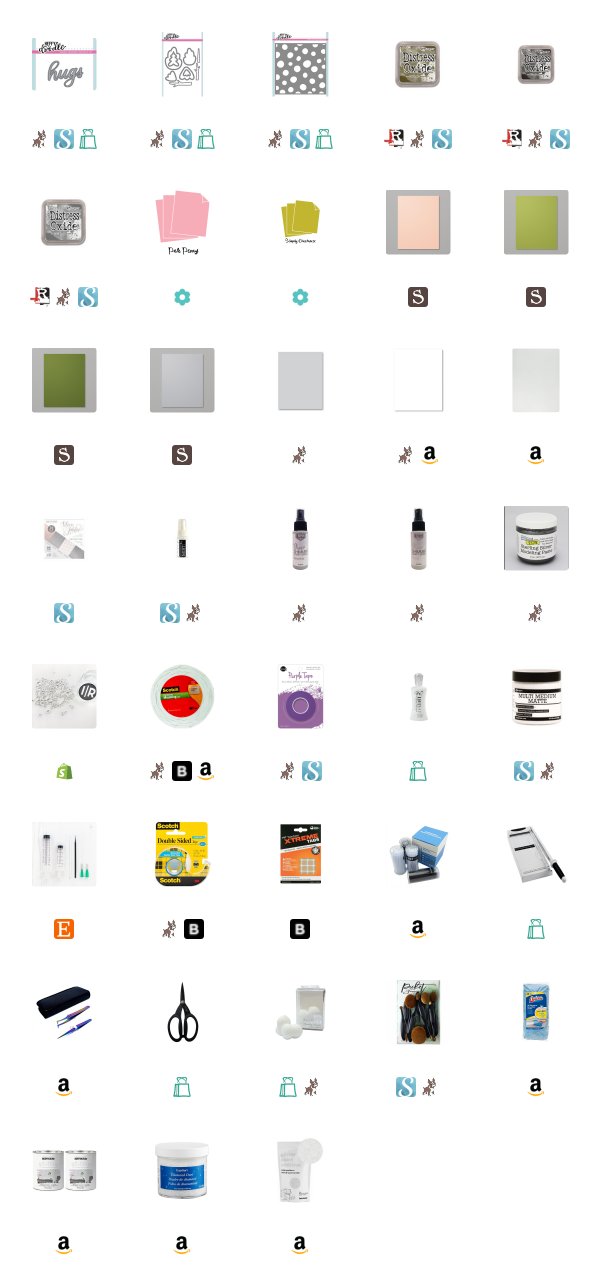
I’m using some Heffy Doodle supplies to create a light up galaxy card to tell someone happy birthday, maybe a little late. I created space because I knew that I wanted to use the “I spaced on your birthday” sentiment. If you press the raised embossed lettering of the sentiment the stars light up the galaxy.

I started with a piece of Neenah 110 lb. Solar White Cardstock cut to 4 3/4 by 3 1/4. This is different than my normal card panel to make the moon fit a little nicer in the foreground.  I used my Picket Fence Studios Blender Brushes to ink blend a galaxy background. I love creating galaxy backgrounds. Space has intensely vibrant colors and just about any combination would make a great galaxy.

Today my galaxy was inspired by a nebula that I saw on one of NASA’s Instagram feeds. Looking back on it, I wish I had used more blue. The colors I used to create this background were all Distress Oxide. I used Black Soot, Hickory Smoke, Stormy Sky (which got lost, in my opinion), Dusty Concord, and Shaded Lilac.

I also placed the background into my Splat Box and used Gansai Tambi Starry Nights Watercolor in #904.  I added a little bit of water to it and scooped a little up with my Zen Royal & Langnickle Round #2 brush and placed it onto and acrylic block. I removed the excess and then lightly tapped the end of my brush onto the side of the acrylic block. This leaves droplets of paint in the sky that look like stars.


I concentrated the majority of the ink blending on the top portion of the background panel, leaving the bottom white. I knew that I wanted to create a moon to fill this area.

To do that, I took a piece of Stampin’ Up!’s Basic Gray cardstock and the Heffy Doodle You’re Weird Die Set. I used the die that coordinates with the moon image in it’s coordinating stamp set. I used it to align the top of a piece of the gray cardstock as to cut the top of it in the shape of the moon but leave the bottom long to have room for a sentiment.  This piece was cut to match the size of the background on the sides but I trimmed the bottom by eye.

To help define the moon’s shape, I stamped it’s coordinating stamp using a stamp positioner. I stamped it with Nuvo Clear Mark Embossing Ink and I used Wow! Black Puff Embossing Powder to do the embossing. I heated it with my Wagner heat tool and left it to cool before stamping the sentiment below it.  This embossing powder is so neat. When you heat it up it expands and creates a texture where its used.

To stamp the sentiment, I put it back into my stamp posistioner and lined up the sentiment knowing that I wanted to leave room for the word Die above it. I stamped the first and last line of this three lined sentiment with Versafine Clair Nocturne Ink and heat embossed it using Hero Arts Clear Embossing Powder. Then I stamped the center of the sentiment with the clear embossing ink and used the same Black Puff Embossing Powder by Wow! But this time I added a little extra powder to really intensify the puff effect but still making sure you can still read the word “spaced”.  I think it looks neat.


Before I could attach the moon panel onto the background I wanted to enhance the background a little more by using the Heffy Doodle Stargazer Backdrop Die to cut stars into the ink blended panel. After running that through my Spellbinders Platinum Die Cutting Machine. I was ready to start putting my card together.

To bring in the lights, I used the new Pear Blossom Press Power Pack kit.  This kit takes the guess work out of lighting up your cards.  They have an easy to use design, without the need to “create” or “build” a switch out of a battery and cardstock.  Pear Blossom Press really makes it easy to give your craft something extra with a simple design and simple instructions.

I began by determining my light and switch locations, and then ran the copper tape in a manner that kept it hidden from my Die-cut Background, but still managed to hit all of the necessary lugs on the lights and power pack.   And of course, I overcomplicated the heck out of this thing.  I wanted the lighting to really shine down onto that beautiful reflective underlayment, so I ran my tape and lights on the underside of my background thinking that it would make things super bright... as it turns out, I shouldn’t have, because you can see the copper tape through the card stock.  It is either a result of the super bright foil (which I guess, I was trying for?), or me just not realizing that the cardstock would be so translucent... or maybe both.  Either way, I don’t think I would suggest running things in this manner... just follow the directions on this one folks!!


I added Craft Perfect Foam squares to the back of the front panel in order to pop it up onto the Tonic Studios Craft Perfect Holographic Mirror Cardstock. This is foiled Cardstock is one of my favorite new products to play with. I loved the look of this so much that I cut the “sorry” from the Heffy Doodle Heffy Cuts word Die collection to make a Holographic sorry above the sentiment.  To make the word die a little more dimensional I added layers of both white and dark gray cardstock.  This is not well represented in the photos but if you look at the word die from the side, you can see white and gray stripes layered beneath it using Nuvo Deluxe liquid adhesive. I also used that same liquid adhesive to mount it to my card panel.

All of these components were placed onto a Simon Says Stamp Fog card base cut to size A2 and scored in a top folding portrait orientation.

I hope that you enjoyed my light up card inspiration. These power packs are sold both individually and in packs of three. I have a small box that I keep all of my light up card components inside of and it helps me stay organized when I go to make a light up card. I also keep a Chibitronics notebook inside of it with tips and notes to help me along the way. Maybe someday I will stop having to refer to my notes. I know that the new switches from Pear Blossom Press make this task so much easier for me.

To visit Pear Blossom Press and to check out the power packs (CLICK HERE!)

This is the last stop on the hop but here is the complete list if you missed anyone.

Thank you for visiting my blog today. I hope that I have inspired you to create something today.

Koren

Saturday, July 13, 2019

Heffy Doodle Personalized Tooth Envelope


Hello everyone.

Today I have a felt project for you. I created a personalized tooth envelope using some NEW Heffy Doodle supplies. I used the NEW Tooth Plush Die set and Heart Gift Card Pocket Die set to put this together. A full list of supplies is linked below, as well as the YouTube video I created while making this project.

I save my kids teeth. I know how creepy that is..., but least I can admit it. I'm still going to save them. This way, I have a cute little pouch to save them in. Just add a small plastic baggy and they can be saved forever. Imagine how embarrassed they will be as adults when I show their significant others, or my future grandchildren the teeth I saved! lol.


Some of you may not know that my "real" job is- Dental Assisting. So, any tooth related sets are right up my alley. I love creating fun tooth projects.

I hope that you all feel inspired to stitch something today. Thank you so much for visiting my blog.

Koren


Saturday, May 18, 2019

Heffy Doodle Forest Builder Flower Card Video


Hello everyone.

Today I have an interesting card for you and a video. I'm using the Heffy Doodle Flower Builder Dies to create a unique looking flower. I like finding ways to stretch my supplies, so I'm sharing my idea with you today.


These dies were intended to make trees, but if you look at them in a different light, you will find that the shapes sort of resemble flowers. So, I laid out my pieces into a flower arrangement. I think it turned out cute and it was a lot of fun to create.

I hope you will check out my YouTube video of my making this card. I will leave it linked in this post.

Thank you for visiting my blog today.

Koren