
Hello everyone.
Today is day three of Neat & Tangled's March Release, and we are showcasing my favorite product from this release. I'm super excited when I get to play with NEW felt dies. I end up making a ton of them 'cause it's so fun. Not only do these dies make fun with felt, but if you come back tomorrow, you can see how I made a card using the same dies. This release will be LIVE Friday, March 8th at 8am. To visit Neat & Tangled (CLICK HERE!)
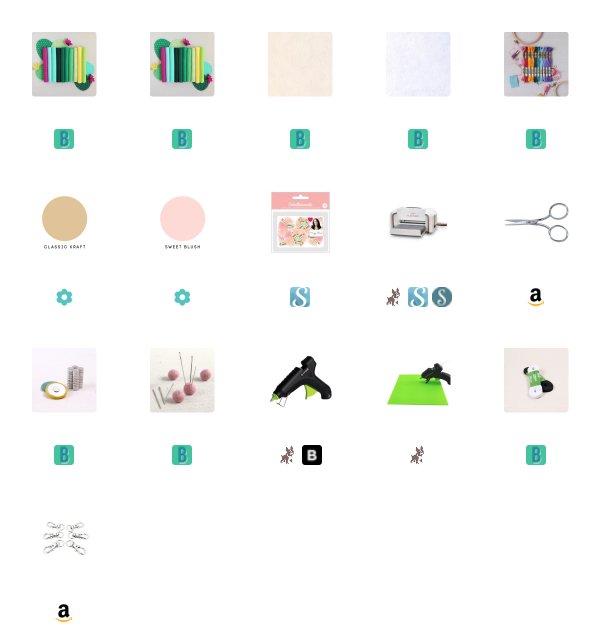
Whenever I find out that there is a NEW stitching die coming out I RUN to BenzieDesign.com. They have collaborated with Neat & Tangled on the stitching dies in this release, just like they have in past releases. These feature a Cactus set and a Llama set. Benzie even has a Color Palette of felt specifically designed for Cactus projects. If you haven't seen their Color Palettes you should take some time to check them out. They are an assortment of colored felt prepackaged to make it easier for you to select color combinations. I love purchasing their felt this way. They even have matching floss! To see more of what Benzie has to offer (CLICK HERE!)

I bought some white and off white shades of felt and floss individually and I also picked up the Cactus Color Palette. Those are the shades of felt I used on my projects today. I also supplemented with a few shades from my felt stash. Yes, I have a felt stash too, lol.
I wanted to make the llamas into little hanging ornaments for my colored pencil cases and wanted them to hang like a decoration. So, I first cut the llama body twice to have two sides. I also cut the saddle pieces twice so that it will have two sides.
Before using coordinating floss to stitch the two halves of the body together, I used black floss and created an eye using a French Knot stitch. I used just one to create an eyeball for my llama on both sides of the body. Make sure you remember that the orientation of the two halves will be opposite. I forgot, and had to remove the knot and flip it over, you know, so that it didn't have an eyeball on the inside of its head.

To make the harness design along the neck of the llama, I added some floss in a straight stitch from one side of the neck to the other. I did this in two different orientations. I wasn't sure which one I would like better. I made sure to finish all of my stitches with a knot at the end to keep it secure.
I also cut a small strip of 3/8 inch white elastic to hold a clasp in place on my llamas back. I strung the elastic through the clasp and heated up my Surebonder hot glue gun.
Once my hot glue gun was nice and hot. I used hot glue to keep my strip of elastic with the clasp attached and adhered between the two halves of the llama.
I placed the two sides together and used coordinating floss to stitch the two sides together. I used a running stitch to do this. I did stitch through the elastic strip to keep it even more secure.

You don't have to use a glue gun for this part, but I like to do it this way. You could also stitch all of your pieces together using floss. I covered the backside of my saddle with hot glue and glued it in place I did this on both sides.
I cut five of the little circle that is included in the die set and used hot glue to keep them in place along the harness for added decoration. To finish off the harness I also tied on a Mini Tassel by Maggie Holmes in a coordinating color.

As for the Cacti, I created a few magnets for my metal wall in my craft room. I love how they add a touch of greenery to my very dark basement sanctuary.
I cut two halves of each cactus, but this time, to add a little interest, I stitched some prickly points into the lighter green one using a contrasting green thread. For the dark green cactus I added white French knots. I did this to each side of the cactus.
Before sewing up the cacti, I added neodymium magnets to the inside using the same Surebonder detail hot glue gun. I get these from harbor frieght in various sizes.
To finish off the smaller light green cactus, I also hot glued a cactus flower in one of the hot pink shades from the same Cactus Color Palette from Benzie.

I have linked below all of the supplies that I used to create this cuties. I hope you will give these felt projects a try. I have some other ideas for these dies that I will have tomorrow and later this month.
Thank you for visiting my blog today. Don't forget to check the Neat & Tangled blog to see what the rest of the design team has created using these fun toys! (CLICK HERE!)
Koren


These are adorable!
ReplyDeleteLol I love sewing and quilting but man I can’t do a French knot to save my life!!! These turned out pretty though.. never thought about using the die cutting machine for anything aside from paper before. Awesome!!
ReplyDeleteToday, I learned that my dies could cut something other than paper! #soexcited
ReplyDeleteYour projects are terrific and clever!
ReplyDeleteWonderful felt creations with these awesome dies! Love your hanging llama ornaments!
ReplyDeleteOh my--these are all so cute. Love the harness and the chain stitch.
ReplyDeleteI LOVE to attach charms to my purses (I have a closet full of wonderful purses!). Thanks for the idea...
ReplyDeleteYou had SO MUCH FUN with this! I love your little purse keychain! Great job!
ReplyDeleteThese are so adorable!! Love their harnesses and the fabulous tassels!
ReplyDeleteSuch cute projects!
ReplyDeleteSuper fun and adorable projects! I just love the warm texture of felt and your creations are fabulous.
ReplyDeleteI just LOVE the adorable felt llamas and cacti that you have created! I want put these on every bag I own! Beautiful and fun!
ReplyDeleteGorgeous creations!!! Love them!!!
ReplyDeletegreat ways of using this fun set - love the key chain:)
ReplyDelete