Today I am sharing a project that I created using some products by Neat and Tangled. I recently attended The Daily Marker Coloring Challenge Road Trip. This event was arranged and demonstrated by Kathy (best known as The Daily Marker), you can find her blog here (CLICK HERE!) and Neat and Tangled. (CLICK HERE!) to see all of the wonderful products Neat and Tangled has to offer. This event was held at The Queens Ink, a fabulous art supply/scrapbook/stamp/card-making store in historic Savage MD... they have a little bit of everything. (CLICK HERE!) to see more about Patty and her team. I had a fabulous time there at this event. Neat and Tangled had a pop-up shop at this event and I was able to score some awesome stamp sets, this Christmas Pageant set was just one of them. It is completely adorable.

I am also playing along with this months challenge at the Little Tangles Challenge Blog. I am playing in challenge #86 Coloring. (CLICK HERE!) to visit the Little Tangles Challenge Blog and check out the challenge for yourself.
I wanted to put all of these cute kids on my card, so I decided to make longer than usual card. This card base measures 4x8 1/2, it fits into a standard business #10 envelope. I started with a Simon Says Stamp Fog card base in the dimensions that I mentioned previously. Then I subtracted a half inch from each dimension to allow for a small border around my card panel. So I cut a piece of Strathmore Bristol Smooth cardstock to 3 1/2 x 7 1/2 and went to town ink-blending my background. I masked off an area for some ground and ink-blended Distress Oxide Ink in Iced Spruce. Then I used the Tree duo stencils to create my background. I took Distress Oxide Ink in Twisted Citron and Cracked Pistachio to blend the trees into the background.

Once my background was blended, I needed to let it sit and dry a little before I handled it too much. So, I stamped my images in Memento Tuxedo black ink to use my Copics color them. For a list of the colors I used, check for the Copic Color Map I created below. It will list the colors I used for each image.

After I finished coloring my images, it was time to put it all together. I stamped my sentiment, justified to the lower right hand corner with Versafine Onyx Black ink. The sub-sentiment was stamped with Versamark ink and white heat embossed with Hero Arts Ultra Fine White embossing powder on Lawn Fawn Black Licorice cardstock. I cut it into a strip and adhered it to my card front with 3M foam tape directly under the sentiment. I stamped some strings with the dotted line image included in the stamp set to hold up a few snowflakes and stars, just like a real Christmas pageant. The rest of the images were adhered with 3M foam tape.
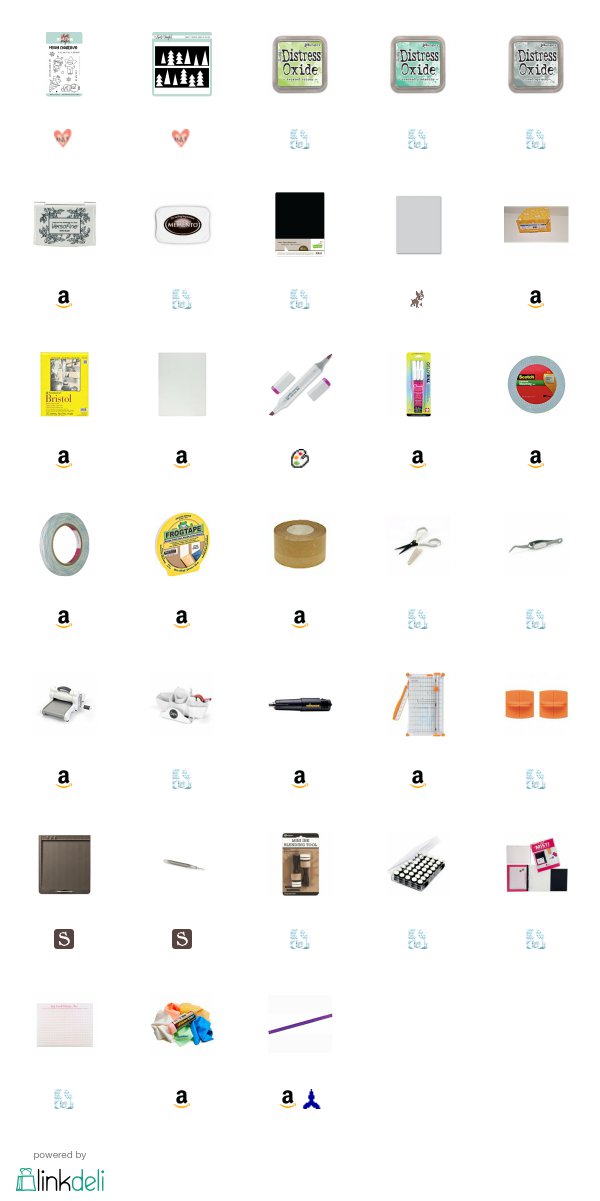
A complete list of supplies, plus a link to the YouTube video I created while making this card are below.
Thank you for visiting my blog today,
Koren

Lucky you to have joined The Daily Marker Coloring Challenge Road Trip! And luckier to have won that beautiful stamp set!! And you've made such good use of it! I absolutely love your card! Love the long length of the card, love the beautiful coloring you've done, and love the layout! Makes for a gorgeous Christmas card! Thank you so much for joining us at Little Tangles challenge!
ReplyDeletehugs, Ashwini, LTDT
This is a cute card, and your coloring is fantastic!!
ReplyDeleteThe card is amazing Love the colouring. Thanks for sharing with us.
ReplyDelete