Sunday, March 29, 2020
The One Where Arteza Sponsored My Lucky to Know You Retreat
Hello everyone. I have a different project for you today. At my recently cancelled Lucky to Know You event I had planned a super fun project using products by Arteza. The people at Arteza where kind enough to send us a ton of acrylic paint to use on a project and even though it was cancelled, I still want to thank them and show you guys what I had planned. You can easily do this project in your own homes. In times like these, a fun project like this may be all you need to lift your spirits.
With Easter approaching, I look forward to dyeing Easter eggs. It was a tradition done in my family for several generations and I continue the activity with my own children.
This project is along the same lines as dyeing Easter eggs only more permanent. I bought 100 wooden eggs from Amazon for us all to paint. Arteza sent us 4 boxes of acrylic paint to make sure we had plenty of colors to choose from.
After my event was cancelled due to unforeseen circumstances, I made a new plan to get my kids in on the painting. They absolutely loved painting eggs with me. My kids range in age from 18 down to age 6 and all of them loved this activity.
We started by making sure everyone had a disposable palette from Arteza. These palettes come in packs of two with 40 sheets in each book. These disposable palette sheets can be used in or torn out of the book. They can be described as highly glossy non stick paper.
Once everyone had a place to put their colors of choice, we began to squeeze out colors which is easily done with the handy squeeze bottle the Arteza Acrylic paints come in. We made piles of pastel colors for everyone. We also used some of Arteza's Iridescent acrylic paints which give a metallic finish.
I liked painting mine fully one color and then adding some metallic accents to the finished egg. I tried everything from taping off a straight line to just adding brush strokes of metallic gold paint. I love the gold that came in the pack of 40. I also really like the green in the Iridescent set of paints.
We used the handy egg cartons to hold the eggs while they dried. The eggs that I bought have a flat bottom. I knew this would be important when we painted them as well as afterwards. Actually using the egg as decor would be much better with a flat bottom.
For the robin's egg looking eggs. I used a baby blue paint to cover the entire egg and once it was dry, I used the brown paint and a little bit of water to water it down, and sprinkled it with a toothbrush over the blue egg. I also did this with the pink and lavender eggs as well.
I did not paint the eggs with any kind of primer before taking the acrylic paint directly to these eggs. I did find that multiple coats were needed without using a primer but we didn't care. We had loads of fun slapping paint on all of these eggs and using our imaginations to decide what they looked like in the end.
I hope that I have inspired you to create something today. I have linked the Arteza products used on this project as well as the eggs purchased from Amazon. We used whatever paint brushes we had in front of us.
I want to thank Arteza again for sponsoring my event and this fun family project.
Thank you for visiting my blog today.
Koren
Thursday, March 12, 2020
The One with the Heffy Doodle Inspiration Hop
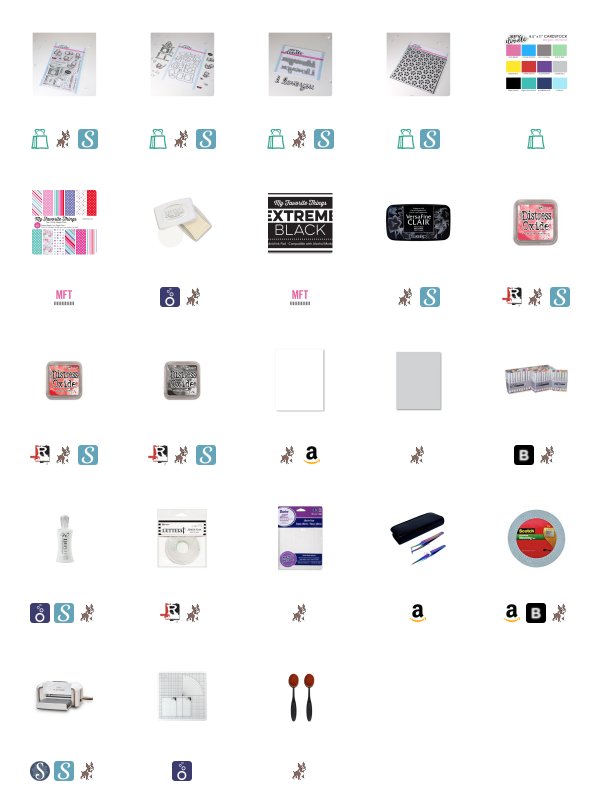
Hello everyone. Today is the Heffy Doodle Inspiration Hop. My card today uses the Purrfect Day stamp set and the I love you shadow die set. I guess I was channeling Hello Kitty with this one. I honestly didn't intend to but it is certainly Hello Kitty Flavor!
There is a GIVEAWAY associated with this hop. Heffy Doodle is giving away a Fifty Pound voucher! Comment on each blog along the hop to be entered in the giveaway. The winner will be selected randomly on March 19th and announced over on the Heffy Doodle Blog.
I started this project with a piece of Razzelberry cardstock from Heffy Doodle cut to 3 1/2 by 4 3/4. I used the Heffy Doodle Kalidescope stencil to dry emboss the design from the stencil into the Razzelberry paper. I use my Spellbinders Platinum die-cutting machine to easily do this using the embossing folder sandwich.
To enhance the dry embossed design further I used some Distress Oxide inks. I used some ink blending brushes to darken the pattern left from dry embossing the stencil.
I then took the pink ink blended panel and cut three small alternating rectangles. Behind them, I used three patterned papers that matched well with the theme of the card. I used foam tape to pop up the panel leaving some space between the two layers.
I stamped each of my images with alcohol marker friendly black ink and colored them with my Copic markers. I have made a Copic Color Map showing the colors of each marker used to color my images.
The images were then cut out using the coordinating die set and popped up into place on the card panel using foam tape.
For the sentiment I used the I love you shadow die set from Heffy Doodle. I cut the shadow from some Simply Teal-lious cardstock and layered the word dies over it cut from Neenah 110 lb. Solar White Classic Crest cardstock. I cut it four times and layered them together using liquid adhesive. I adhered the shadow and word die to the panel using clear foam adhesive by Ranger so that it's harder to see.
The finished card panel was then added to a Simon Says Stamp Fog cardstock card base cut to size A2 and scored in a top folding portrait orientation. I used tear tape adhesive to do this.
Don't forget to comment here and on all of the blogs in the hop in order to enter the fabulous GIVEAWAY. Here is the blog hop line up...
Koren Wiskman (you are here)
I hope that I've inspired you to create something today. Thank you for visiting my blog.
Koren
Tuesday, March 10, 2020
The One with the My Favorite Things March Release Video
Hello everyone.
Today is an exciting day! It's the My Favorite Things March Release Day! I made a video sharing what I have of the release as well as a fun card for your squad!
You can check out more from the New Release over in the MFT Online Store as well as visit their blog for more inspiration. (CLICK HERE!) to go to MFTStamps.com and SHOP!
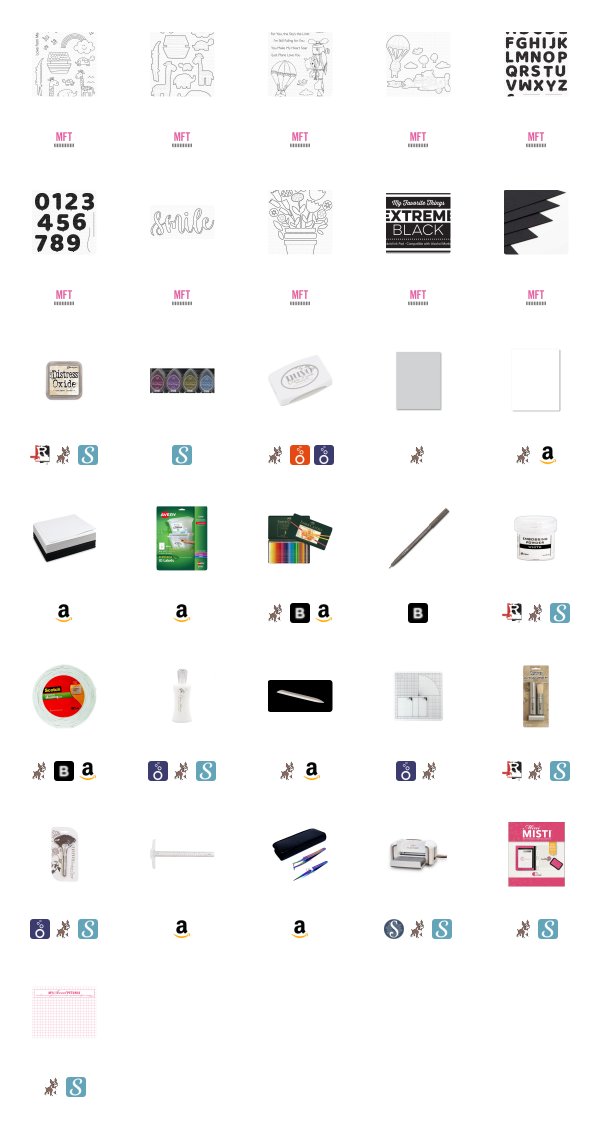
My card today uses the NEW Double the Fun stamp set and coordinating dies to create this soft child-like card. I colored my images using colored pencils to keep the child-like effect that the images portray. I've made a Color Map giving you all of the pencils I used on each animal.
Here is the video I made making this card. You can find it over on my YouTube channel.
I hope that I've inspired you to create something today. Thank you so much for visiting my blog.
Koren
Thursday, March 5, 2020
The One with the NEW Simon Says Stamp March Release "Lucky to Know You" Video
Hello everyone. Today I have the wonderful pleasure of looking through the NEW Simon Says Stamp March release, affectionately named "Lucky to Know You". Great minds think alike I suppose, as my next event is also called "Lucky to Know You". Even though these two things are unrelated, I was excited to have the opportunity to share them both with you this month.
To check out the entire Simon Says Stamp March release (CLICK HERE!) and visit their website and blog to shop the release, and to find even more inspiration using the NEW Simon exclusive products.
I have a video showing the entire release as well as a few cards that I made using some of the products that were intriguing to me. I will leave a link to that video below.
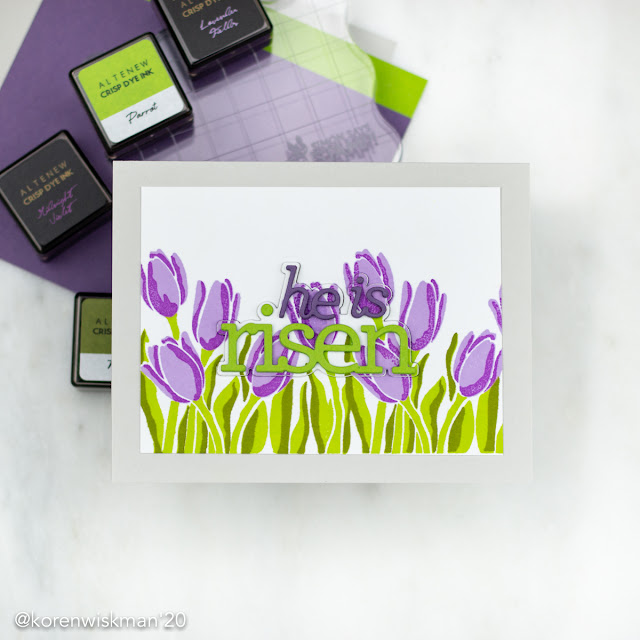
Spoiler Alert! The release is fantastic so, I made a few cards that I want to share with you here. Starting with this "he is risen" card made using the NEW Layered Tulips stamp set and CZ Designs "he is risen" die set.
I took a piece of Neenah 110 lb. cardstock cut to 4 1/4 by 5 1/2 and loaded it into my MISTI. I love that the stamps are slightly longer than an A2 size card front which makes for the perfect fit for your tulips. I stamped the two stem layers using Altenew Parrot and Moss ink, and I stamped the two bud layers with Altenew Lavender Fields and Midnight Violet ink. The layers were super easy to line up and the result is a fantastic floral background.
I thought briefly about ink blending some sky towards the top of the card but ultimately decided not to and left it white.
I used some coordinating purple and green cardstock from my stash to cut out the "he is risen" sentiment from Simon Says Stamp and CZ Designs. I cut it four times and layered them together creating a nice chipboard like embellishment.
As for its shadow, I took the background panel that I just stamped with the Layered Tulips and cut it down to 3 1/2 by 4 3/4 and arranged the shadow die from the "he is risen" die set towards the center. I cut it directly from the background. I also cut it from a piece of white craft foam. This allowed me to put it right back where I cut it from but popping it up to make it stand out with a little dimension.
I added my new camouflaged panel to a Simon Says Stamp Fog card base cut to size A2 and scored in a landscape orientation.
I absolutely love how this turned out and although the sentiment is a bit time consuming to put together, this could easily be massed produced for a lovely Easter card.
I also put together a fun card using the NEW Spring Gnomes stamp set and coordinating dies. This card features the adorable gnome with bunny ears and the sentiment "i'm all ears" is just perfect.
This simple card starts with a piece of Neenah 110 lb. I stamped my adorable gnome with Simon Says Stamp intense black ink so that he could be colored with my Copic markers.
I ended up paper piecing his beanie using some plaid papers from Lawn Fawn. In addition to the hat I also cut the heart shape from the set so that he could wear a little heart almost like a pin or broach. I used the coordinating dies to cut him out.
I took another piece of the same heavyweight white cardstock and cut it down to 3 1/2 by 4 3/4. I stamped the sentiment "i'm all ears" with the same black ink towards the bottom of the piece leaving room for my gnome above it. I popped him up using foam tape.
The entire panel was then popped up onto a Simon Says Stamp Fog card base cut to size A2 and scored in top folding portrait orientation. I used white craft foam to do this.
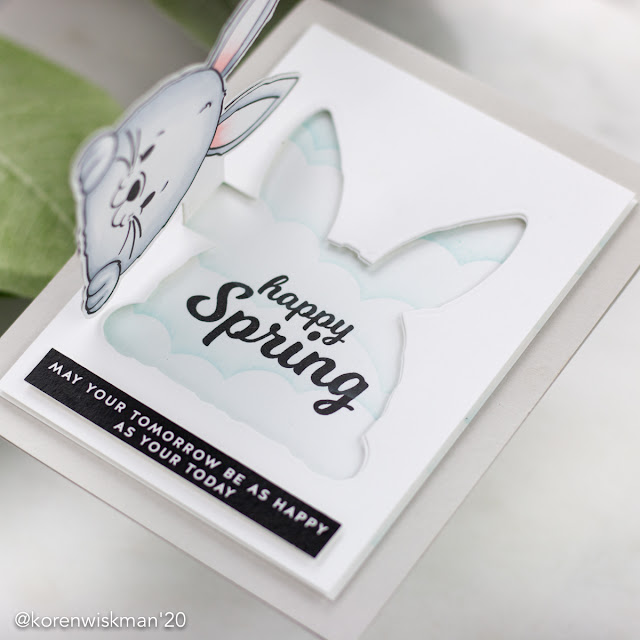
I also have this fun bunny butt card that I made in the video linked above. I hope that you will watch the video and check it out. I use the NEW Bunny Butt Peek-A-Boo stamp set and coordinating dies to make it.
I hope that you've enjoyed taking a look at Simon Says Stamps NEW March release "lucky to Know You". For more information about the release (CLICK HERE!) to visit the online shop or blog for more inspiration using the NEW release.
Thank you so much for visiting my blog today,
Koren