Saturday, December 12, 2020

The One with the December Card Making Haul and Card Video Featuring Avery Elle


avery elle stamps, ranger, scrapbook.com, distress oxide ink, haul, cardmaking, speckled egg, alcohol markers, stamping, ink blending, ink splattering, die-cutting, coloring, snow scene, woodland creatures, critters, white, blue, snow, sledding

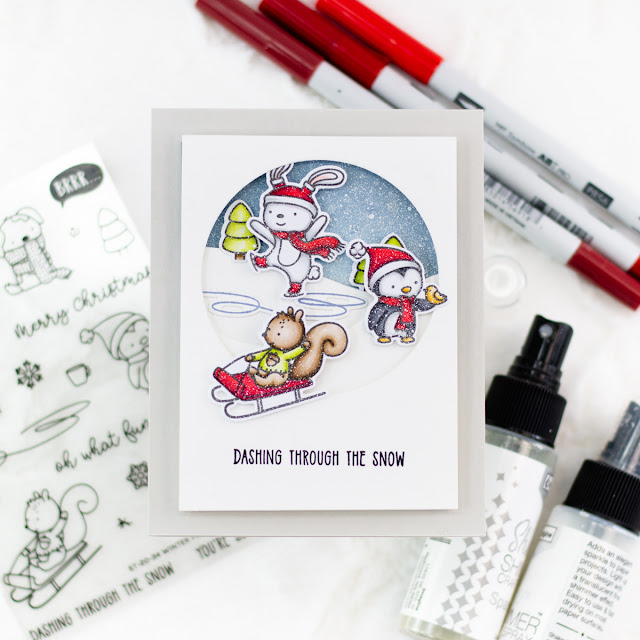
Hello everyone. Today I am sharing a card video over on YouTube. In it, I'm using the Winter Friends stamp set from Avery Elle. I love this illustrator and I try to collect as much of her work as possible. 


Here is the video as well as some photos and a Kolour Map listing all of the markers I used to color the images used on this card. 


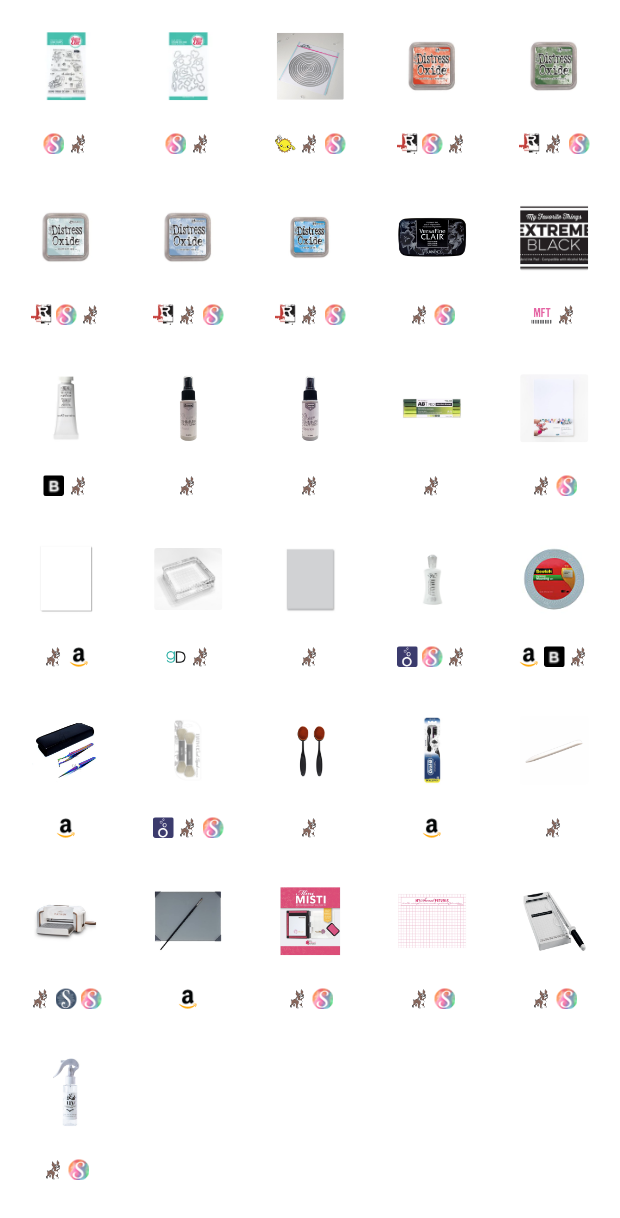
Thank you so much for visiting my blog today. All of the products used on this card or featured in this video are linked below. Affiliate links are used when available. 


Find more from Crafty Meraki by (CLICKING HERE!)


Koren 

avery elle stamps, ranger, scrapbook.com, distress oxide ink, haul, cardmaking, speckled egg, alcohol markers, stamping, ink blending, ink splattering, die-cutting, coloring, snow scene, woodland creatures, critters, white, blue, snow, sledding


Tuesday, December 8, 2020

The One with the Cards from the My Favorite Things December Release.


my favorite things, blastoff buddies, koren wiskman, stamping, card making, die cutting, ink blending, galaxy background, ranger distress oxide ink, shimmer spray, alcohol markers, copic, tombow


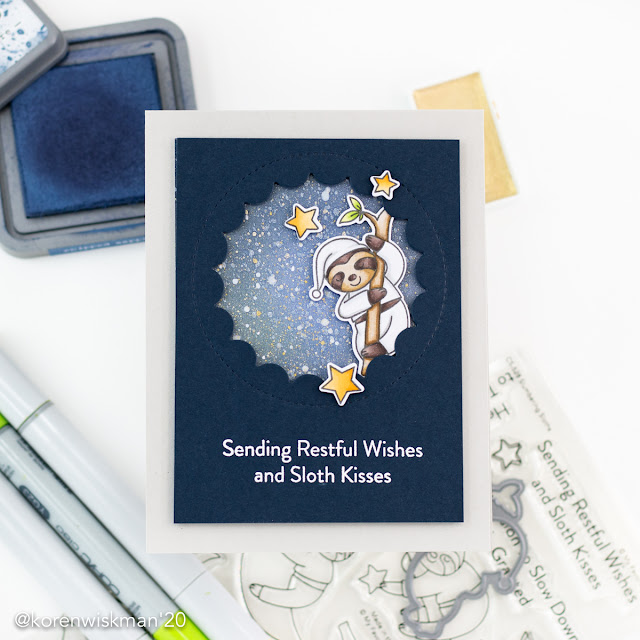
Hello everyone. I wanted to share the cards I made using the NEW My Favorite things December Release. The release is now available and you can find it by (CLICKING HERE!). I made two cards, both using a similar technique to create the backgrounds. 

I used the NEW Blastoff Buddies stamp set for one and the NEW Slumbering Sloths for the other. Both stamp sets are available in the new release. 

my favorite things, blastoff buddies, koren wiskman, stamping, card making, die cutting, ink blending, galaxy background, ranger distress oxide ink, shimmer spray, alcohol markers, copic, tombow


my favorite things, koren wiskman, slumbering sloths, stamping, card making, die cutting, starry sky, navy blue, cardstock, watercolors, splatter, ink blending, aperature, a2 size card, portrait, simon says stamp, embossing powder, alcohol markers, copic markers, tombow abt pro markers


I ink blended the backgrounds using Distress Oxide inks and then splattered additional watercolors and shimmer sprays to really make it shine. The images were colored using alcohol markers. Kolour Maps are provided below listing all of the markers used for each card. 


my favorite things, koren wiskman, slumbering sloths, stamping, card making, die cutting, starry sky, navy blue, cardstock, watercolors, splatter, ink blending, aperature, a2 size card, portrait, simon says stamp, embossing powder, alcohol markers, copic markers, tombow abt pro markers


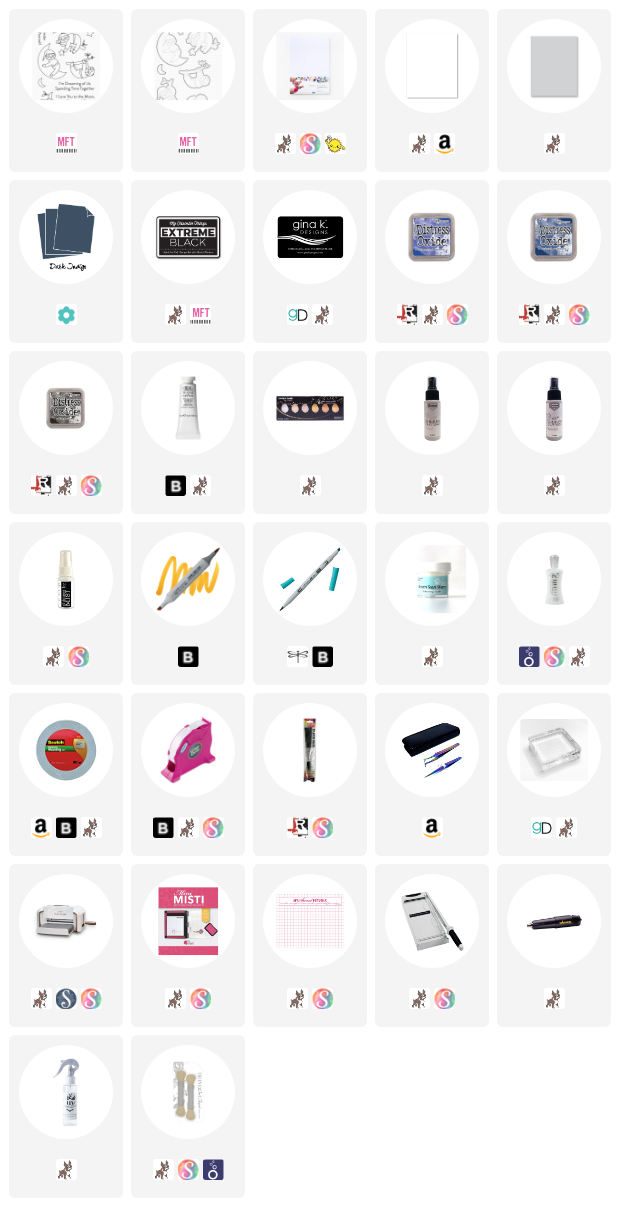
I have linked the supplies used on these projects below. You can check out the entire release by (CLICKING HERE!)

Thank you so much for visiting my blog today. 

Koren 


Tuesday, November 10, 2020

The One with the MFT November Release Pile On the Hugs


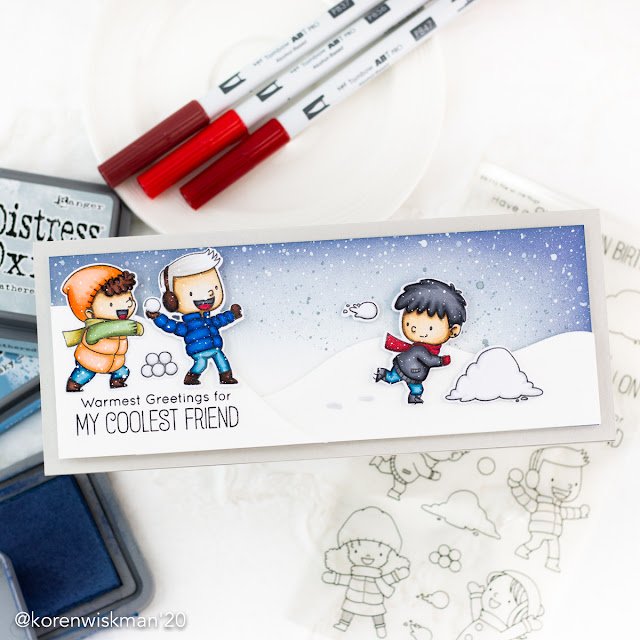
my favorite things, tombow, alcohol markers, card, greeting, mftstamps, ink blending, rangerink, birdie brown, blue, snowball fight, slimline, snow scene, ink splatter, koren wiskman, coloring, kolour map

Hello everyone. Today I have a video to share with you. In this video I'm using the new Birdie Brown Stamp set from the My Favorite Things November Release called Pile on the Hugs. To check out the entire release (CLICK HERE!) and visit the MFT stamps online store. For more inspiration using this set and others from the release (CLICK HERE!) to visit the MFT stamp blog and fine projects from the design team and guests. The products I used in this video are linked below. 


Thank you so much for visiting my blog today, 

Koren 


my favorite things, tombow, alcohol markers, card, greeting, mftstamps, ink blending, rangerink, birdie brown, blue, snowball fight, slimline, snow scene, ink splatter, koren wiskman, coloring, kolour map


Monday, October 26, 2020

The One with the Fun Stampers Journey Buzzworthy Collection


Hello everyone. 

Today I am playing with the Fun Stamper's Journey Buzzworthy Collection. I have the Sweet as Honey Stamp set and the Sweet Honey Comb Stencil. This set features some bees and a beautiful floral image, as well as some additional greenery images, but I did not use on the cards I am sharing with you today. I made three somewhat different cards using the same color scheme and many of the same products. The stamps are red rubber which always leave behind a great image but because they are not clear, can be a little trickier to use. To help me be successful with red rubber stamps I like to use a Stamp-A-Ma-Jig stamp positioner tool. 

To find more from this collection (CLICK HERE!) to visit the Spellbinders website where you can both shop and be inspired by tons of additional projects using these products. 


For the first card, I used the solid cluster of honey combs from the Sweet as Honey Stamp set to stamp a border along the bottom and the top of my card panel (which measures 3 1/2 by 4 3/4"). I stamped this onto two separate panels interchanging the design. I took one of the panels and cut it along the edge of the honey combs in order to create an additional layer to pop up onto my design. I used Distress Oxide ink in Mustard Seed to stamp them onto a piece of Neenah 110 lb. Classic Crest cardstock. I stamped the sentiment "you're a keeper" using Versafine Clair Nocturne ink towards the center of the panel, leaving space for my bee image to live. The bee was stamped using alcohol marker friendly ink and colored using my Tombow ABT Pro alcohol markers. I fussy cut the image to the best of my ability and then popped up all of the images using Scotch 3M foam tape. 


I wanted to keep all of the cards around the same color scheme so each card has a little black and white feel along with the traditional honey color to the combs. This next card I kept it super simple and did some watercoloring. I added a little color to the background panel using a wet on wet technique and a little bit of splatter. I used Arches cold pressed watercolor paper. The sentiment from the same Fun Stampers Journey Sweet as Honey stamp set, was stamped toward the bottom right using Versafine Clair Nocturne ink. The image was stamped in Distress Oxide in Antique Linen and colored with a few Daniel Smith watercolors. I fussy cut the image and popped it up with Scotch Foam tape. I trimmed the white watercolor panel down to 3 1/4 by 4 1/2 and stuck it to a piece of black cardstock cut to 3 1/2 by 4 3/4 leaving a very small 1/4 inch frame. 


On the third and final card, I used the Sweet Honey Comb stencil also from the Buzzworthy collection, to ink blend a bit. I concentrated the Distress Oxide ink in Fossilized Amber toward the bottom left corner of the card panel both with the stencil in place and without to give a faded look to my honey combs. I then stamped the solid image in Mustard Seed, the honey combs from the Sweet as Honey stamp set right on top of my ink blending to give a look of dimension. (I wished the honey combs were the same size but they are slightly different). I then stamped the sentiment "Bee happy". Since the black ink is much harder to work with, I started with the black and masked the part of the image that stamped BEE. I stamped "happy" in the same Versafine Clair Nocturne ink. I then masked the happy in order to stamp the "Bee" in the same Distress Oxide ink. The bee image for this card was left black and white on purpose. It was stamped in black ink and cut out. I popped it up with foam tape once again. I really enjoyed the look of the black outline from the previous card so I did that also. 


All of these cards were attached to Simon Says Stamp Fog card bases in size A2 in a top folding portrait orientation. 

I hope you enjoyed having a play with the Fun Stamper Journey Buzzworthy collection. If you want to take a closer look at these products for see much more inspiration using them (CLICK HERE!) to visit the Spellbinders website where you can shop or read the blog. 

Thank you so much for visiting my blog today. I hope I've inspired you to create something! 

Koren 


Wednesday, September 2, 2020

The One with the Simon Says Stamp Blog Party


Hello everyone. Today is the Simon Says Stamp Blog Party to celebrate the 10th Anniversary of STAMPtember. If you don't already know, STAMPtember is kind of a big deal around here. We should not let 2020 be any different. I used the NEW Deco Squares background stamp and Because of You sentiment stamp set to create this Art Deco inspired greeting card. 

To check out more from the NEW Simon Says Stamp STAMPtember release (CLICK HERE!) to visit the online store or website for more paper crafting inspiration. 

Background:

I loaded the Deco Squares red rubber background stamp into my Original MISTI and stamped it with some Gina K watermark ink. I stamped it twice to make sure I got a great impression. I then used Hero Arts Gold embossing powder to heat emboss the background. This panel was cut down to 3 1/2 by 4 3/4. 

Sentiment: 

I stamped the "you made all the difference" sentiment with the same watermark ink on a piece of Fun Stampers Journey's Rustic Rose cardstock. I used a basic diamond die from my stash to cut it out. I used a nesting set of dies, so I grabbed the next size up and my EK Success Woodgrain paper. I have been hoarding this paper for a long time. I will be surprised if it is still available, but I will link it below if it is. This paper is sorta thin, so I also cut a piece of chip board that I had lying around my craft room. A piece of Neenah 110 would have done the trick as well. I glued the woodgrain paper onto the chipboard to create my own little diamond shape wood element to back my sentiment piece with. I popped up both pieces using foam tape onto the background. 

The sub-sentiment "I just wanted you to know" was also stamped and embossed. I used the Fiskars Cut line paper trimmer to cut it down into a strip. I also cut a thin strip of Fog cardstock to use as an accent piece. 

All the pieces were assembled onto a piece of Simon Says Stamp Fog cardstock cut to size A2 and scored in a top folding portrait orientation. 

I hope that I've inspired you to create something today. Don't forget to (CLICK HERE!) to visit Simon Says Stamp and shop the NEW STAMPtember release. 

Thank you for visiting my blog today, 

Koren 


Tuesday, September 1, 2020

The One with the Simon Says Stamp STAMPtember Card Video


simon says stamp, halloween, greeting card, candy, all I want is candy and you, alcohol markers, heat embossing, die cutting, fractured background, The boo crew, stamping, coloring, splatter, gouache, nuvo drops, kolour map

Hello everyone. I have a NEW video for you today. In celebration of Simon Says Stamp's NEW STAMPtember release, I made a fun Halloween card inspired by another card maker that I admire, Francine Vuilleme. You can find the card that inspired mine by visiting her blog (CLICK HERE!)

To check out the entire Simon Says Stamp STAMPtember release (CLICK HERE!) Don't forget to visit the Simon Says Stamp blog for even more inspiration using the NEW release as well as challenges designed to motivate you to create with others. 

I also created a Kolour Map of the markers that I used on this project. I have been loving my Tombow ABT Pro alcohol markers so, that is what I used. 


simon says stamp, halloween, greeting card, candy, all I want is candy and you, alcohol markers, heat embossing, die cutting, fractured background, The boo crew, stamping, coloring, splatter, gouache, nuvo drops, kolour map

I hope that I've inspired you to create something today. Make sure you check out #STAMPtember over on Instagram to see a ton of inspiration using the NEW release. 

Thank you so much for visiting my blog today, 

Koren


Friday, August 28, 2020

The One with the Pear Blossom Press and My Favorite Things Collaboration Video


my favorite things, pear blossom press, boo crew, haunted house, ez lights, ink blending, distress oxide background, interactive card, light up card, frankenstein, monster, tombow abt pro markers, alcohol markers, your next stamp, cloud edge, grassy edge border die, die cutting, ink splattering,

Hello everyone. Today I have a fun video for you using New products from the My Favorite Things August release as well as some EZ Lights from Pear Blossom Press. In this video I make an electrifying  Halloween card. I used the tree die from the NEW Haunted House Die-namics set to make some lightning to light up the sky. 

For more from My Favorite Things (CLICKHERE!) or Pear Blossom Press (CLICKHERE!)

I also have a Kolour Map here for you, listing all of the alcohol markers I used to color my images on this card. I used my Tombow ABT Pro Alcohol Markers  along with a few other of my favorite coloring supplies.  

I had so much fun making this card- the EZ Lights more than live up to their name, as the incorporation of the lights into the project were exactly as expected- easy!

my favorite things, pear blossom press, boo crew, haunted house, ez lights, ink blending, distress oxide background, interactive card, light up card, frankenstein, monster, tombow abt pro markers, alcohol markers, your next stamp, cloud edge, grassy edge border die, die cutting, ink splattering,


If you want to find more information regarding the NEW August release of My Favorite Things (CLICK HERE!) to shop and visit the blog for inspiration. 

EZ Lights can be found at Pearblossompress.com is single or multipacks. 

Thank you so much for visiting my blog today. I hope that I've inspired you to create something. 

Koren 

my favorite things, pear blossom press, boo crew, haunted house, ez lights, ink blending, distress oxide background, interactive card, light up card, frankenstein, monster, tombow abt pro markers, alcohol markers, your next stamp, cloud edge, grassy edge border die, die cutting, ink splattering,

Friday, July 3, 2020

The One with the Heffy Doodle Release July 2020


Hello everyone, today marks the end of pre-order and the first day of the now available Heffy Doodle July 2020 release. This NEW release comes packed with fun stamp sets, innovative stand alone dies, and amazing NEW stencils. To check out the entire NEW release (CLICK HERE!) and visit the Heffy Doodle online shop or blog for even more inspiration. 

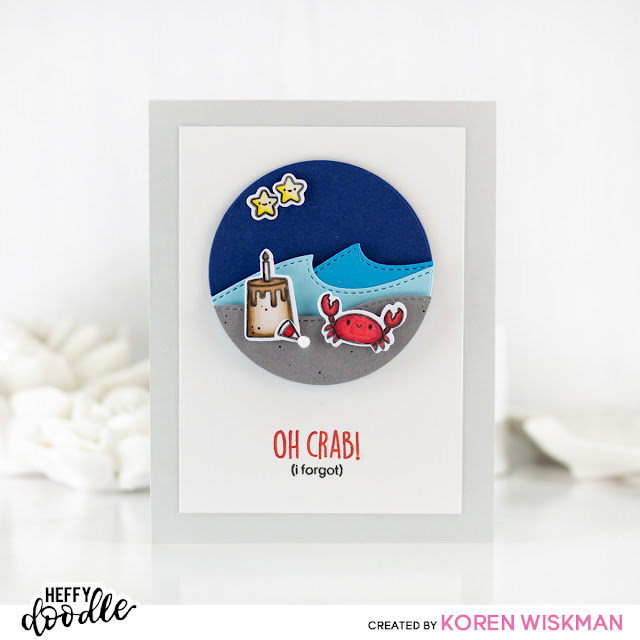
Today I have a card using the NEW A Little Shellfish stamp sent and coordinating dies as well as the NEW Breaking Waves border dies. I love love love this release and I encourage you to check out the rest of it linked within this post. 

Background:
For the background of my card, I grabbed a piece of Blueberry Bliss cardstock found in the Heffy Doodle cardstock assortment pack and one of the Skinny Circle Frames dies. Together I chose a circle die that fit well on a card panel cut to 4 3/4 by 3 1/2. I cut a piece of Neenah to those exact measurements and held up the circle frames until I saw one I liked. This was going to be the background of my scene. 


I then grabbed the NEW Breaking Waves Border dies and two more colors of cardstock from the assortment pack. I picked Blueberry Bliss and Ice Blast for my waves. I cut pieces of cardstock cut to 4 1/4 by 5 1/2 first with the wave border die and then with the same circle frame die as before to keep it within my circle scene. I also used a piece of Holy Mackerel cardstock as my night sandy beach.  I used the more subtle wave from the set to create an evening coastline. 

Images:
I stamped my images for this project using alcohol marker friendly black ink onto Heffy Doodle's Alcohol Marker Friendly cardstock. This stuff is amazing for blending your alcohol markers. I haven't reached for anything else since I first tried it. It's a must have in my book. I do however heat set my inks when I stamp on it to give it extra time to dry. Although the sheen on this paper is not glossy, it's not exactly matte either. It lies somewhere between the two in the semi-matte territory. I love it. I used the coordinating dies to cut out my images, which are also available in this new release.  


Sentiment:
Before adhering everything together, I put my white card panel into my MISTI and stamped the "Oh Crab!" part of my sentiment in Candied Apple Distress Oxide ink. I did this by masking the lower part of the sentiment using Heffy Doodle Memo Tape. I then spun the tape around to mask the red part of the sentiment and stamped the "(i forgot)" sub-sentiment in the same black ink as before. 

I finished off the card by layering everything together into my circle aperture. I added the panel to an Oyster Shell cardstock base cut to size A2 and scored in a top folding portrait orientation. I also added a little tiny pom pom onto the party hat that was left over from the party. To add a little tiny bit of texture to the beach I added a few little black dots of sand to mimic the look of the sand castle cake image.

I adhered the stars in the sky to wish us goodnight on this project, and I hope that I've inspired you to create something today. 

If you have time and interest, don't forget to check out the rest of this fabulous NEW release from Heffy Doodle. (CLICK HERE!) to visit their online store or blog for more inspiration using the new release. 

Thank you for visiting my blog today, 
Koren 

Friday, June 26, 2020

The One with the Simon Says Stamp Send Happiness Release

Simon Says Stamp, Fairy Tale Spinners, Poppy Bouquet, fairy, butterflies, grass, greeting card, off white, vellum, alcohol markers, Koren Wiskman, I believe in you, pink, green, purple, flowers, white, stars

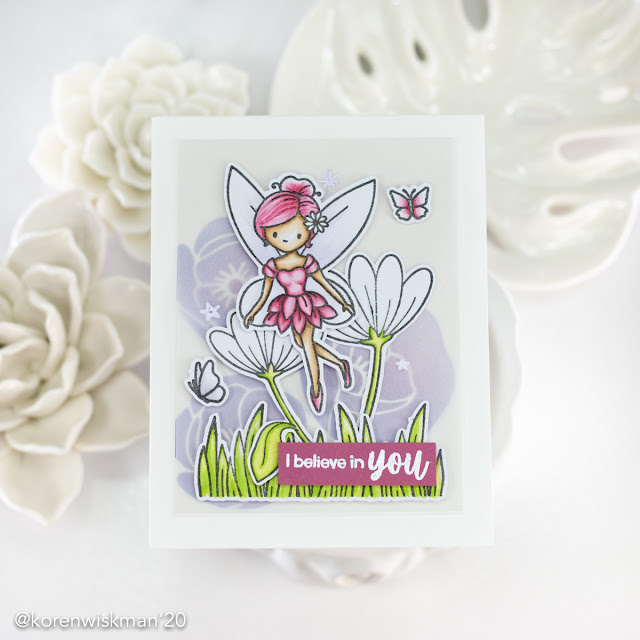
Hello everyone, I have a super cute card using some of the products in the NEW Simon Says Stamp Send Happiness Release. I used the NEW Fairy Tale Spinners stamp set and the NEW Poppy Bouquet stencil to create this fairy inspiration card. 

The NEW Simon Says Stamp Send Happiness release is available now. (CLICK HERE!) to visit the Simon Says Stamp online store and shop the NEW release. 

Background:
The background of my card was simple to create. I started with a piece of Rustic White cardstock cut to 4 3/4 by 3 1/2. I originally thought I would be using a more vibrant background than the one you see in the final photos. I thought the specks from the natural fibers in the cardstock would make a nice fairy dust effect but in the end, I covered the element of the card to mute the background. I used the NEW Poppy Bouquet stencil to ink blend some poppies on the panel. I used purple tape to mask the areas of the stencil that represented leaves. I didn't want the leaf images in the background, only the poppies. I used Distress Oxide inks in Dusty Concord and Shaded Lilac and some make-up brushes to blend the ink onto the paper. 

Once the background was completed, I felt like it was too intense for the images that I intended to use and the color scheme of the project, so I cut a piece of vellum the same size to mute it's vibrancy. This also allowed me to stamp a few of the star images in watermark ink and heat embossed with Soft Lilac embossing powder. I was a little heavy handed with the stamping of these cute little stars but I love the look of them. I remember drawing something similar all over my school work growing up. 

Simon Says Stamp, Fairy Tale Spinners, Poppy Bouquet, fairy, butterflies, grass, greeting card, off white, vellum, alcohol markers, Koren Wiskman, I believe in you, pink, green, purple, flowers, white, stars

Images:
I stamped the images used on this project using the NEW Simon Says Stamp Fairy Tale Spinners stamp set as well as Simon's Intense black ink. I stamped them onto my latest favorite toy, alcohol marker friendly paper from my friend Lesley of Heffy Doodle. She sent me some to try and I'm using it all!! It's so fun to blend alcohol markers on. It's like a slick track for your markers but it's not glossy. I made a color map listing the markers I used to color these images. 

Once the images where colored I used my Brother Scan N Cut to "fussy cut" them out. I do not enjoy cutting out my images with scissors, plus I have an issue with my shoulder that affects my ability to hold things in my dominant hand, so I am constantly looking for ways to assist myself in every way possible to enjoy my hobby. I am lost without dies, I always highly recommend getting the coordinating dies if available. The Scan N Cut does an adequate job of cutting out most things but I enjoy the finished look that a die gives you.  

To adhere everything together, I put all of the images onto the vellum overlay first before attaching the see through panel to the ink blended panel. This helped me hide the adhesive needed to put it together. The images were stuck on using foam tape or liquid adhesive depending on where or on what layer they looked best. The first flower image was adhered with liquid adhesive directly to the vellum panel starting off the collage of florals, grass, and butterflies to create the scene. 

Once all of the images were attached, I then added liquid adhesive behind them hiding it so that you couldn't see it through the vellum. I added the vellum panel to the ink blended panel this way and then attached the stack to a WHITE CARD BASE! Can you believe it? I'm using a Neenah 110 lb. cardstock to create my A2 size top folding portrait orientation base today. It simply looked better than my standard gray this time. 

Simon Says Stamp, Fairy Tale Spinners, Poppy Bouquet, fairy, butterflies, grass, greeting card, off white, vellum, alcohol markers, Koren Wiskman, I believe in you, pink, green, purple, flowers, white, stars

Sentiment:
The sentiment was added last, using Simon Says Stamp White embossing powder to heat emboss the "I believe in you" sentiment onto a piece of Autumn Rose cardstock. I used my cut line paper trimmer to cut it down into a strip and popped it up onto the card using foam tape. 

I hope you enjoy my project today and I've inspired you to create something. If you would like to see the entire Simon Says Stamp Send Happiness release (CLICK HERE!) to visit the online store or visit the blog for even more crafty inspiration. 

Thank you for visiting my blog today, 
Koren 
Tuesday, June 9, 2020

The One with the MFT June Release Card Video

palm tree, car, surboard, cooler, sun, stamps, dies, my favorite things, sending sunny vibes, beach, summer, crafty, card making, ink blending, die cutting, red, blue, green, yellow, white, gray

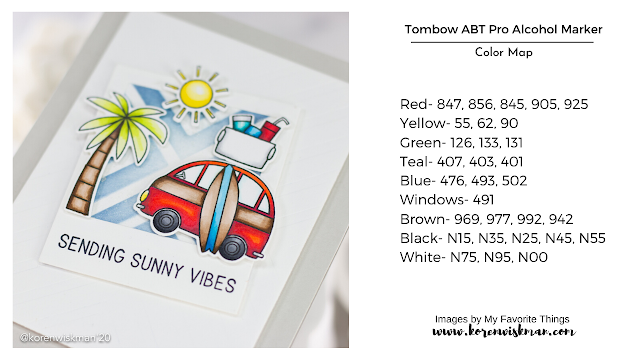
Hello everyone, I have a new video for you over on my YouTube channel. I have two simple projects using the NEW MFT June Release. You can (CLICK HERE!) to visit the MFT online store and check out the entire June Release. 

palm tree, car, surboard, cooler, sun, stamps, dies, my favorite things, sending sunny vibes, beach, summer, crafty, card making, ink blending, die cutting, red, blue, green, yellow, white, gray


The first project uses the new Sunny Vibes stamp set and Inward Elements stencil to create a cute card to capture that summer energy. 

I also have a fun project using the new Baby Shark Die-namics. My son loved this project so much. He had a blast creating baby shark popcorn holders so I decided to share it with you. 

palm tree, car, surboard, cooler, sun, stamps, dies, my favorite things, sending sunny vibes, beach, summer, crafty, card making, ink blending, die cutting, red, blue, green, yellow, white, gray

The video will be linked below when available.  To find much more MFT inspiration (CLICK HERE!) and visit the MFT Stamps website. 


Thank you so much for visiting my blog, I hope that I've inspired you to create something today.

Koren 


Thursday, May 28, 2020

The One with the Simon Says Stamp Crafty Hugs Release Card Video


Hello everyone. Today I have a video that takes a look at some of the products from the NEW Simon Says Stamp Crafty Hugs Release. In the video, I get to check out a few of the products from the release as well as create a fun, crafty, and cute card using some of the new products.

I hope that you will take a look at the video linked below. 


Thank you so much for visiting my blog today. 

Koren 


Tuesday, May 5, 2020

The One with the May MFT & Friends Blog Post

My favorite things, yellow lemons, blue woodgrain, sequins, gray cardstock, stamping, die cutting, adhesive, handmade card, greeting card, mftstamps, to my main squeeze, white background, glitter rim

Hello everyone. Today Is an exciting day! I am happy to be participating in this month's MFT & Friends Blog Hop. The May release is full of fun products to play with and I have a video showing some of the NEW Release. (CLICK HERE!) to visit the MFT & Friends post and the check out the entire release as well as tons of inspiration from the design team and fellow MFT Insiders like myself.


My favorite things, yellow lemons, blue woodgrain, sequins, gray cardstock, stamping, die cutting, adhesive, handmade card, greeting card, mftstamps, to my main squeeze, white background, glitter rim

I hope that I've inspired you to create something today. Remember to (CLICK HERE!) to visit MFTstamps.com and see all of the NEW goodies and inspiration that comes with it. 

Thank you so much for visiting my blog today, 

Koren 

My favorite things, yellow lemons, blue woodgrain, sequins, gray cardstock, stamping, die cutting, adhesive, handmade card, greeting card, mftstamps, to my main squeeze, white background, glitter rim